Electrolyte Gummies
These easy electrolyte gummies are animal-based, made with only four whole ingredients, and take just a few minutes to whip up.
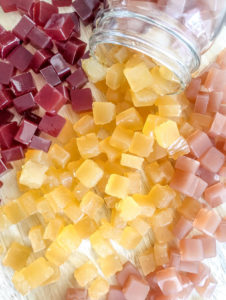
Tried this recipe?Mention @ashrothstein or tag #asheats!
Ingredients
- 3 tbsp gelatin, certified glyphosate-free (ASHLEYR for 10% off)
- 3 tbsp raw honey (local or Manuka - ASHLEYR for 10% off)
- 1/2 cup fruit juice*
- 1/2 cup water (or coconut water)
- 1 tsp sea salt (or 2 packets of LMNT)
Instructions
- If you’re interested solely in the recipe, skip this bullet point and keep on reading. For those interested in sourcing nutrient-dense food, low-toxic household products, and discounts on brands that may support your AB journey, you may find value in my product guides. Head over to this page if you’d like to check them out. All are free (and always will be).
Select your fruit juice.
- For selecting fruit juice*, see the "Substitutions" section near the top of this post.
Make the gummy mixture.
- In your cooking pot, add the fruit juice and water (or coconut water) and bring to low heat.
- Note: if you go through tons of salt in your household like we do, check out this salt purchasing hack that will save you money + make things more efficient. We started this last year, and I'm so happy we did!
- Note: If using Redmond Real Salt, you may see a few dark pieces of salt at the bottom. This is normal.
- Add the gelatin into your cooking pot VERY SLOWLY and continue to mix as you pour in the gelatin. Do not stop mixing during the entire gelatin pouring process. Imagine that you're sprinkling the gelatin like you would salt over a meal. Too big of a gelatin "dump" will result in a clump. The occasional clump is fine, but you want to avoid them as much as possible. It took me 60-90 seconds or so to sprinkle in each tbsp, so take your sweet time.
- Once the gelatin is fully mixed in, stir the mixture for another 30 seconds or so and remove from heat.
- Note: You may have some clumps. This is fine. Just remove them or leave them in the pot and work around them.
Pour the mixture into your gummy mold.
- Take your dropper and fill your gummy mold with the mixture.
- Note: Mixtures with gelatin start to solidify pretty quickly, so you'll want to act relatively fast. You do have some time (a few minutes or so), but I recommend pouring the mixture into your gummy mold immediately after removing it from heat. Using a dropper helps a lot here. The gummy mold I used comes with one. If you don't have a dropper, I highly recommend getting one. Also, try to avoid bubbles when you're pouring the gummy mixture into the mold. I included a picture of what bubbles look like in the "Tips to make the best..." section above. Most of them will probably pop or dissolve so they're not the end of the world, but if you're looking to make beautifully shaped gummies, avoid bubbles.
Place your gummies in the freezer to set.
- Place your gummies in the freezer for 10 minutes to set. Make sure not to leave them for much longer as they'll begin to freeze. This won't harm them in any way, but you'll have to defrost them if this happens.
Place your gummies in the fridge.
- Once you remove them from the freezer, place your gummies in the fridge for about 10 minutes. You can store them here until you're ready to enjoy them.
- Once you're ready to enjoy them, pop them out of their molds and dig in!
- Because they're made with real fruit juice, they must be stored in an airtight container in the fridge. They'll last for up to 1-2 weeks stored like this.
- Note: I was able to leave two flavors of the gummies I made out for a couple hours at room temperature with no problems, so depending on the fruit juice you use, they may last at room temperature for a little bit. Some fruit juices are more prone to melting.
Notes
*For selecting fruit juice, see the "Substitutions" section near the top of this post.