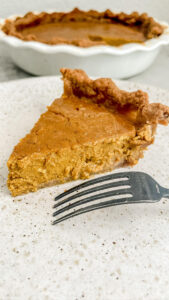
Animal-Based Pumpkin Pie
This animal-based pumpkin pie has a pork-based crust with a creamy, nutrient-dense pumpkin-egg-milk center. Sweetened and flavored with maple syrup, vanilla, pumpkin spice, and sea salt.
Tried this recipe?Mention @ashrothstein or tag #asheats!
Equipment
Ingredients
For the crust:
- 1 lb ground pork
- 5 oz pork rinds (pre-ground)
- 3 eggs
- 1 tbsp ghee (or butter)
- 4 tbsp maple syrup
- 1/4 tsp sea salt (ASHLEYR for 15% off)
For the filling:
- 1 15 oz can pumpkin puree
- 2/3 cup milk (or cream)
- 3 eggs
- 6 tbsp maple syrup
- 2 tsp vanilla extract
- 1 tbsp pumpkin spice
Instructions
- If you’re interested solely in the recipe, skip this bullet point and keep on reading. For those interested in sourcing nutrient-dense food, low-toxic household products, and discounts on brands that may support your AB journey, you may find value in my product guides. Head over to this page if you’d like to check them out. All are free (and always will be).
If a visual will help, watch the Instagram Reel for this recipe.
Make the crust.
- In your blender, crush the pork rinds to a fine powder. Set the pork rind powder aside.
- Melt the ghee on your stovetop.
- Add the paste to a mixing bowl. Fold in the pork rind powder to form a dough. It should be thick and dense.
- Note: if you go through tons of salt in your household like we do, check out this salt-purchasing hack that will save you money + make things more efficient. We started this last year, and I'm so happy we did!
- Transfer the dough to the refrigerator for 20+ minutes to firm up.
While your dough is refrigerating, make the filling.
- In your mixing bowl, add the pumpkin puree, eggs, milk (or cream), maple syrup, vanilla, pumpkin spice, and sea salt (ASHLEYR for 15% off).
- Mix well until an even consistency is achieved.
Form the pie crust.
- Preheat your oven to 375 degrees.
- Remove your dough from the fridge and place it in your pie pan.
- Form the pie crust. I recommend making it thin with thick edges (since the edges crisp up).
- Note: To form the crust, I started with the dough in the center and pushed it outward, thinning out the bottom. When I got to the edges, I used the edge of my pie pan to make the curled edges. There are tutorials online for fancy ways to make pie crust edges if that interests you. For a visual, check out the Instagram reel for this recipe.
- Note: This crust bakes down, so form it taller than you want it to end up post-baking.
- Note: If you make your pie crust on the thinner side (which I recommend doing), you may have some dough left over. You can freeze the leftover dough for later use, or get creative. Example: make little mini quiches with it. Use a cupcake baking pan. Fill the slots with the leftover dough, fill with your favorite breakfast toppings (egg, sausage, etc.), and bake for about 20-30 minutes or until done to your liking.
- Note: DO NOT add the filling to the pie crust yet!
Bake the pie crust.
- Bake the pie crust for about 20 minutes at 375 degrees.
Add the filling.
- Once your crust is done baking, add the filling to the center.
- Important note: before adding the filling, blot out/remove the fat from the center of your crust. I did not do this (you'll see if you watch the reel), and midway through baking the full pie, I had to blot/remove the excess fat from the top of the pie. It was a pain in the butt.
Bake the pie.
- Bake the pie on a low rack at 375 degrees for 60-65 minutes. When done, the center will be a bit jiggly. If you stick a toothpick in the center, it should come out clean.
Serve and enjoy!
- Allow the pie to cool to room temperature before cutting and serving, about 30-40 minutes or so.
- If there are leftovers, store them in the fridge in an airtight container for 3-4 days.
- Note: due to the moisture from the pie filling, the floor of the pie crust - although it has a "bready" texture - is not crunchy. However, the edges of the pie crust (if you form them high enough), are crunchy.