Prep time: 45 min Cook time: 1 hr Rest time: 15 mins Total time: 2 hrs
Macronutrients per batch: 136g fat | 188g protein | 0g carbohydrates
Makes: 2-3 servings
![]()
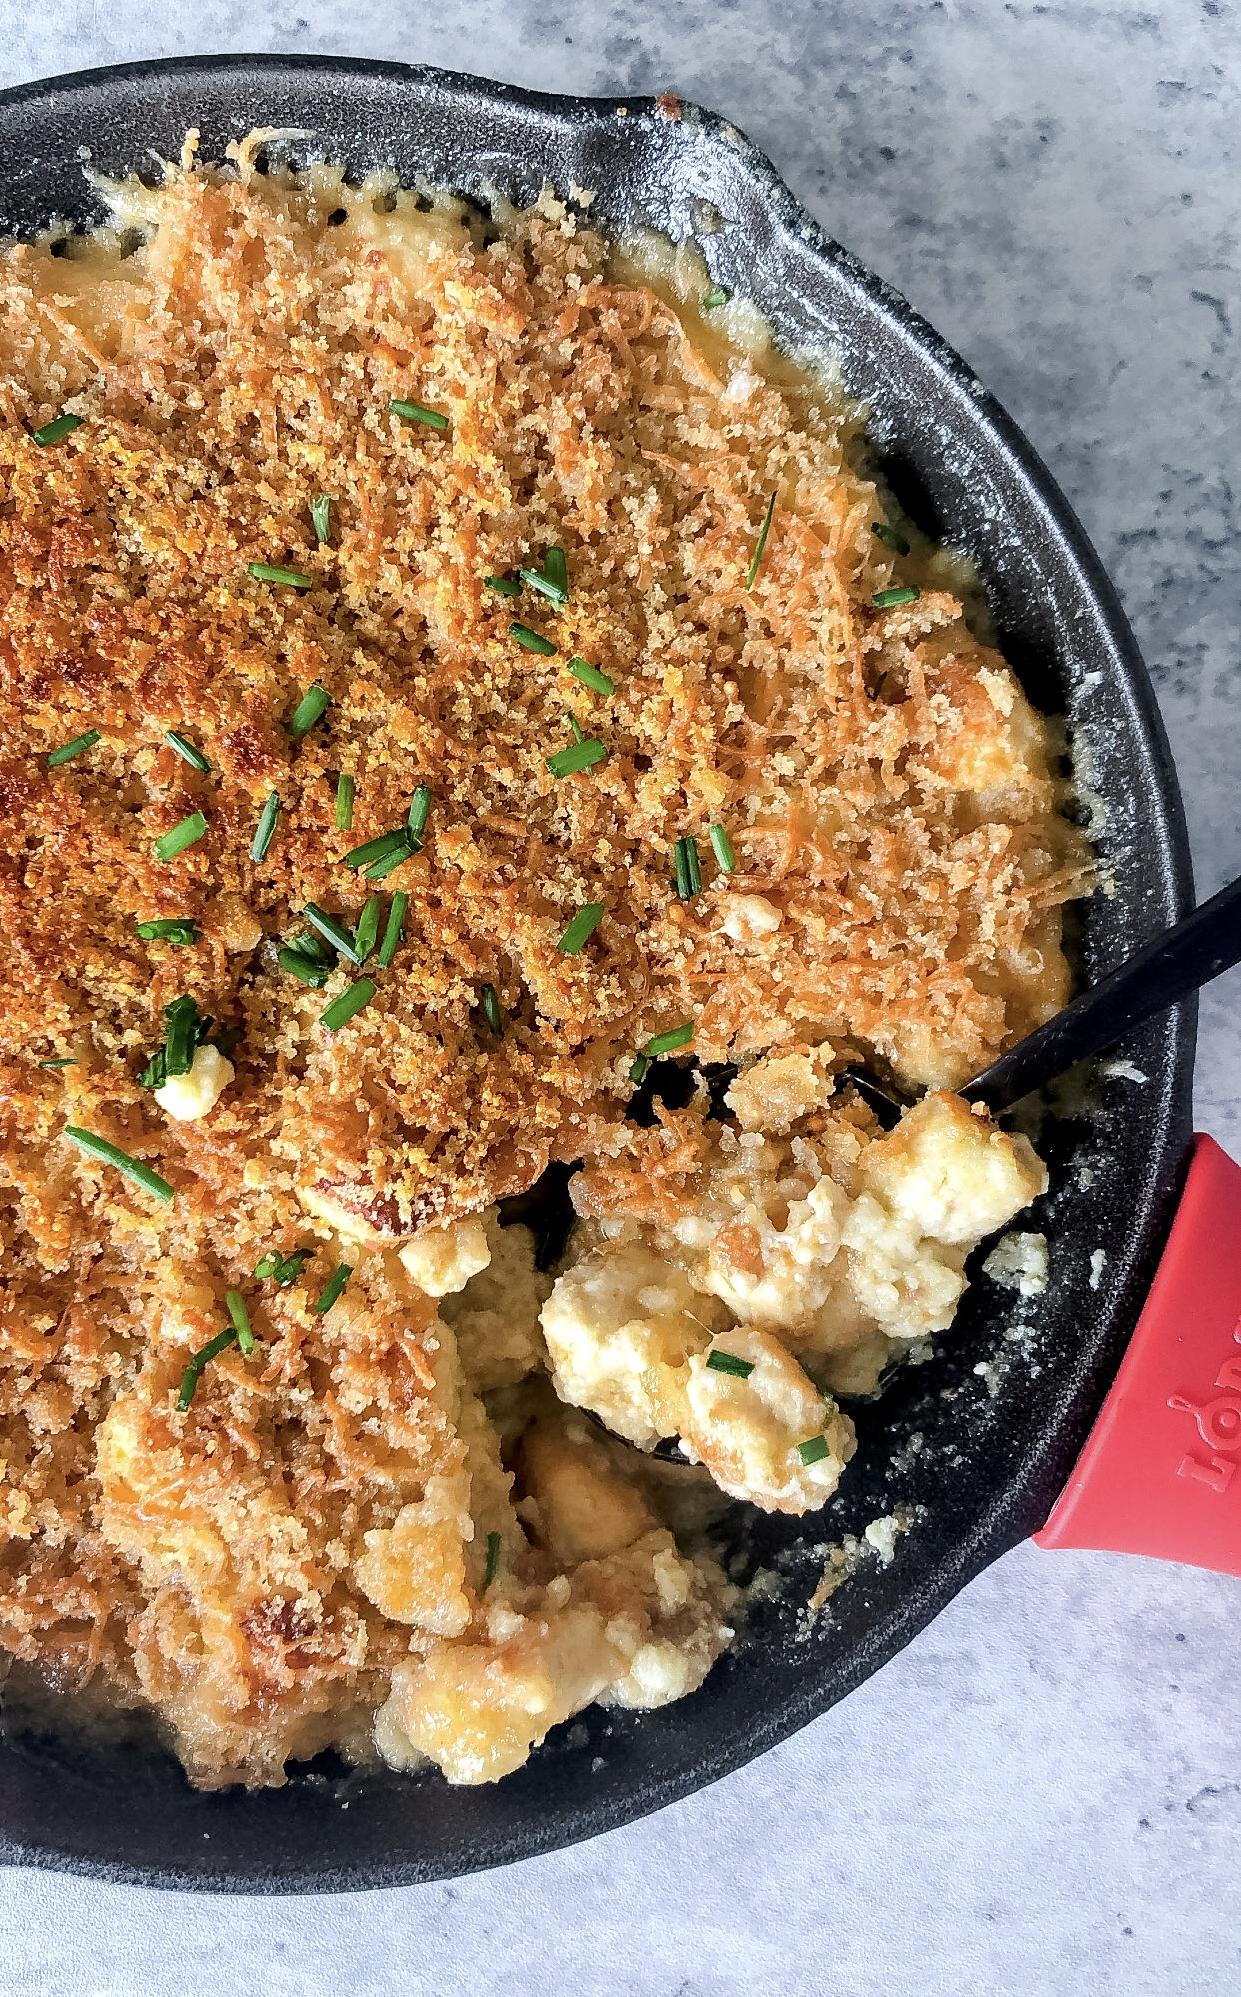
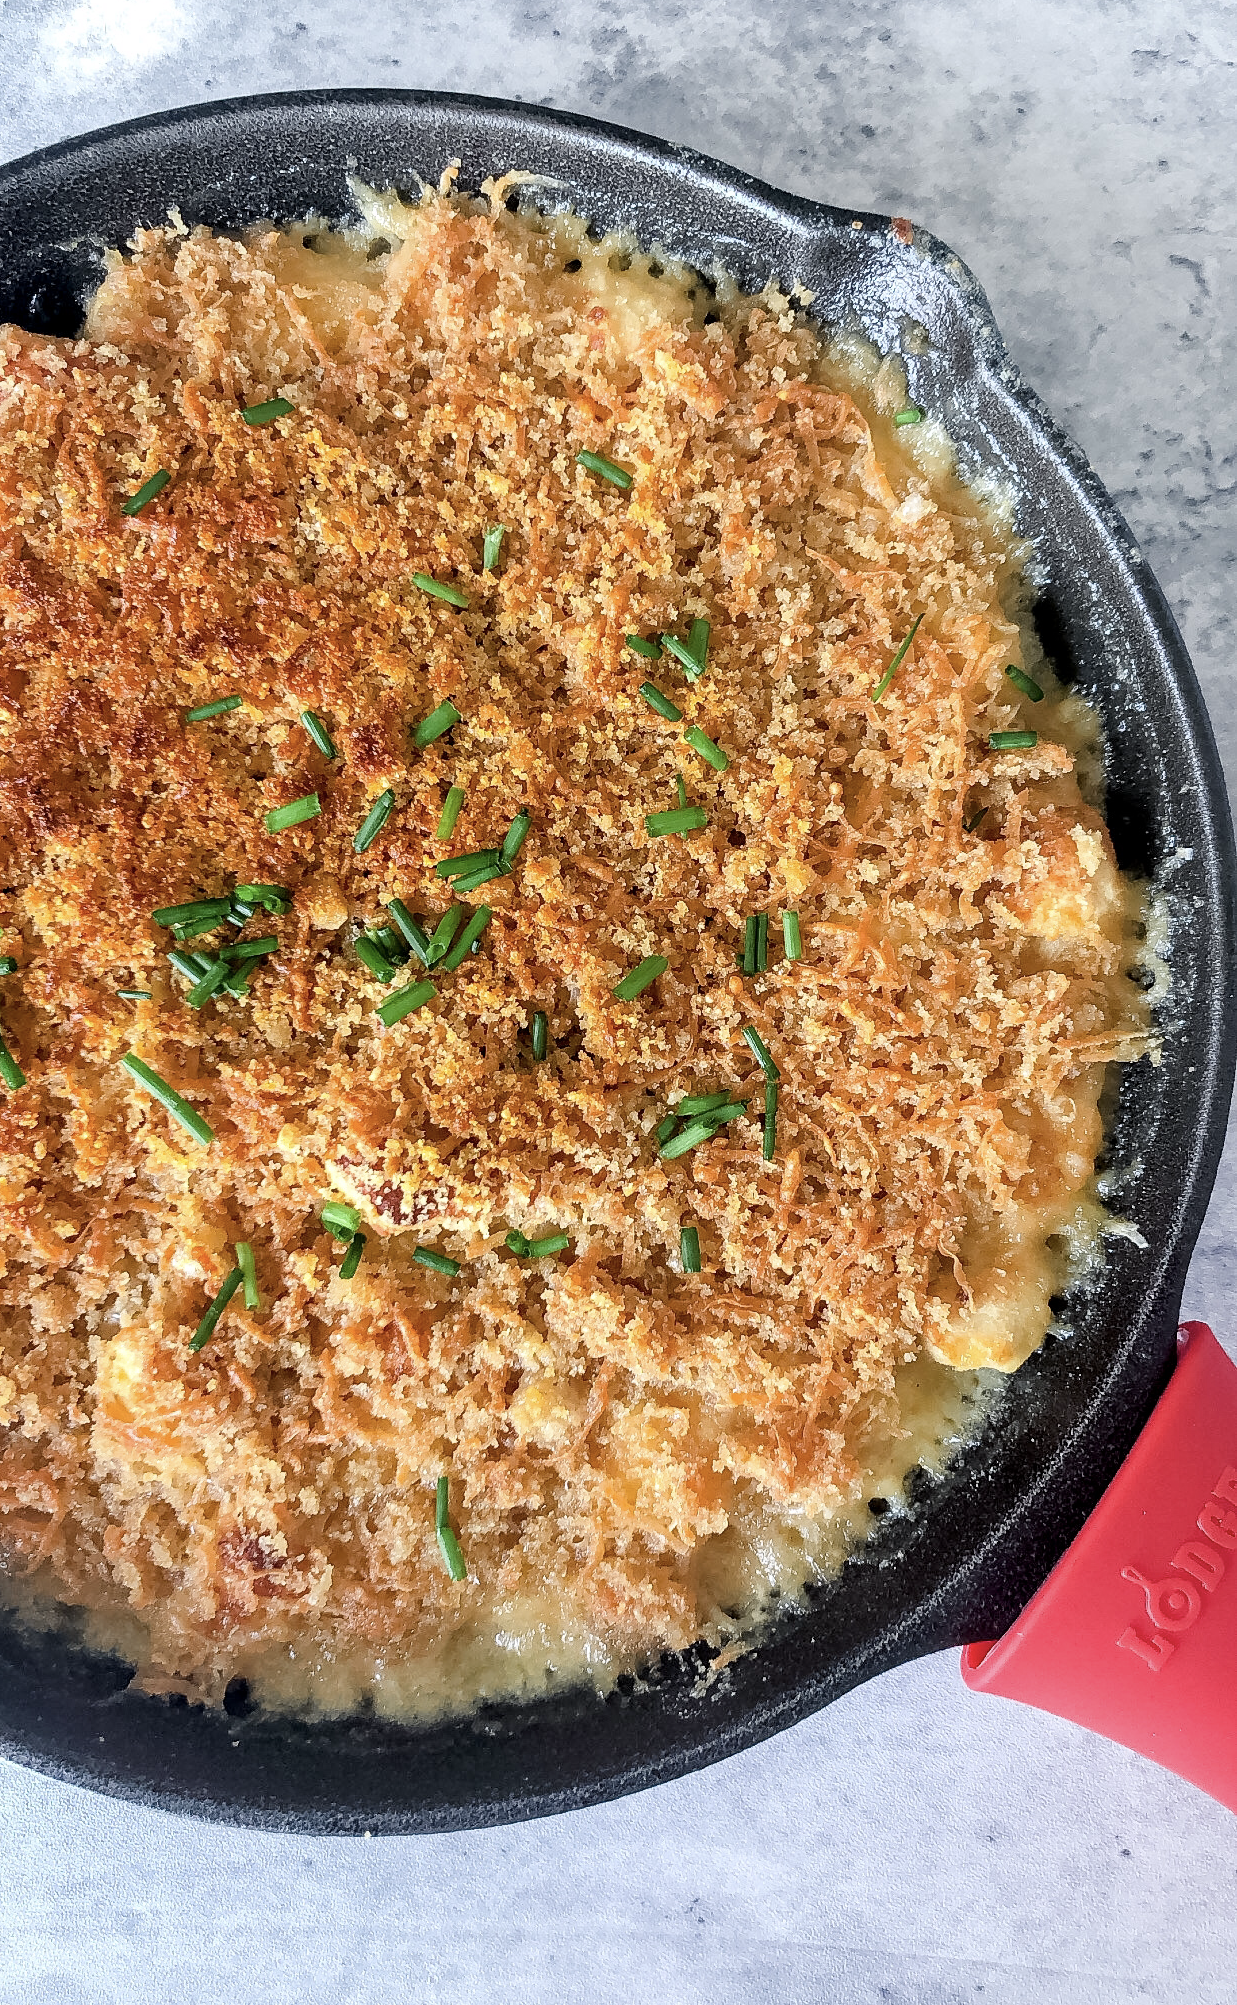
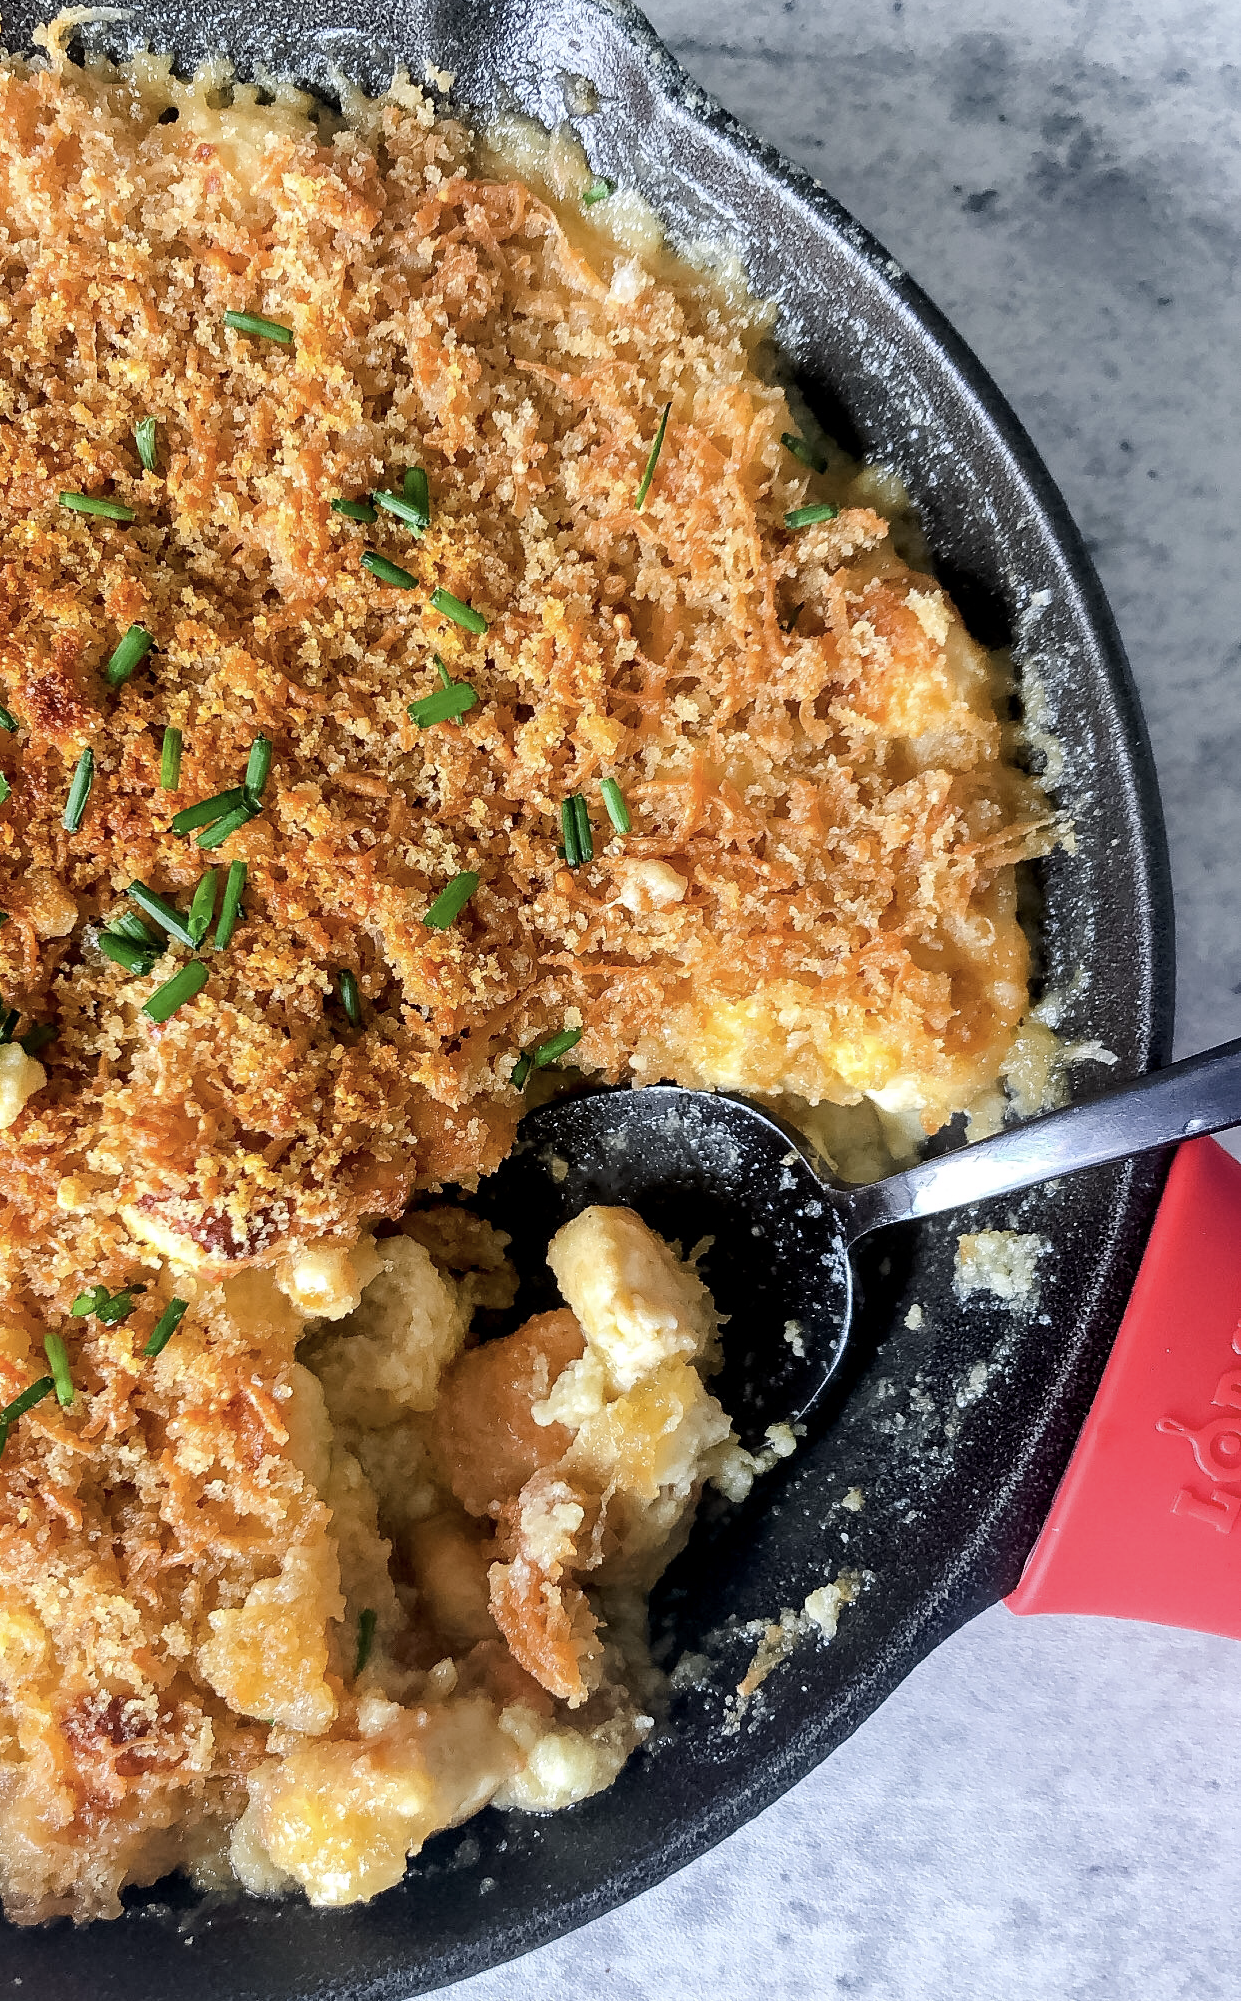
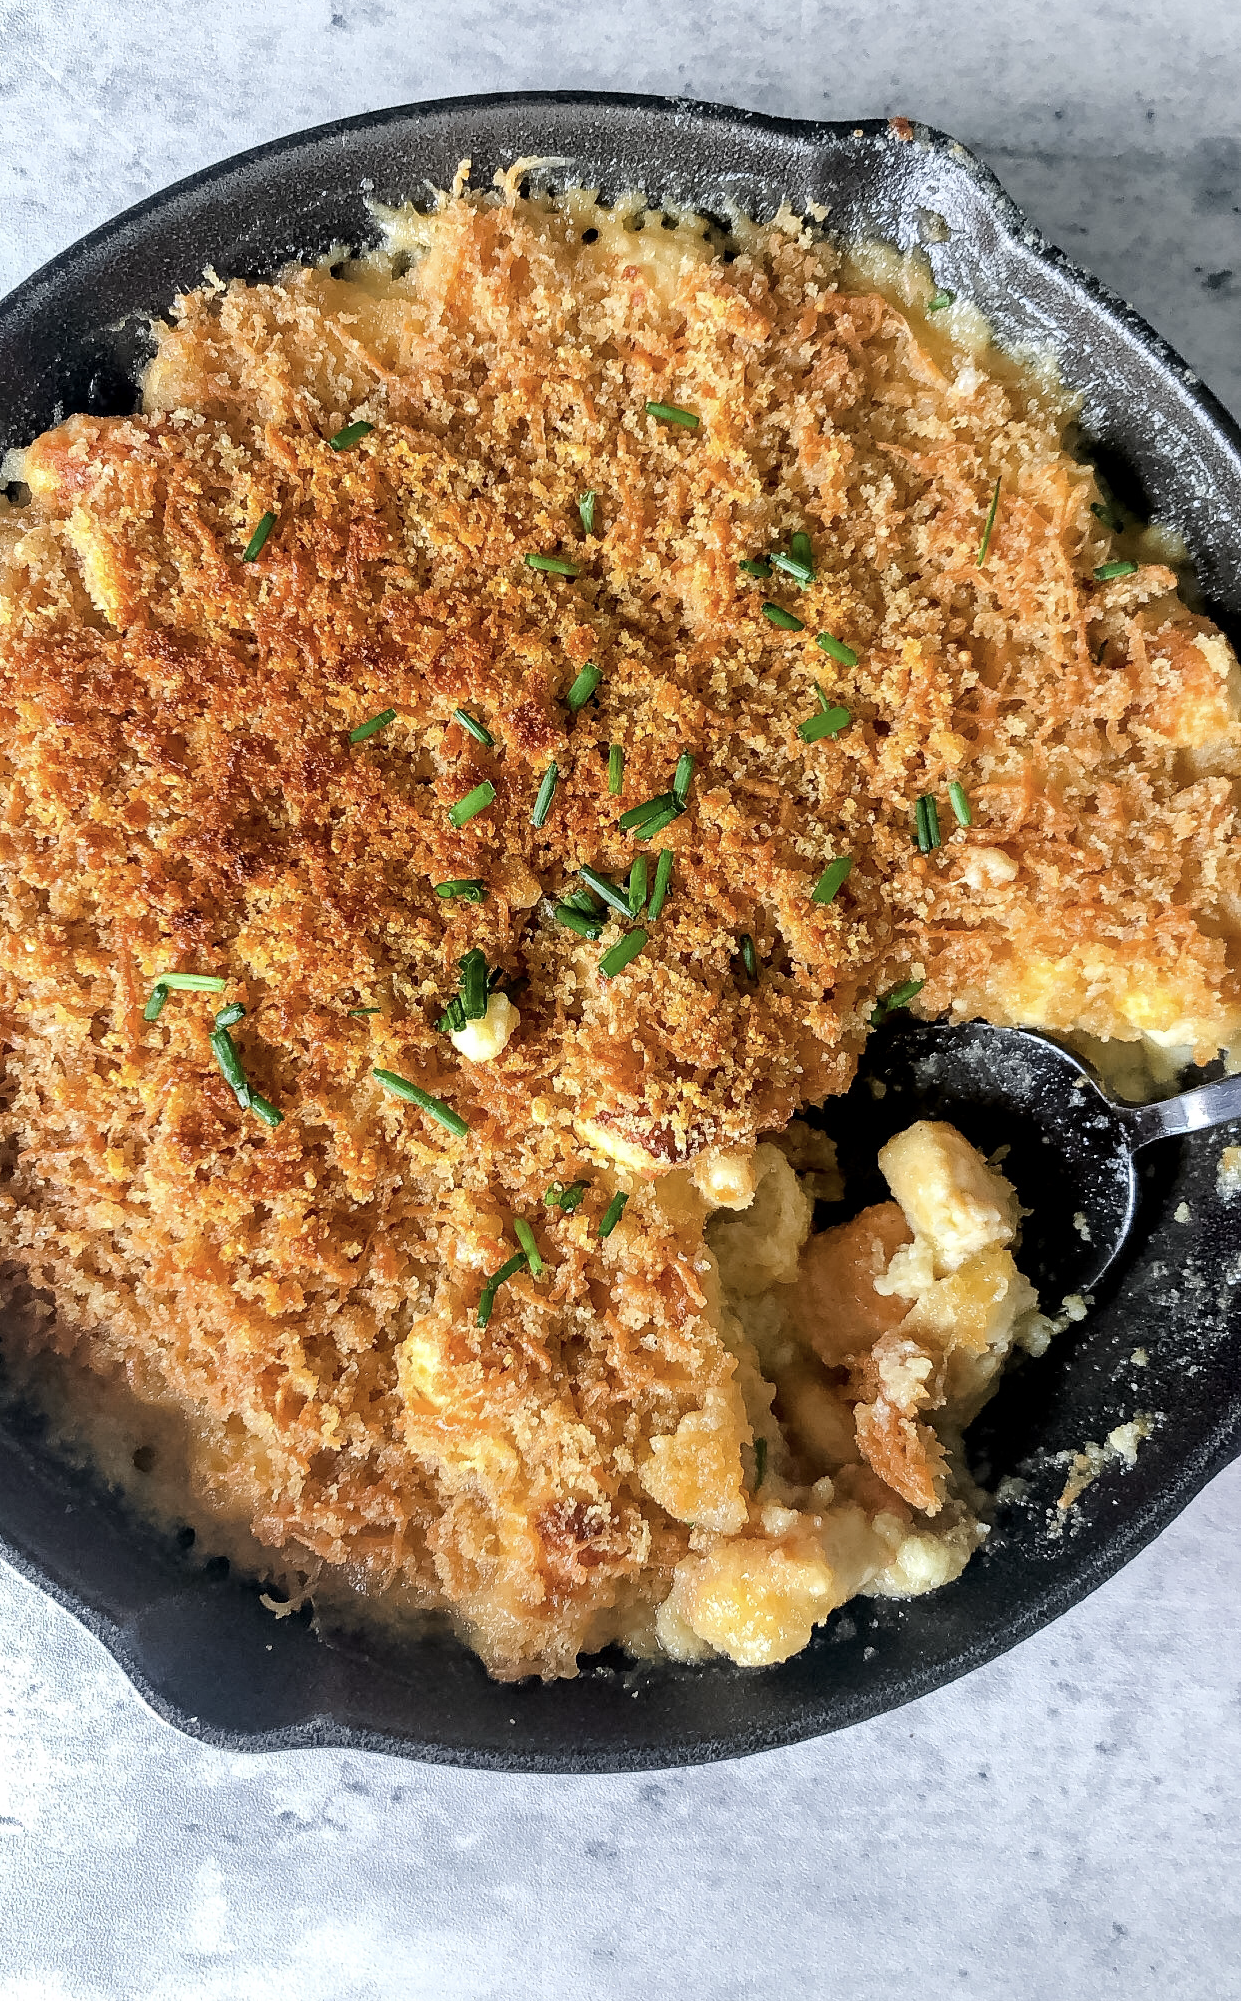
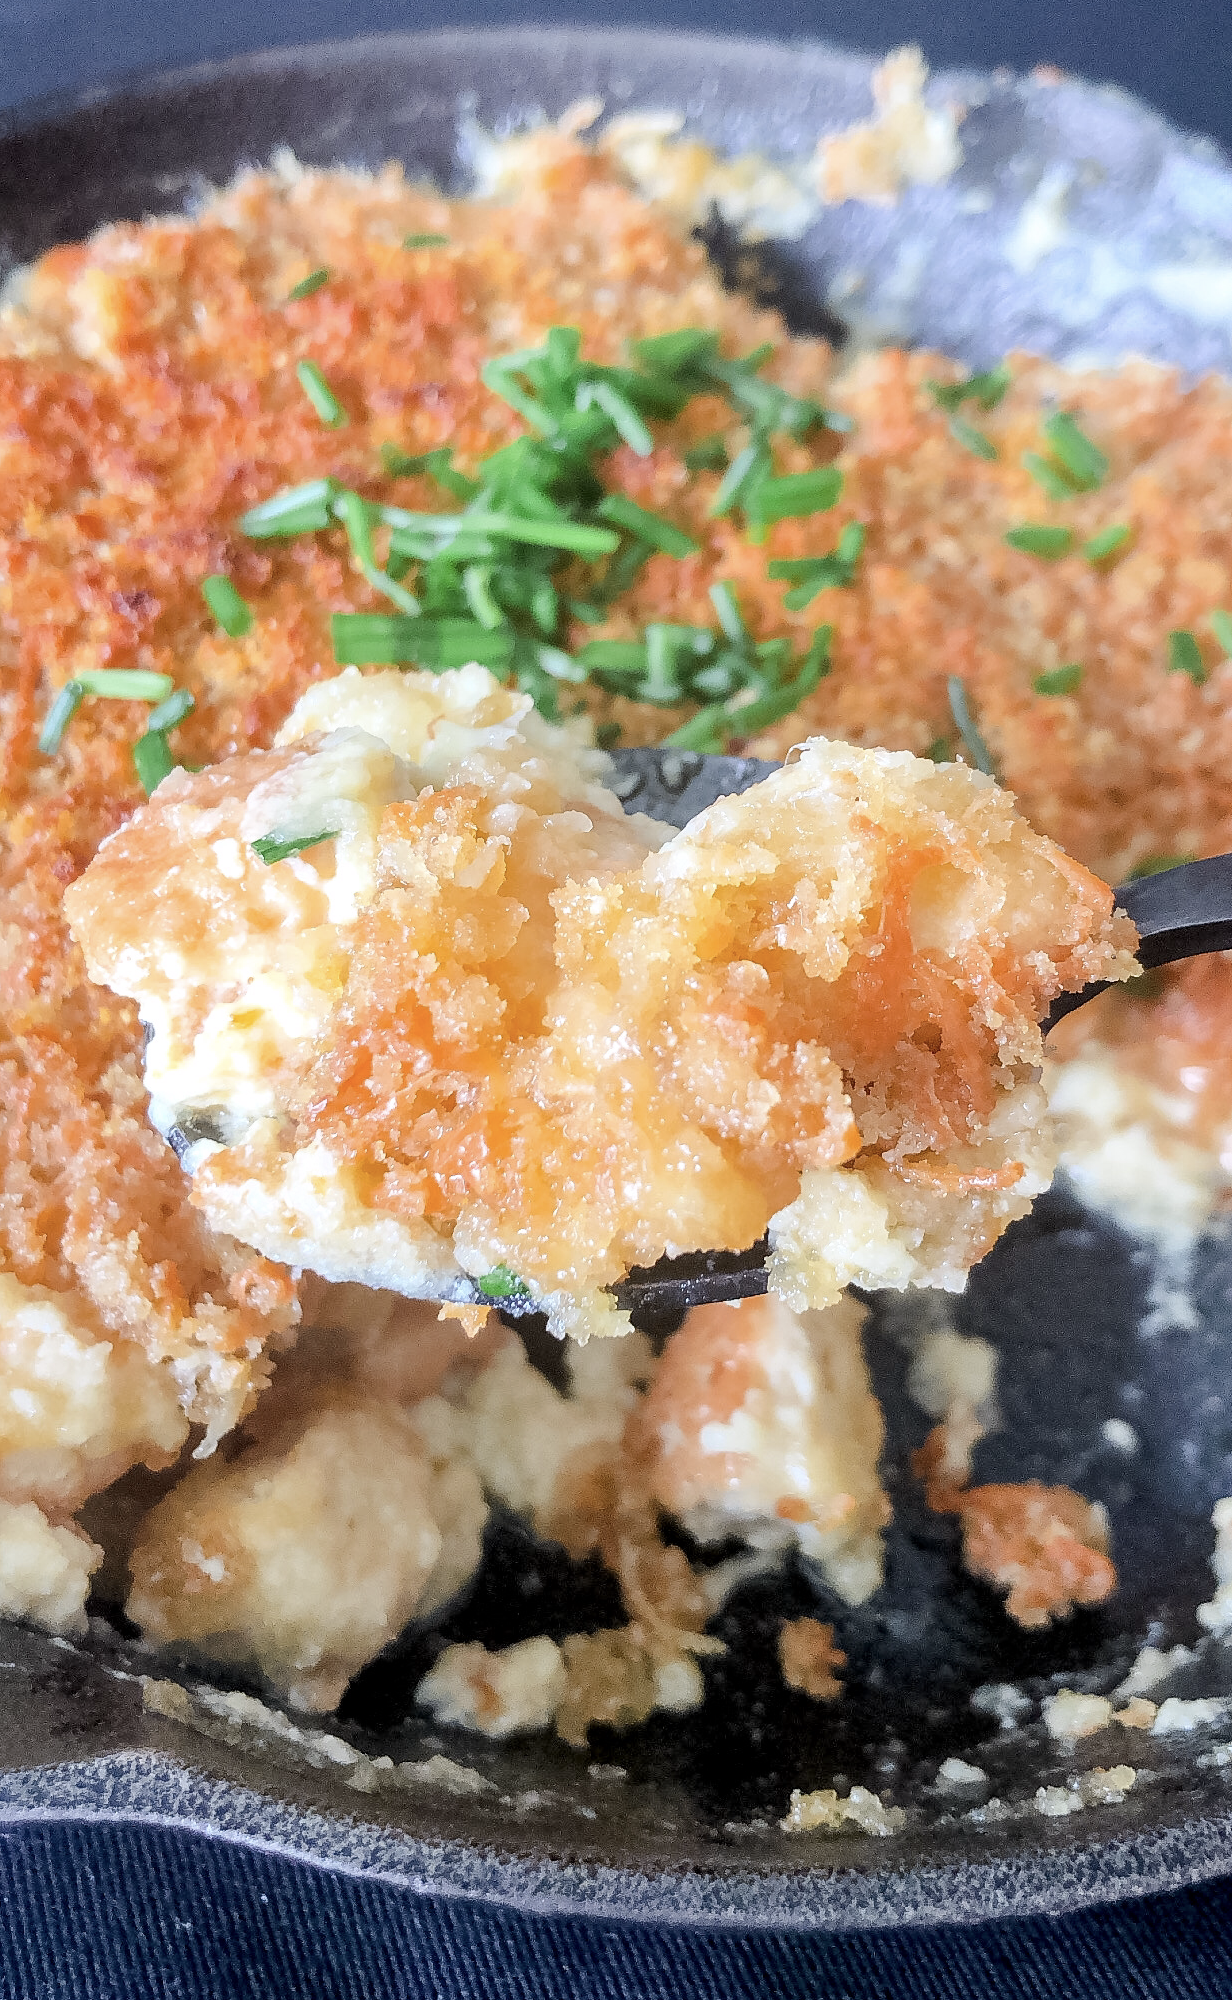
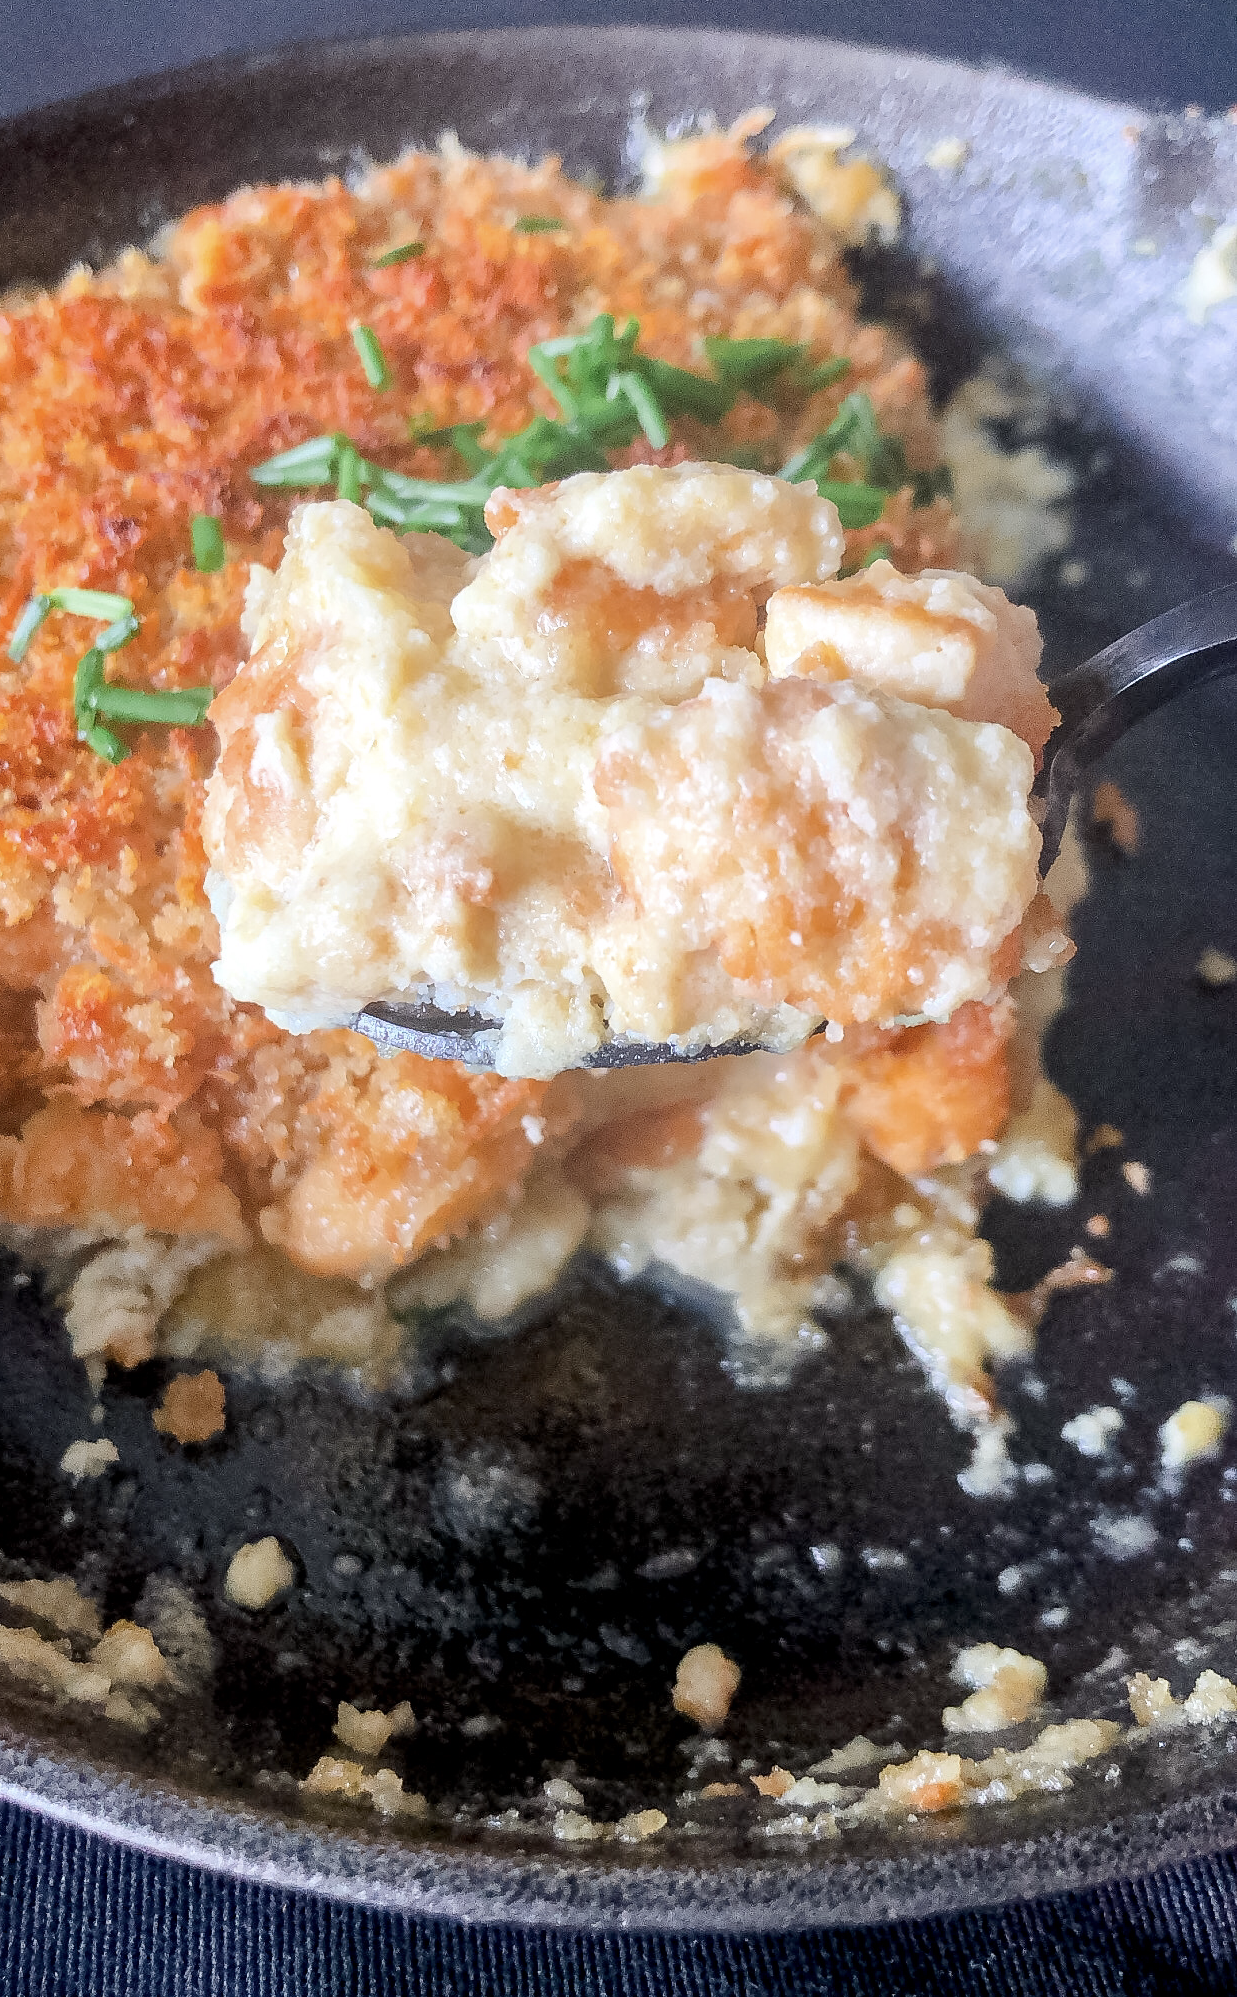
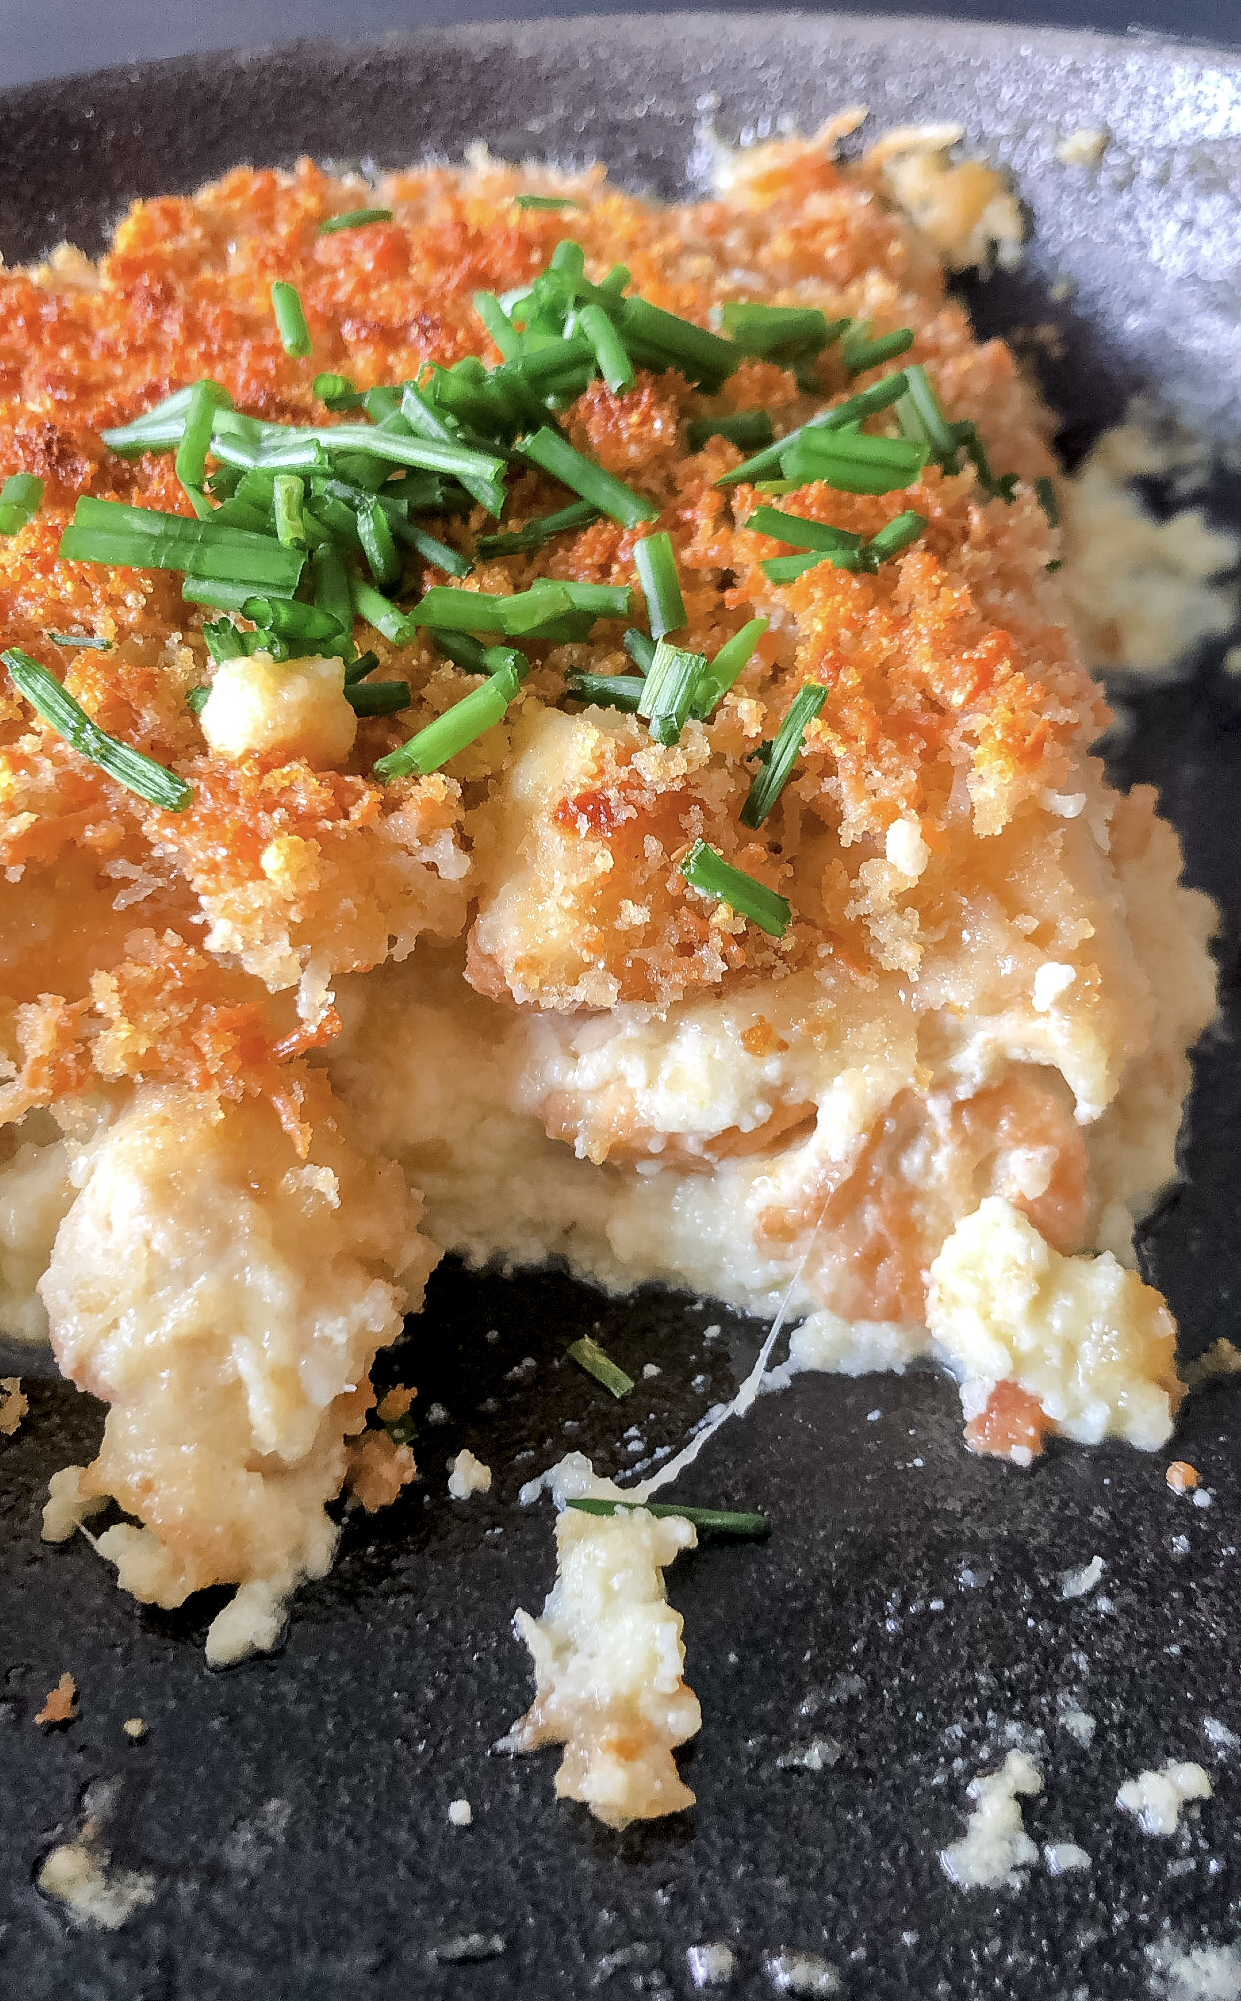
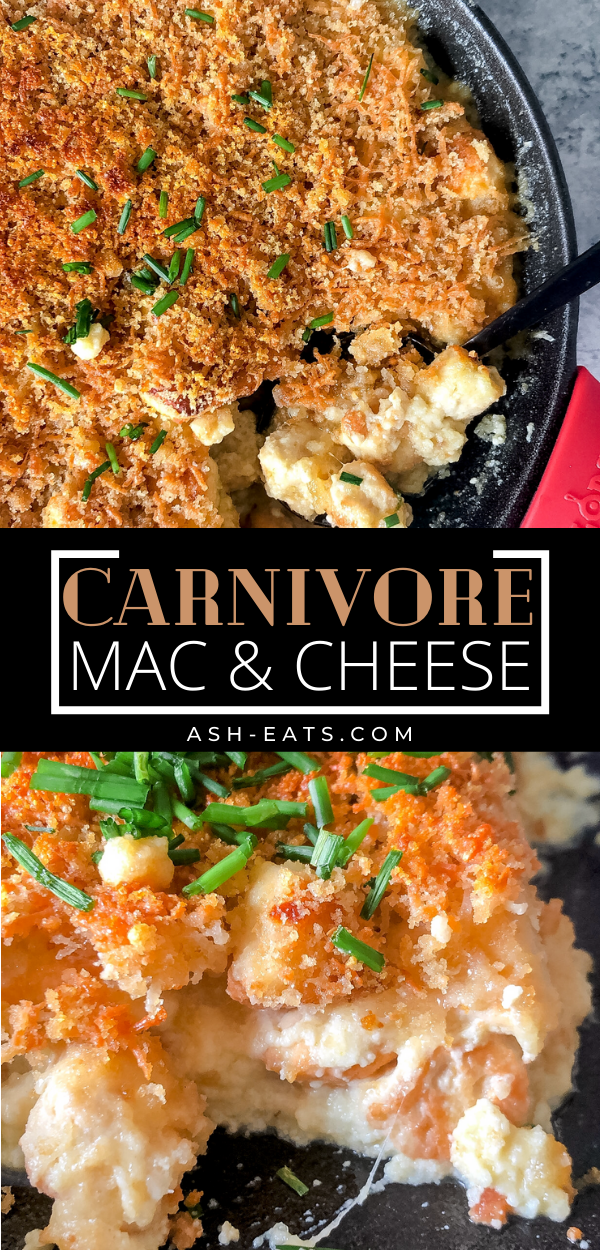
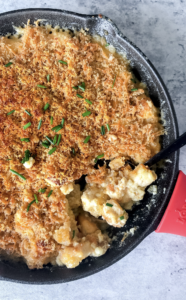
This Carnivore Mac and Cheese is creamy, decadent, topped with crispy raw cheese-pork rind breadcrumbs, and garnished with (optional) chives.
Note: This recipe was inspired by Carnivorous Chef! I changed some things around, but his Carnivore Mac and Cheese recipe gave me a foundation to build this one from. Check him out – he has tons of great (and beautifully presented) recipes.

What you need to make Carnivore Mac and Cheese
Ingredients:
For the “breadcrumbs”:
- Pork rinds
- Raw cheese (ASHLEY20 for 20% off)
For the “mac”:
- Eggs (ASHLEY20 for 20% off)
- Raw ground chicken
- Grass-fed ghee (or butter) (for pan-frying)
Cheese sauce:
- Cheese
- Milk or cream
- Lemon (optional, but recommended)
- Yellow mustard (optional, but recommended)
- Sea salt (ASHLEYR for 15% off)
Garnish:
- Chives (optional)
Equipment:
- Blender or food processor
- Cooking pan
- Cooking pot
- Vegetable grater
- Freezer bags (or a large plastic bag)
- Kitchen shears
- 8″ cast iron pan for baking (or other baking dish)

How to make Carnivore Mac and Cheese
Make the “breadcrumbs”.
In your blender, blend the pork rinds down to a fine powder, then set the powder aside in a bowl.
Cut 1/4 (2oz) off your 8oz block of raw cheese.
In the same bowl with the pork rind powder, with your vegetable grater, finely shred the 2oz block of raw cheese.
Mix the pork rind powder and shredded raw cheese around with your hands to get it to a uniform consistency, then set the mixture aside.
Make the “mac”.
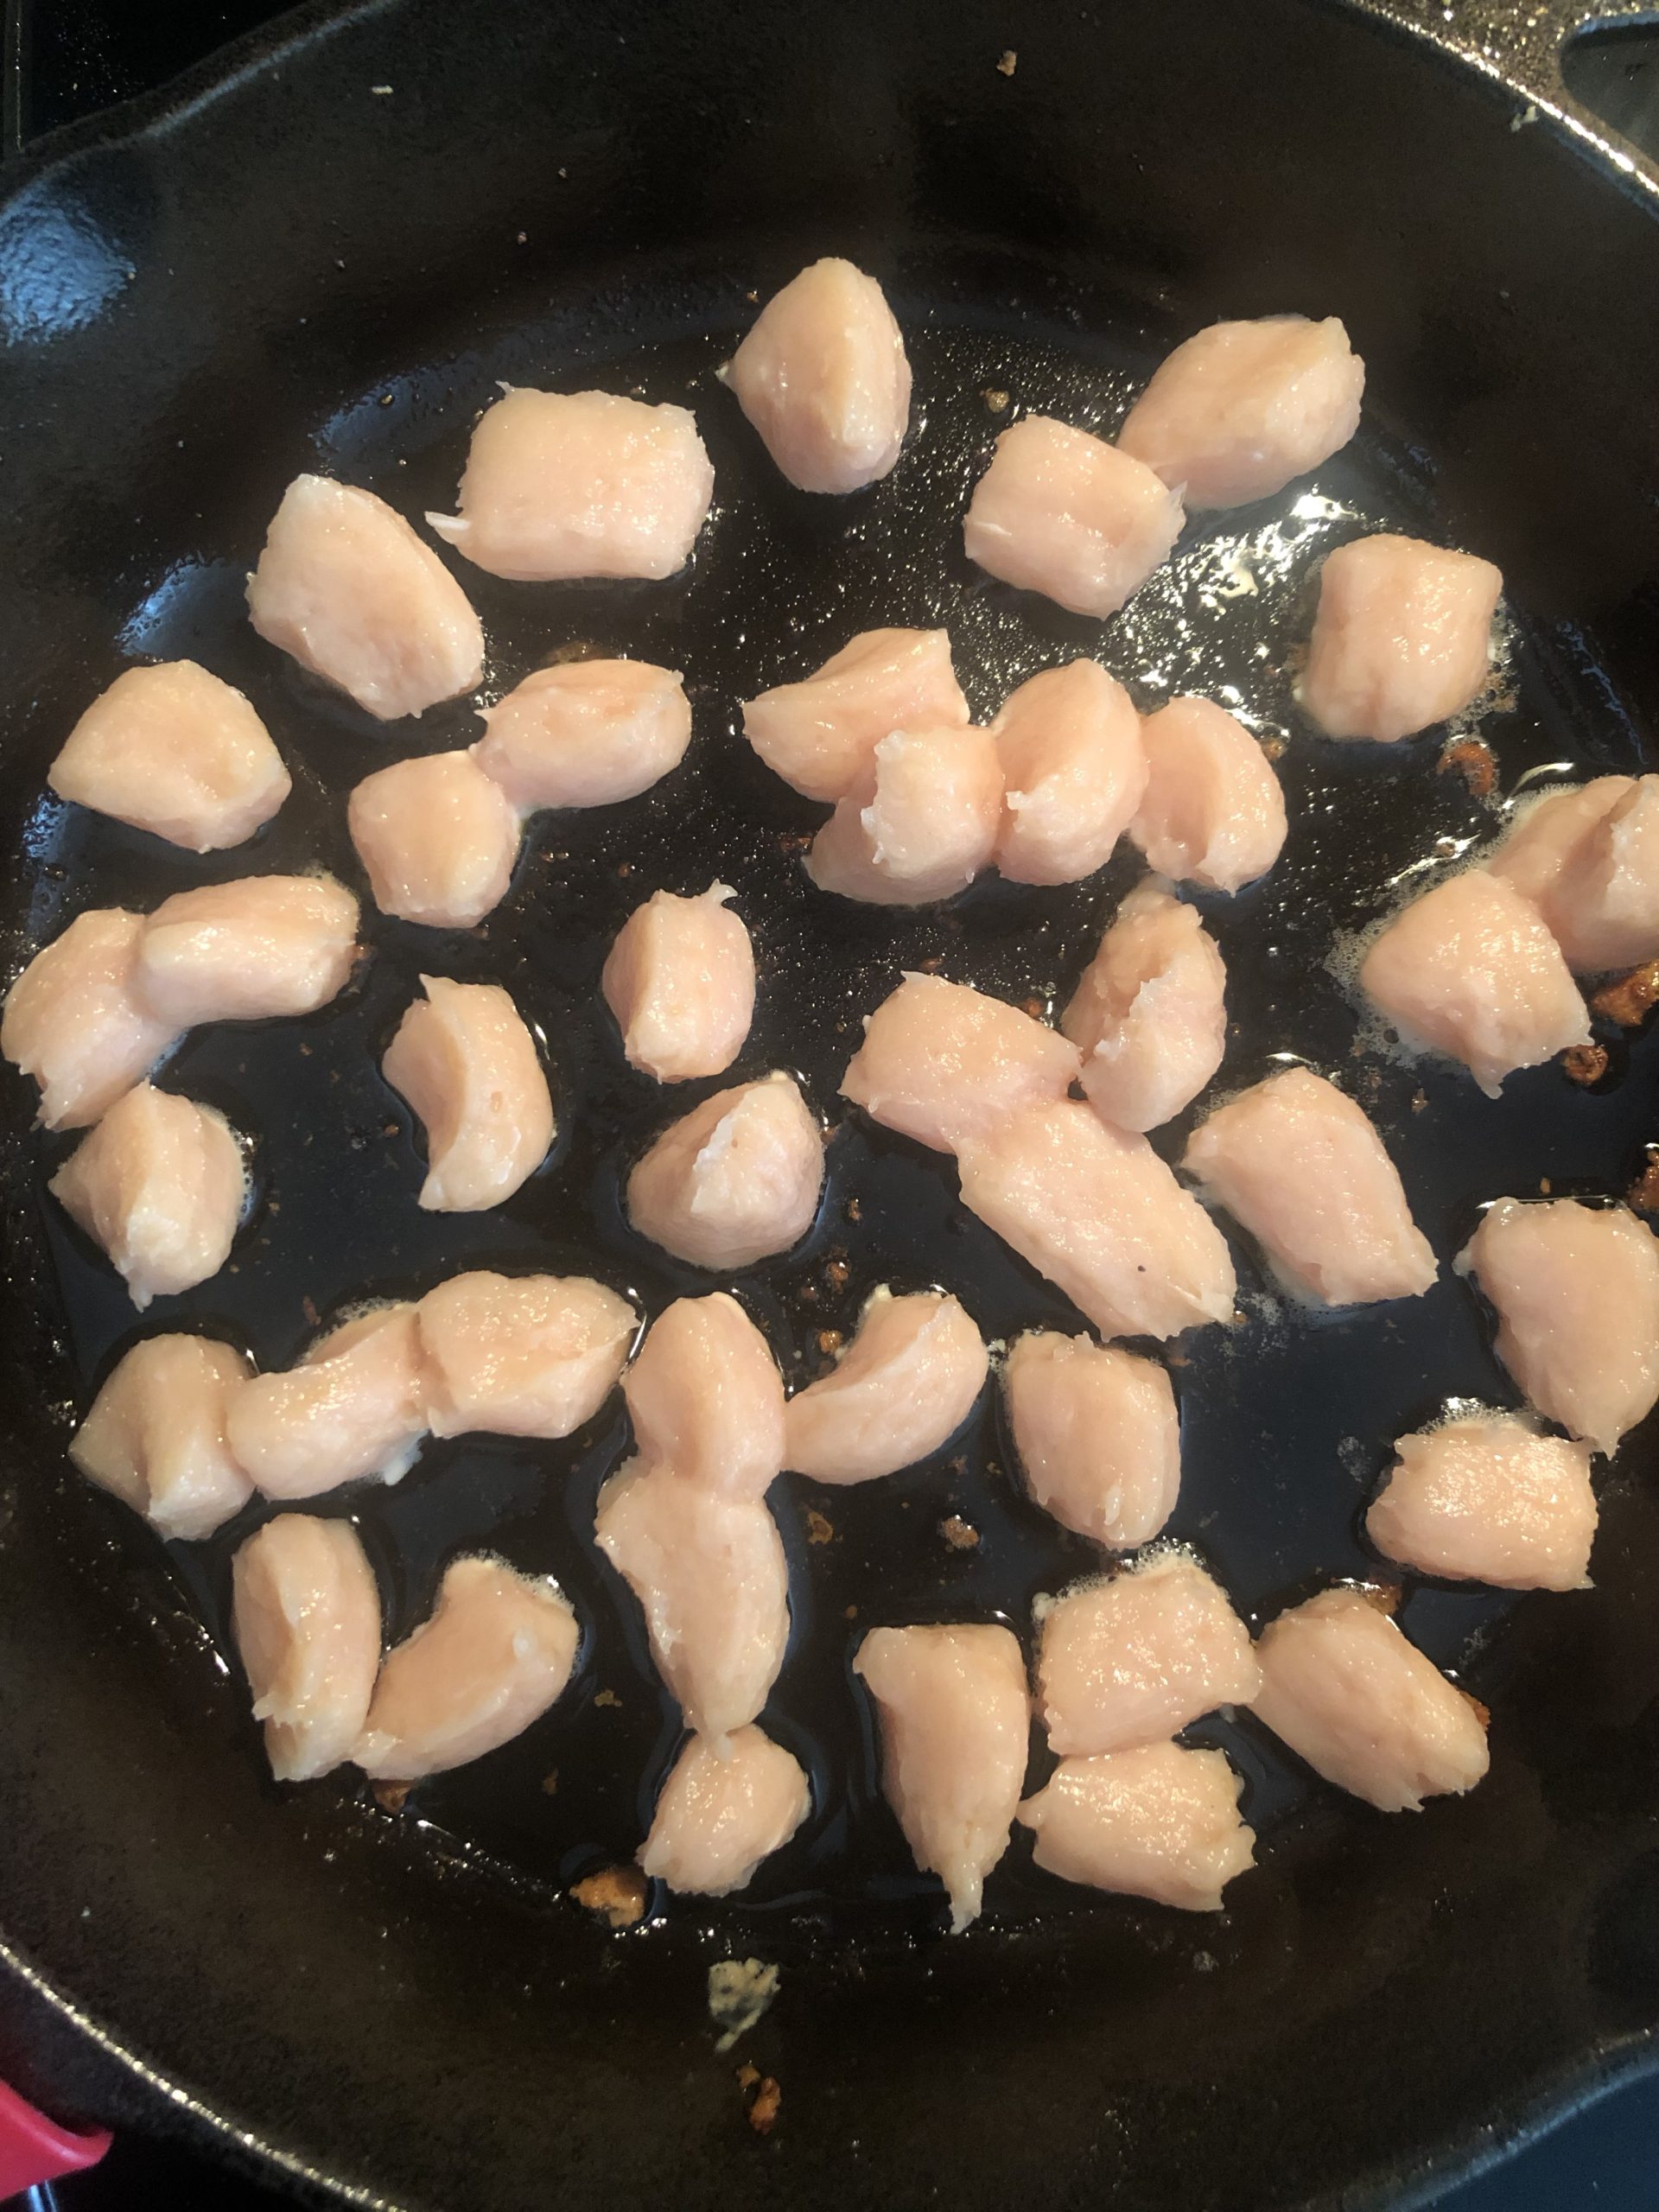
In your blender, combine two eggs, the raw ground chicken, and a dash of sea salt until it forms a paste.
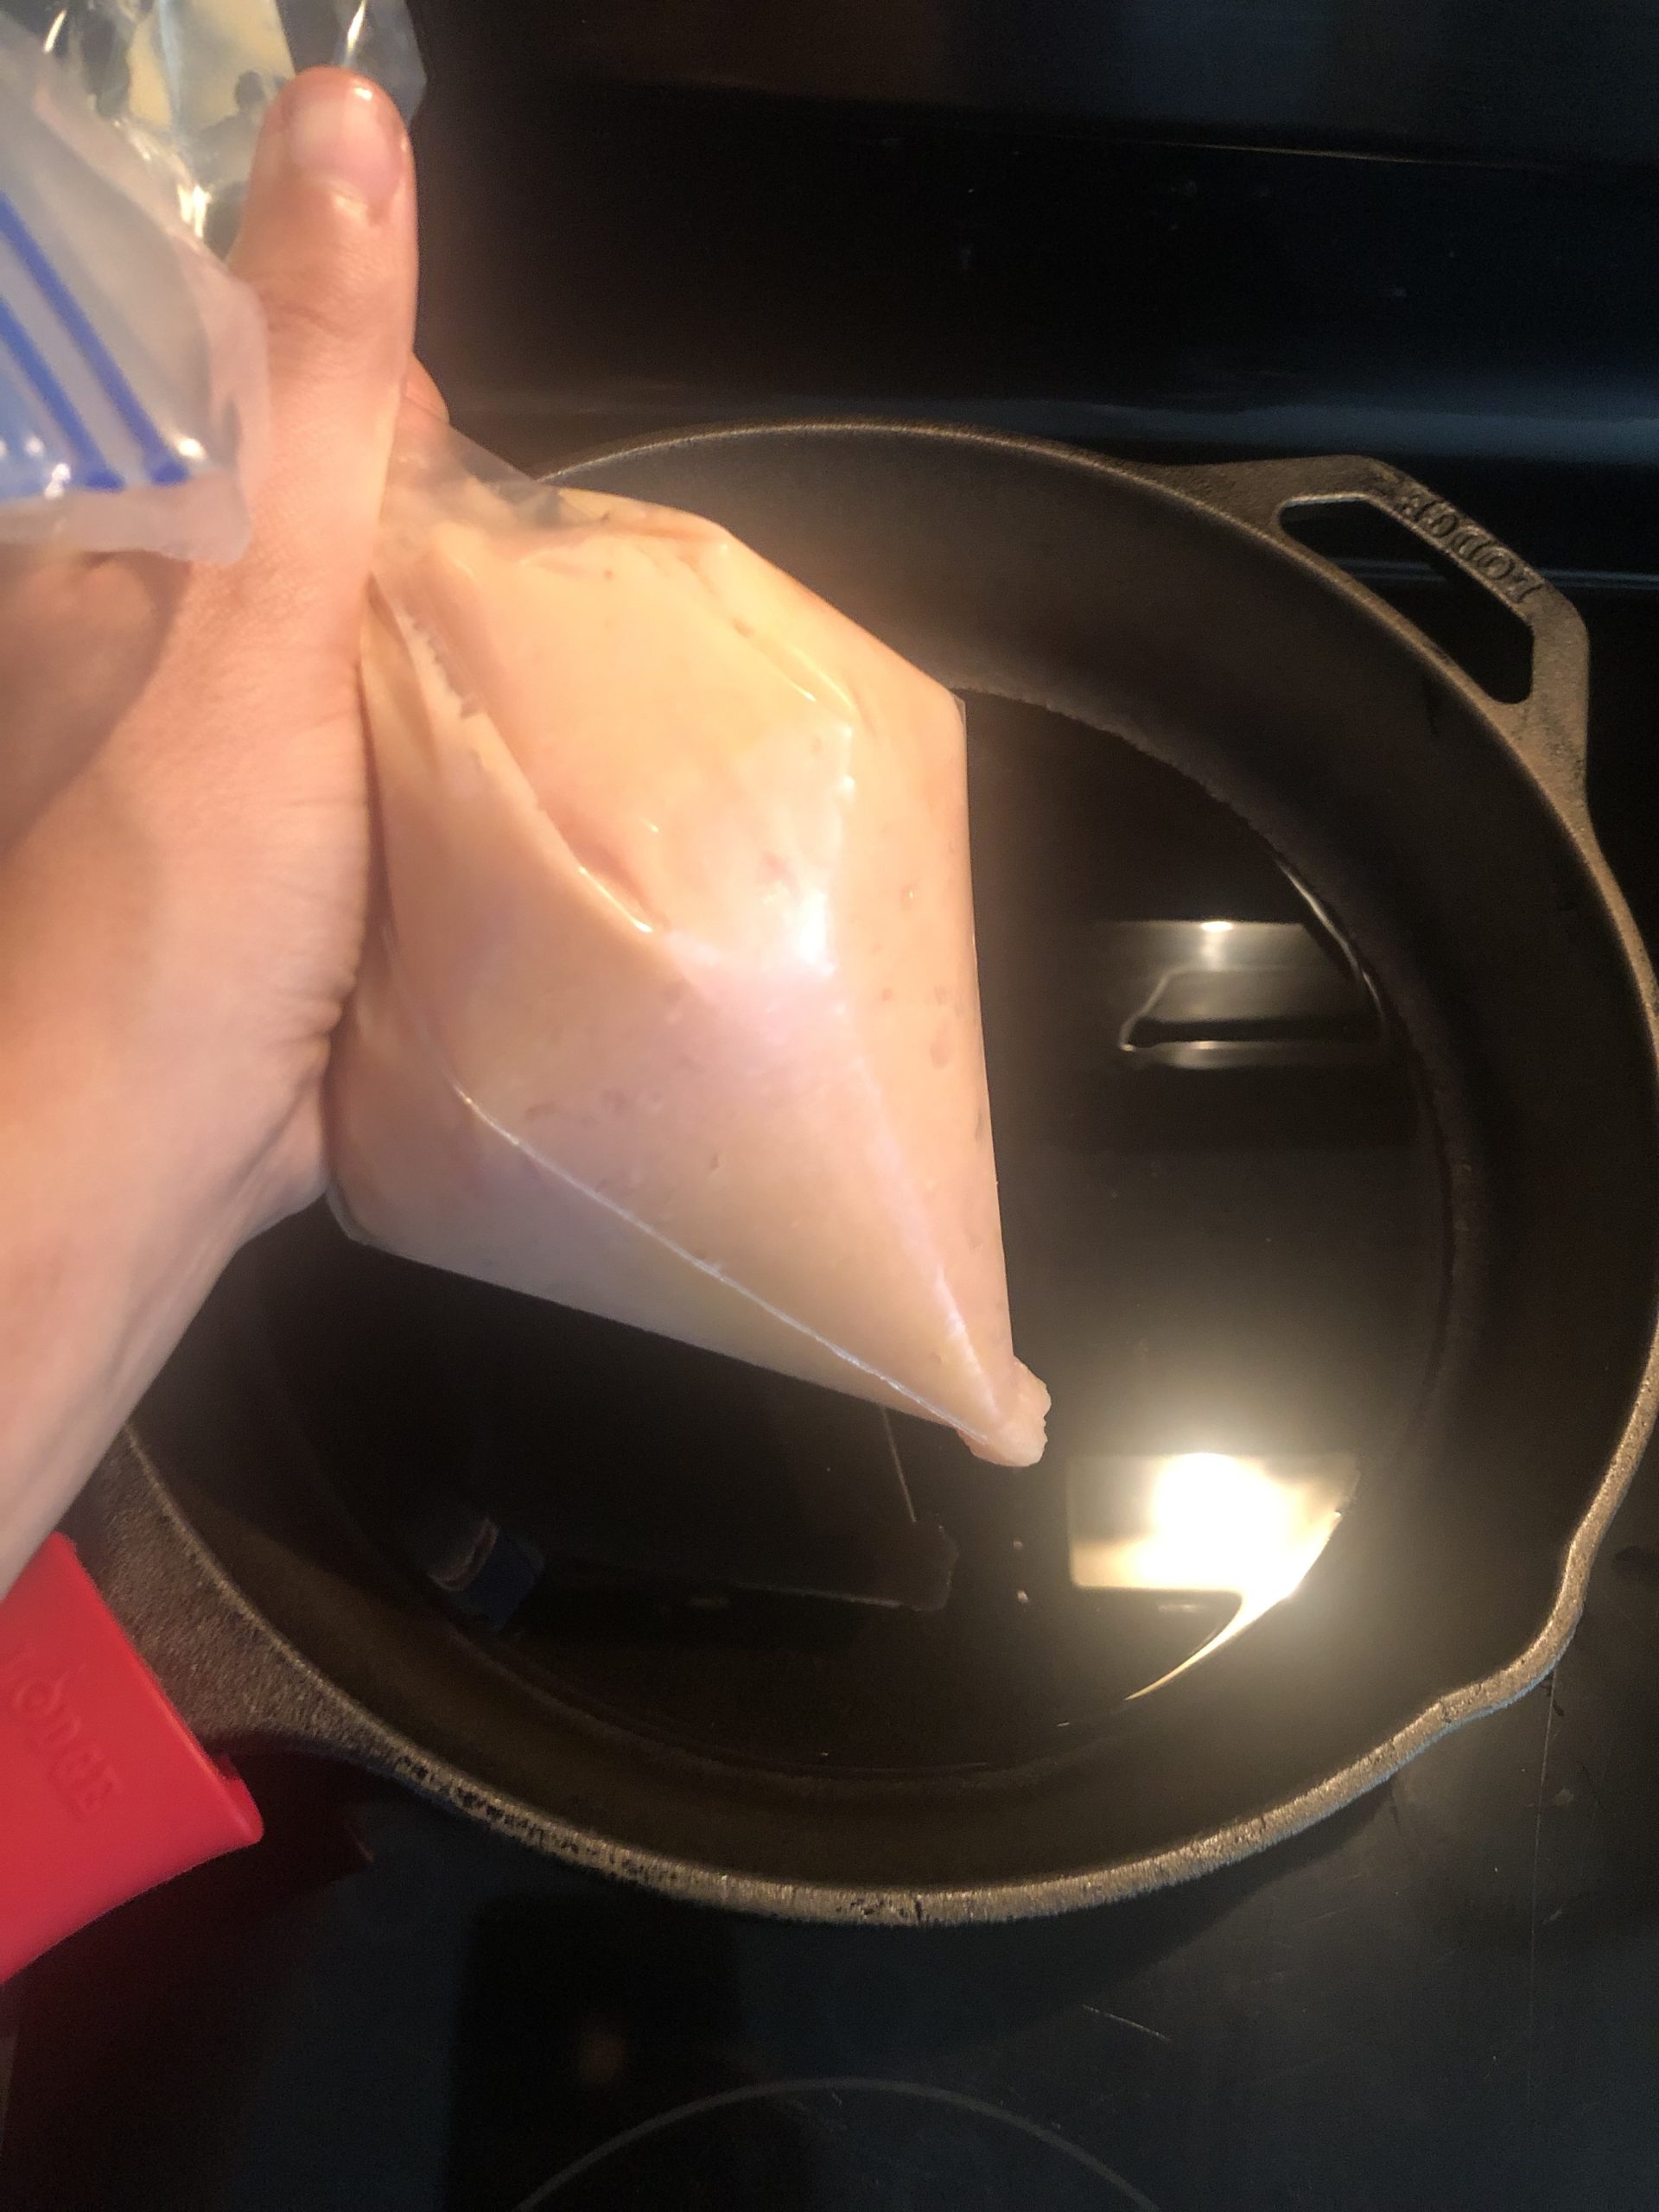
Pour the paste into your freezer bag (or large plastic bag) and zip it shut while removing the air and pushing the mixture down to one corner.
Note: Act as if you’re creating a tool to ice a cake. There are pictures under the “Tips to make the best…” section to demonstrate this for reference.
Place 1-2 tbsp of ghee in your cooking pan, and bring to medium-high heat.
Once the pan is hot, cut one of the corners of the plastic bag with your kitchen shears, creating a hole to squeeze out the mixture.
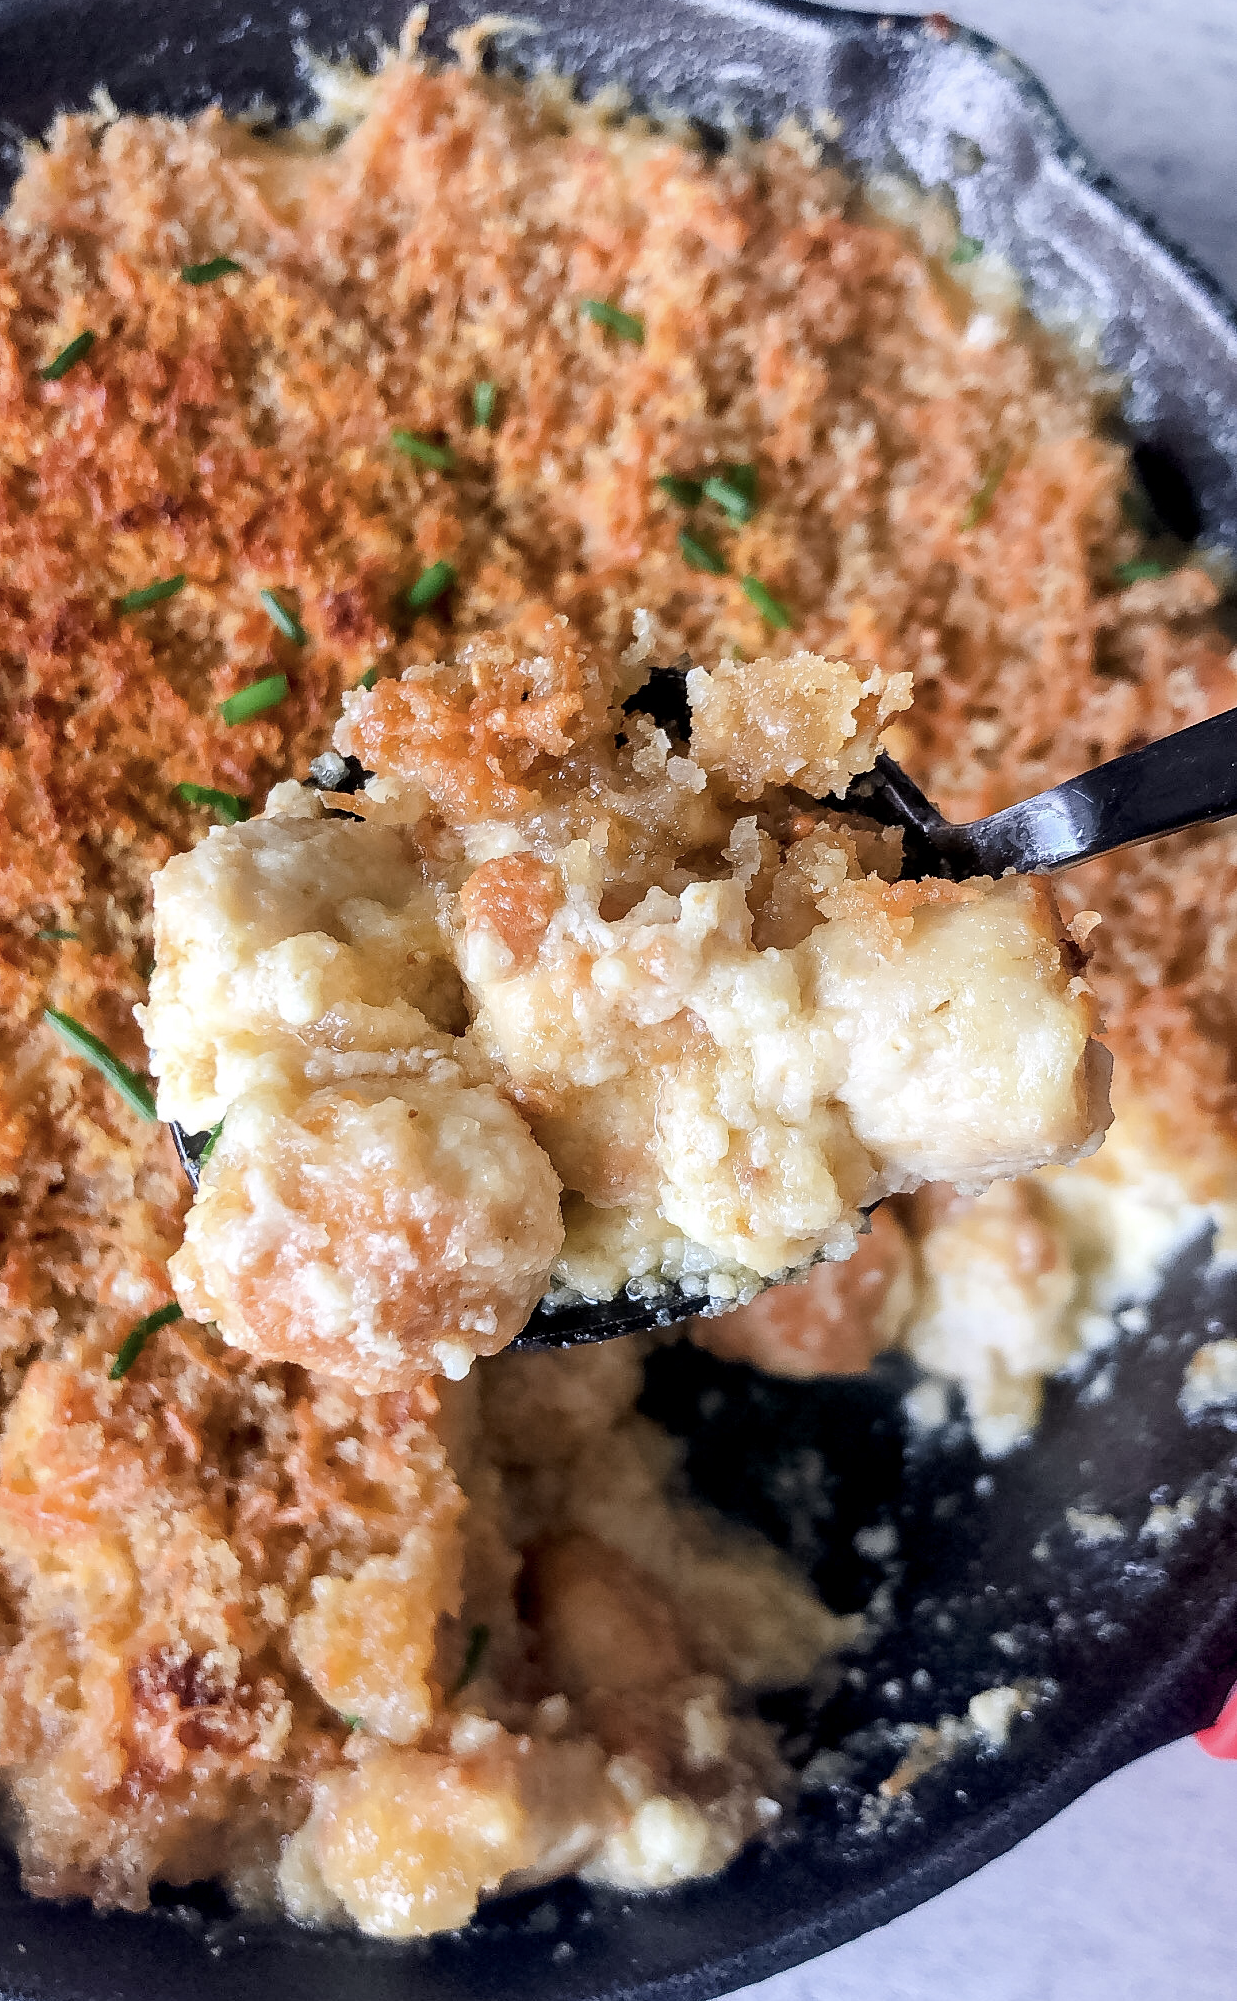
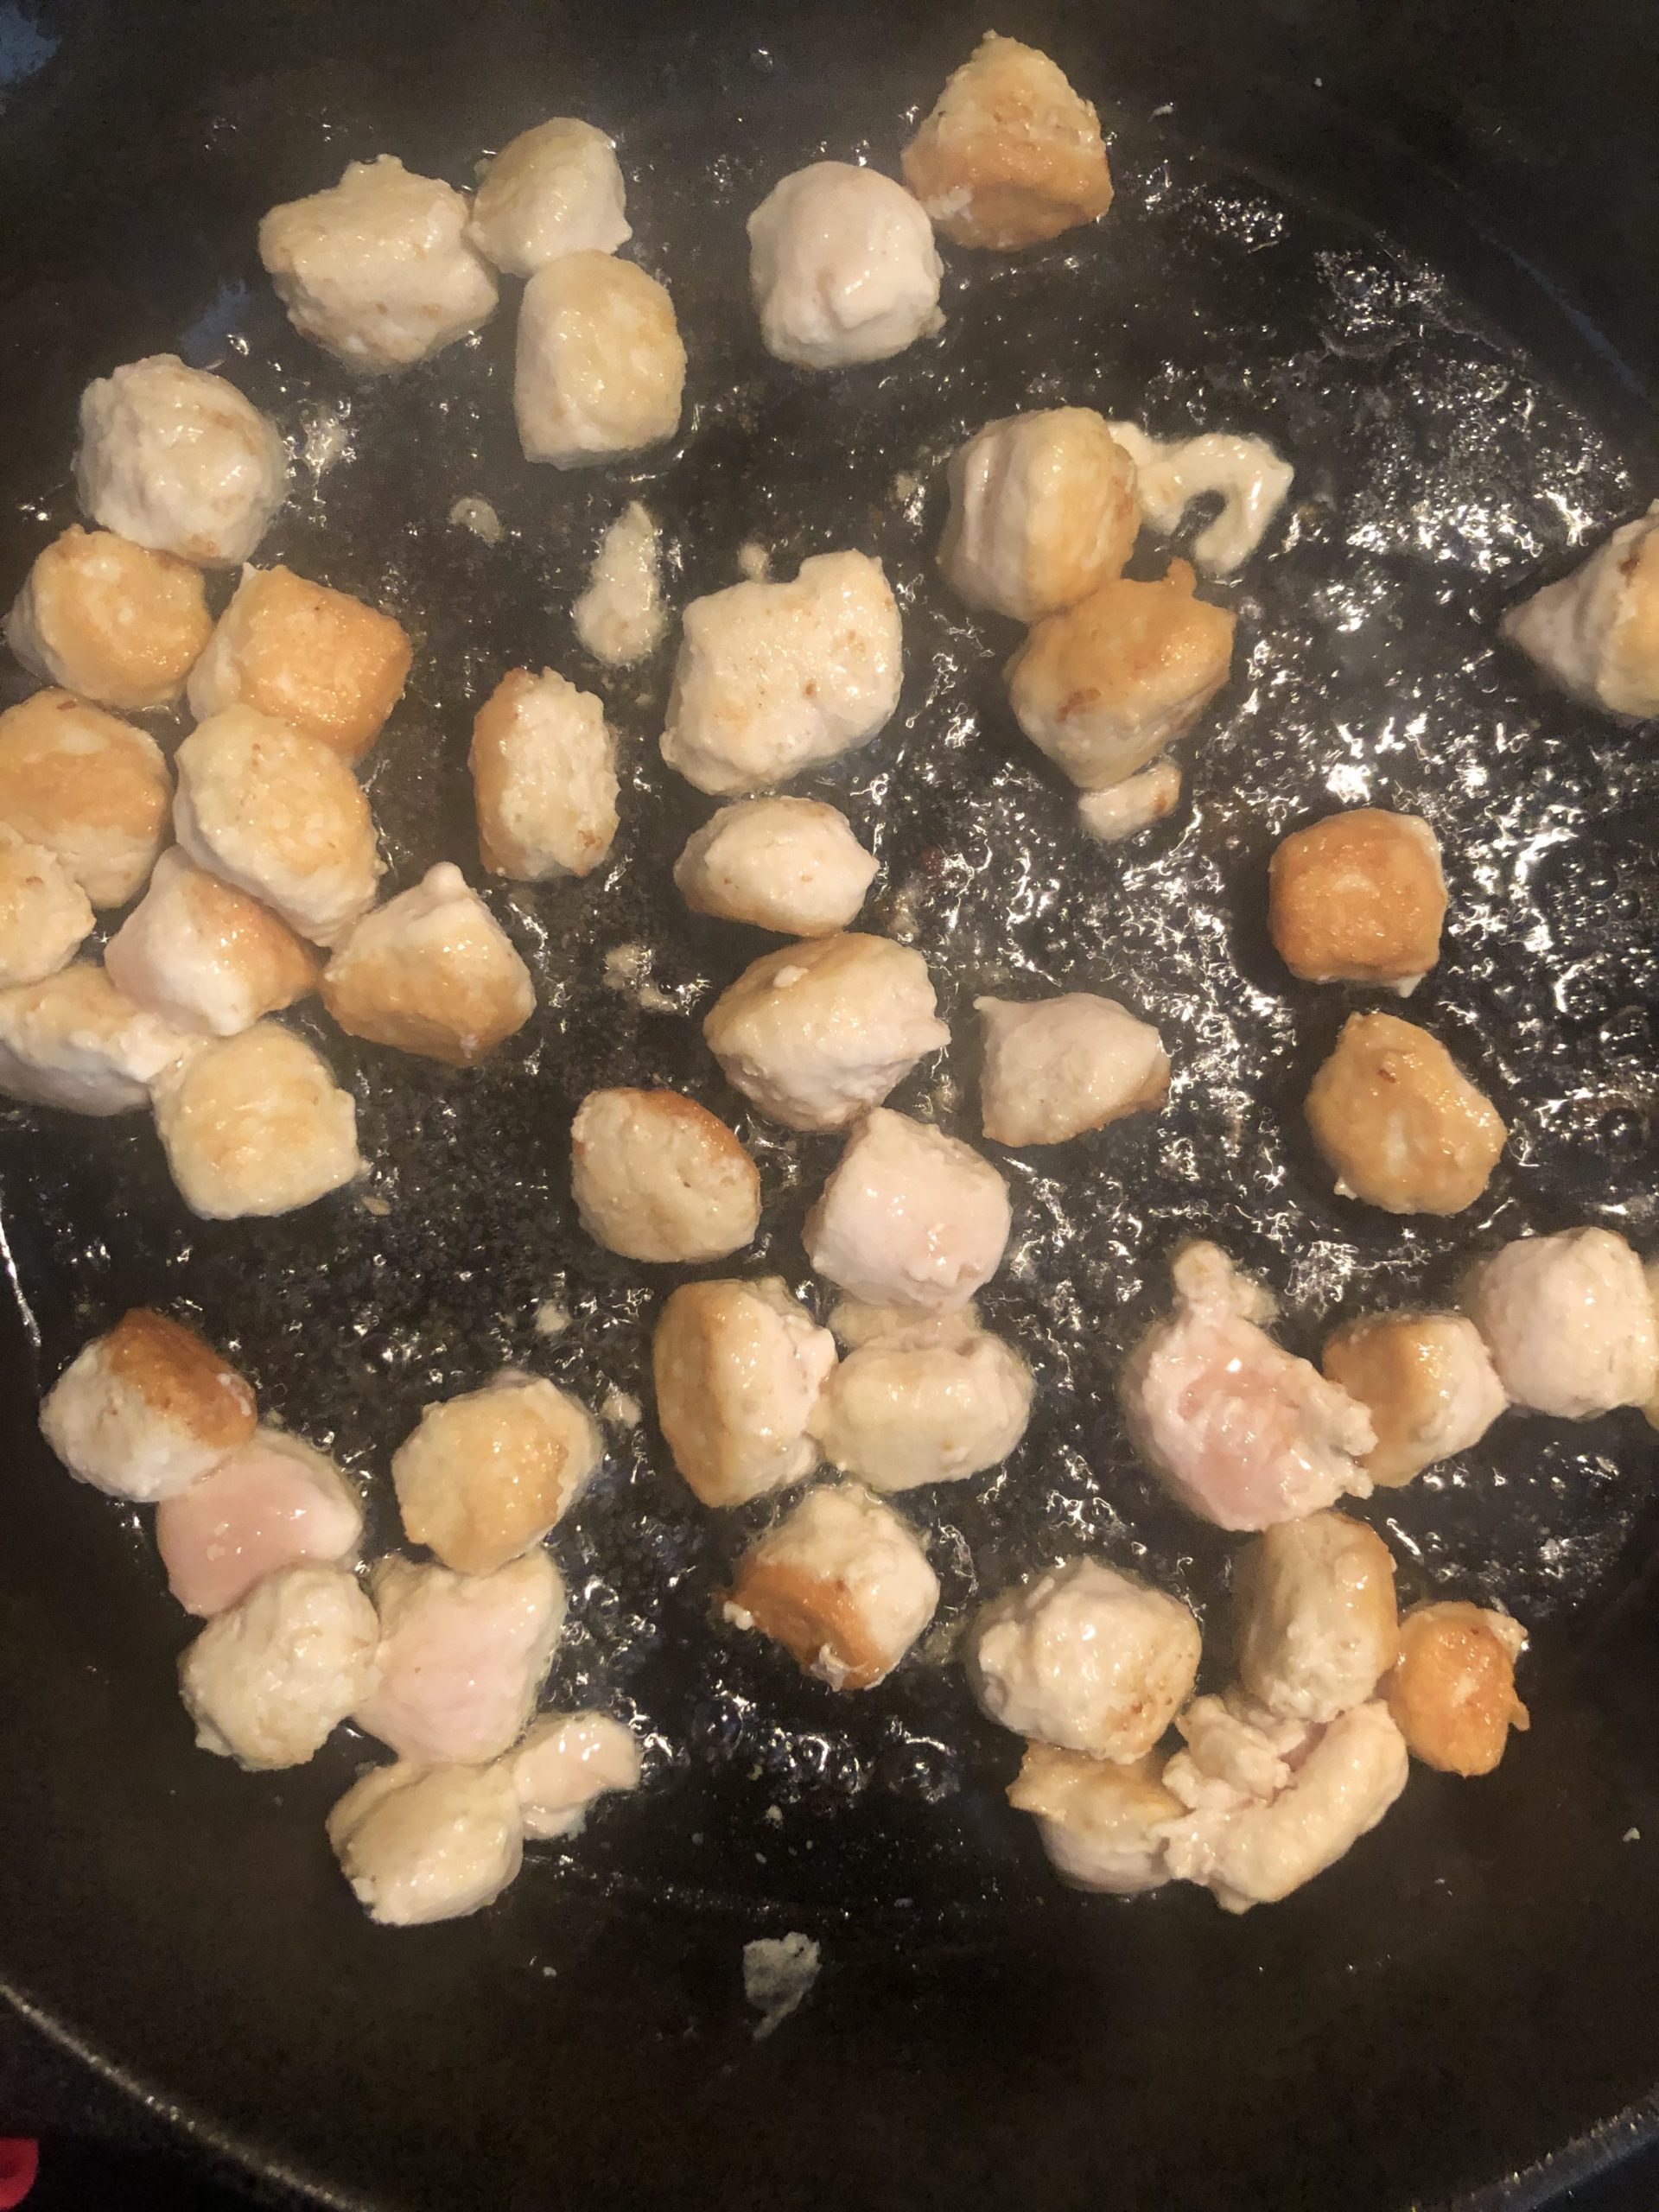
Squeeze out nuggets of the chicken-egg mixture into the hot pan, and pan-fry them until golden brown. I did 1-2 minutes on each side, then kept flipping them until they turned the color I wanted.
Note: There are pictures under the “Tips to make the best…” section to demonstrate this step for reference.
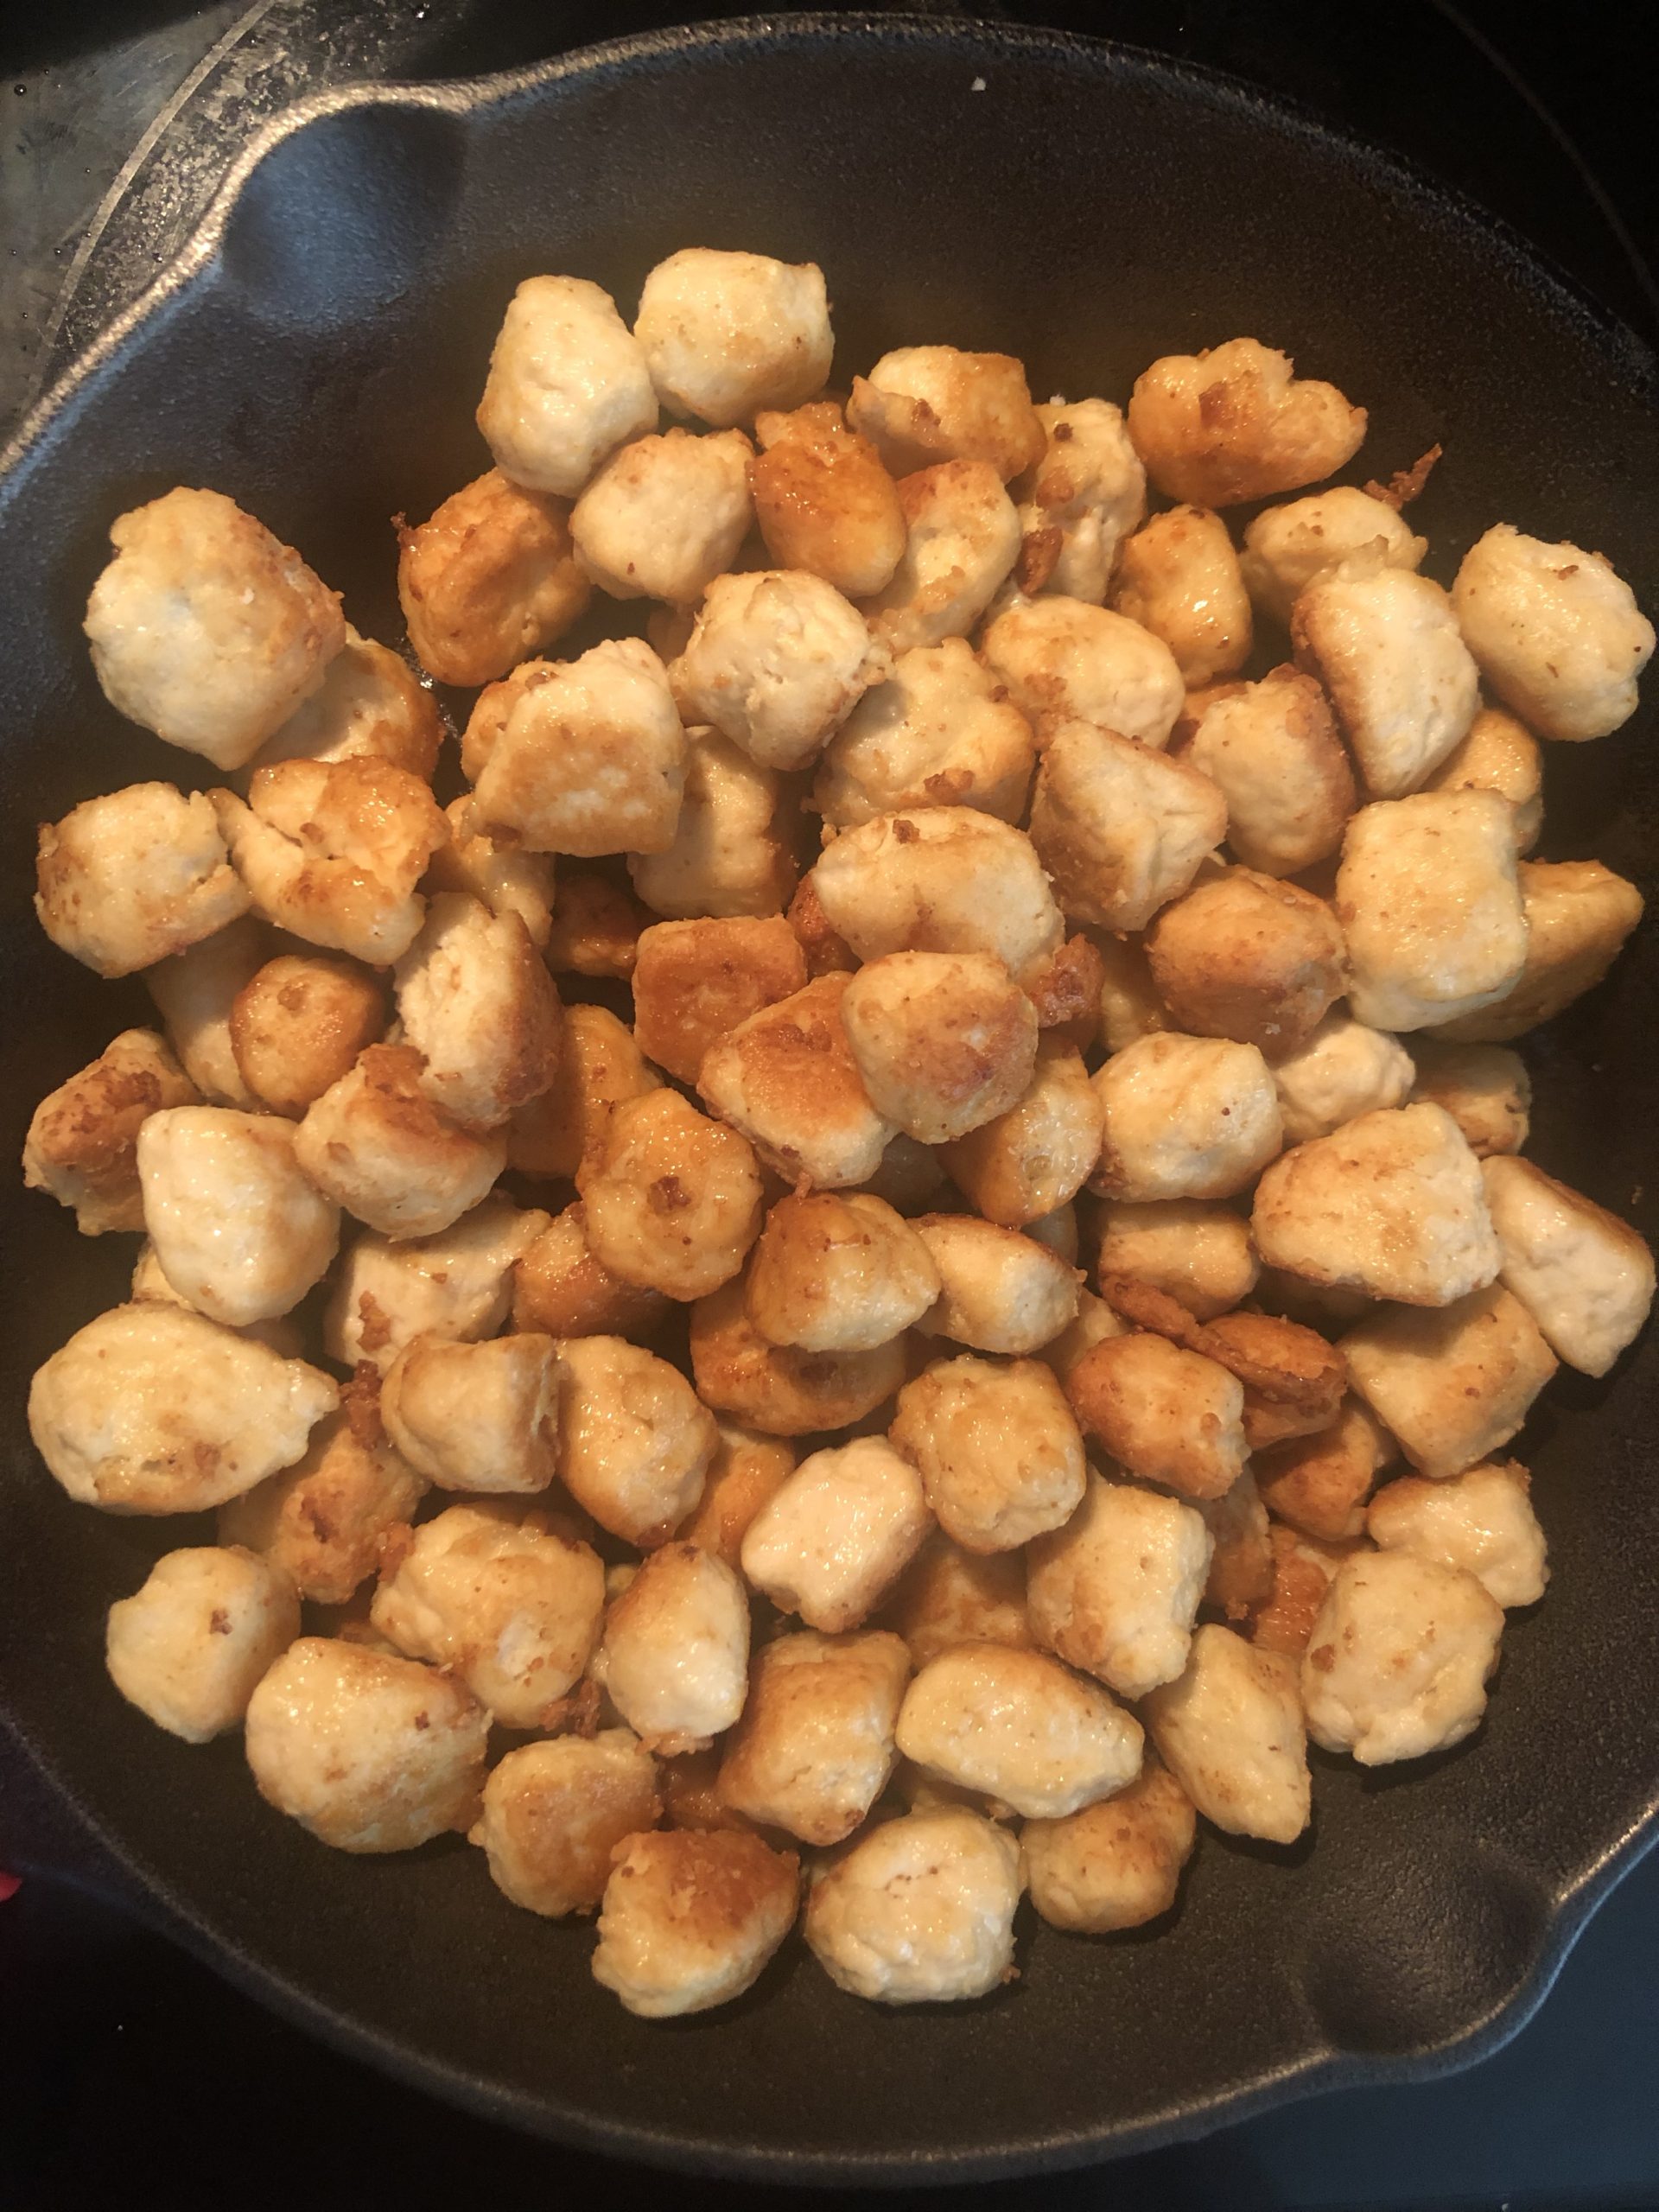
You may have to add more ghee to the pan if it runs out before you’re done pan-frying. Once the pieces are all done frying, place them in your 8″ cast iron pan (or whatever baking dish you’re using) and set it aside.

Make the cheese sauce.
Preheat your oven to 400 degrees.
Pour the milk (or cream) into your cooking pot, and bring it to a boil while stirring.
Once the milk is boiling, slowly stir in the remaining (6oz) raw cheese.
Add the mustard, lemon juice, and a dash of sea salt to the sauce while still stirring.
Once it’s fully mixed, remove the sauce from heat.
Prepare the dish.
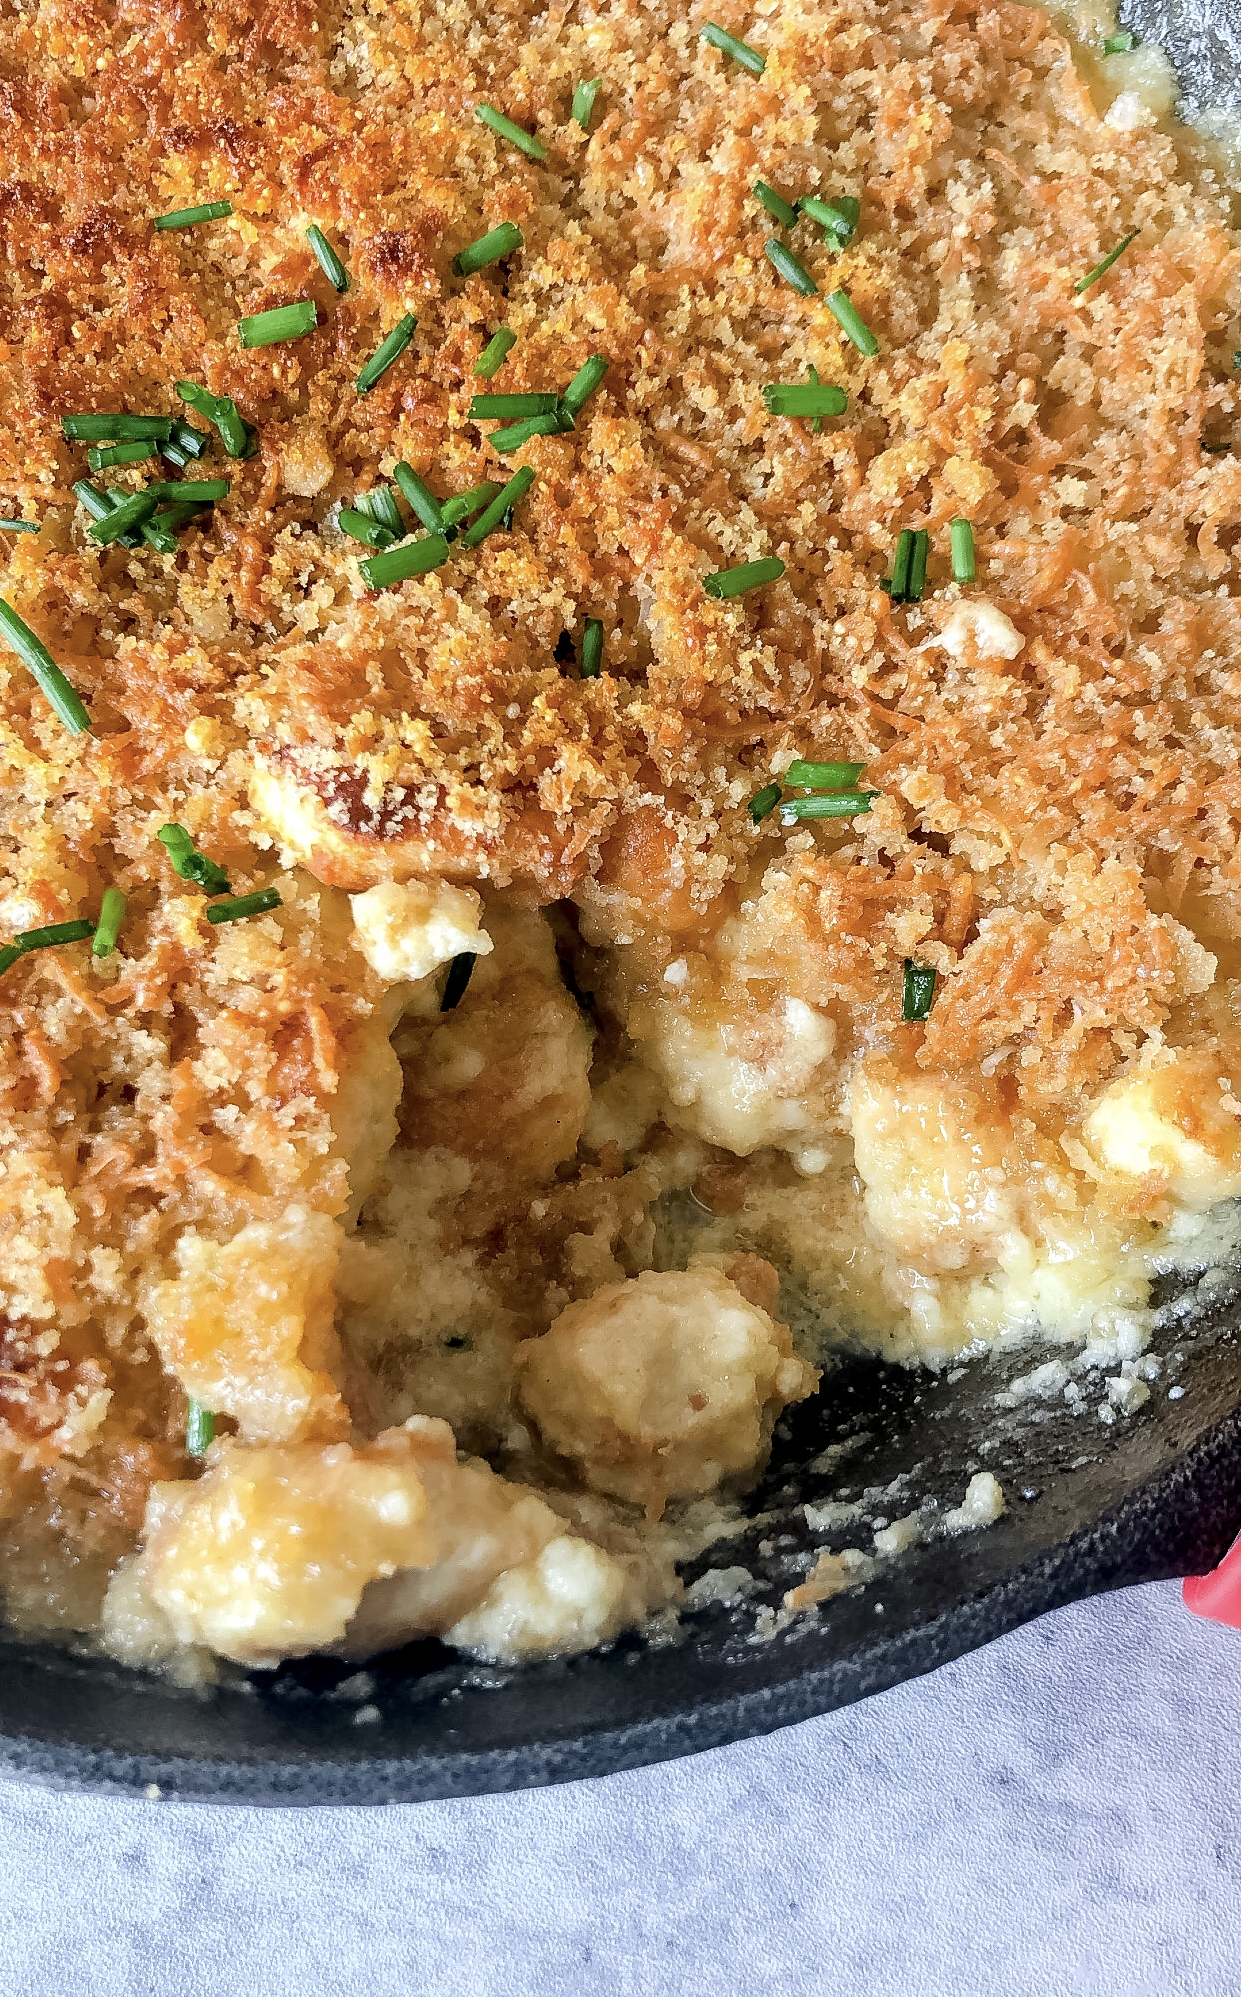
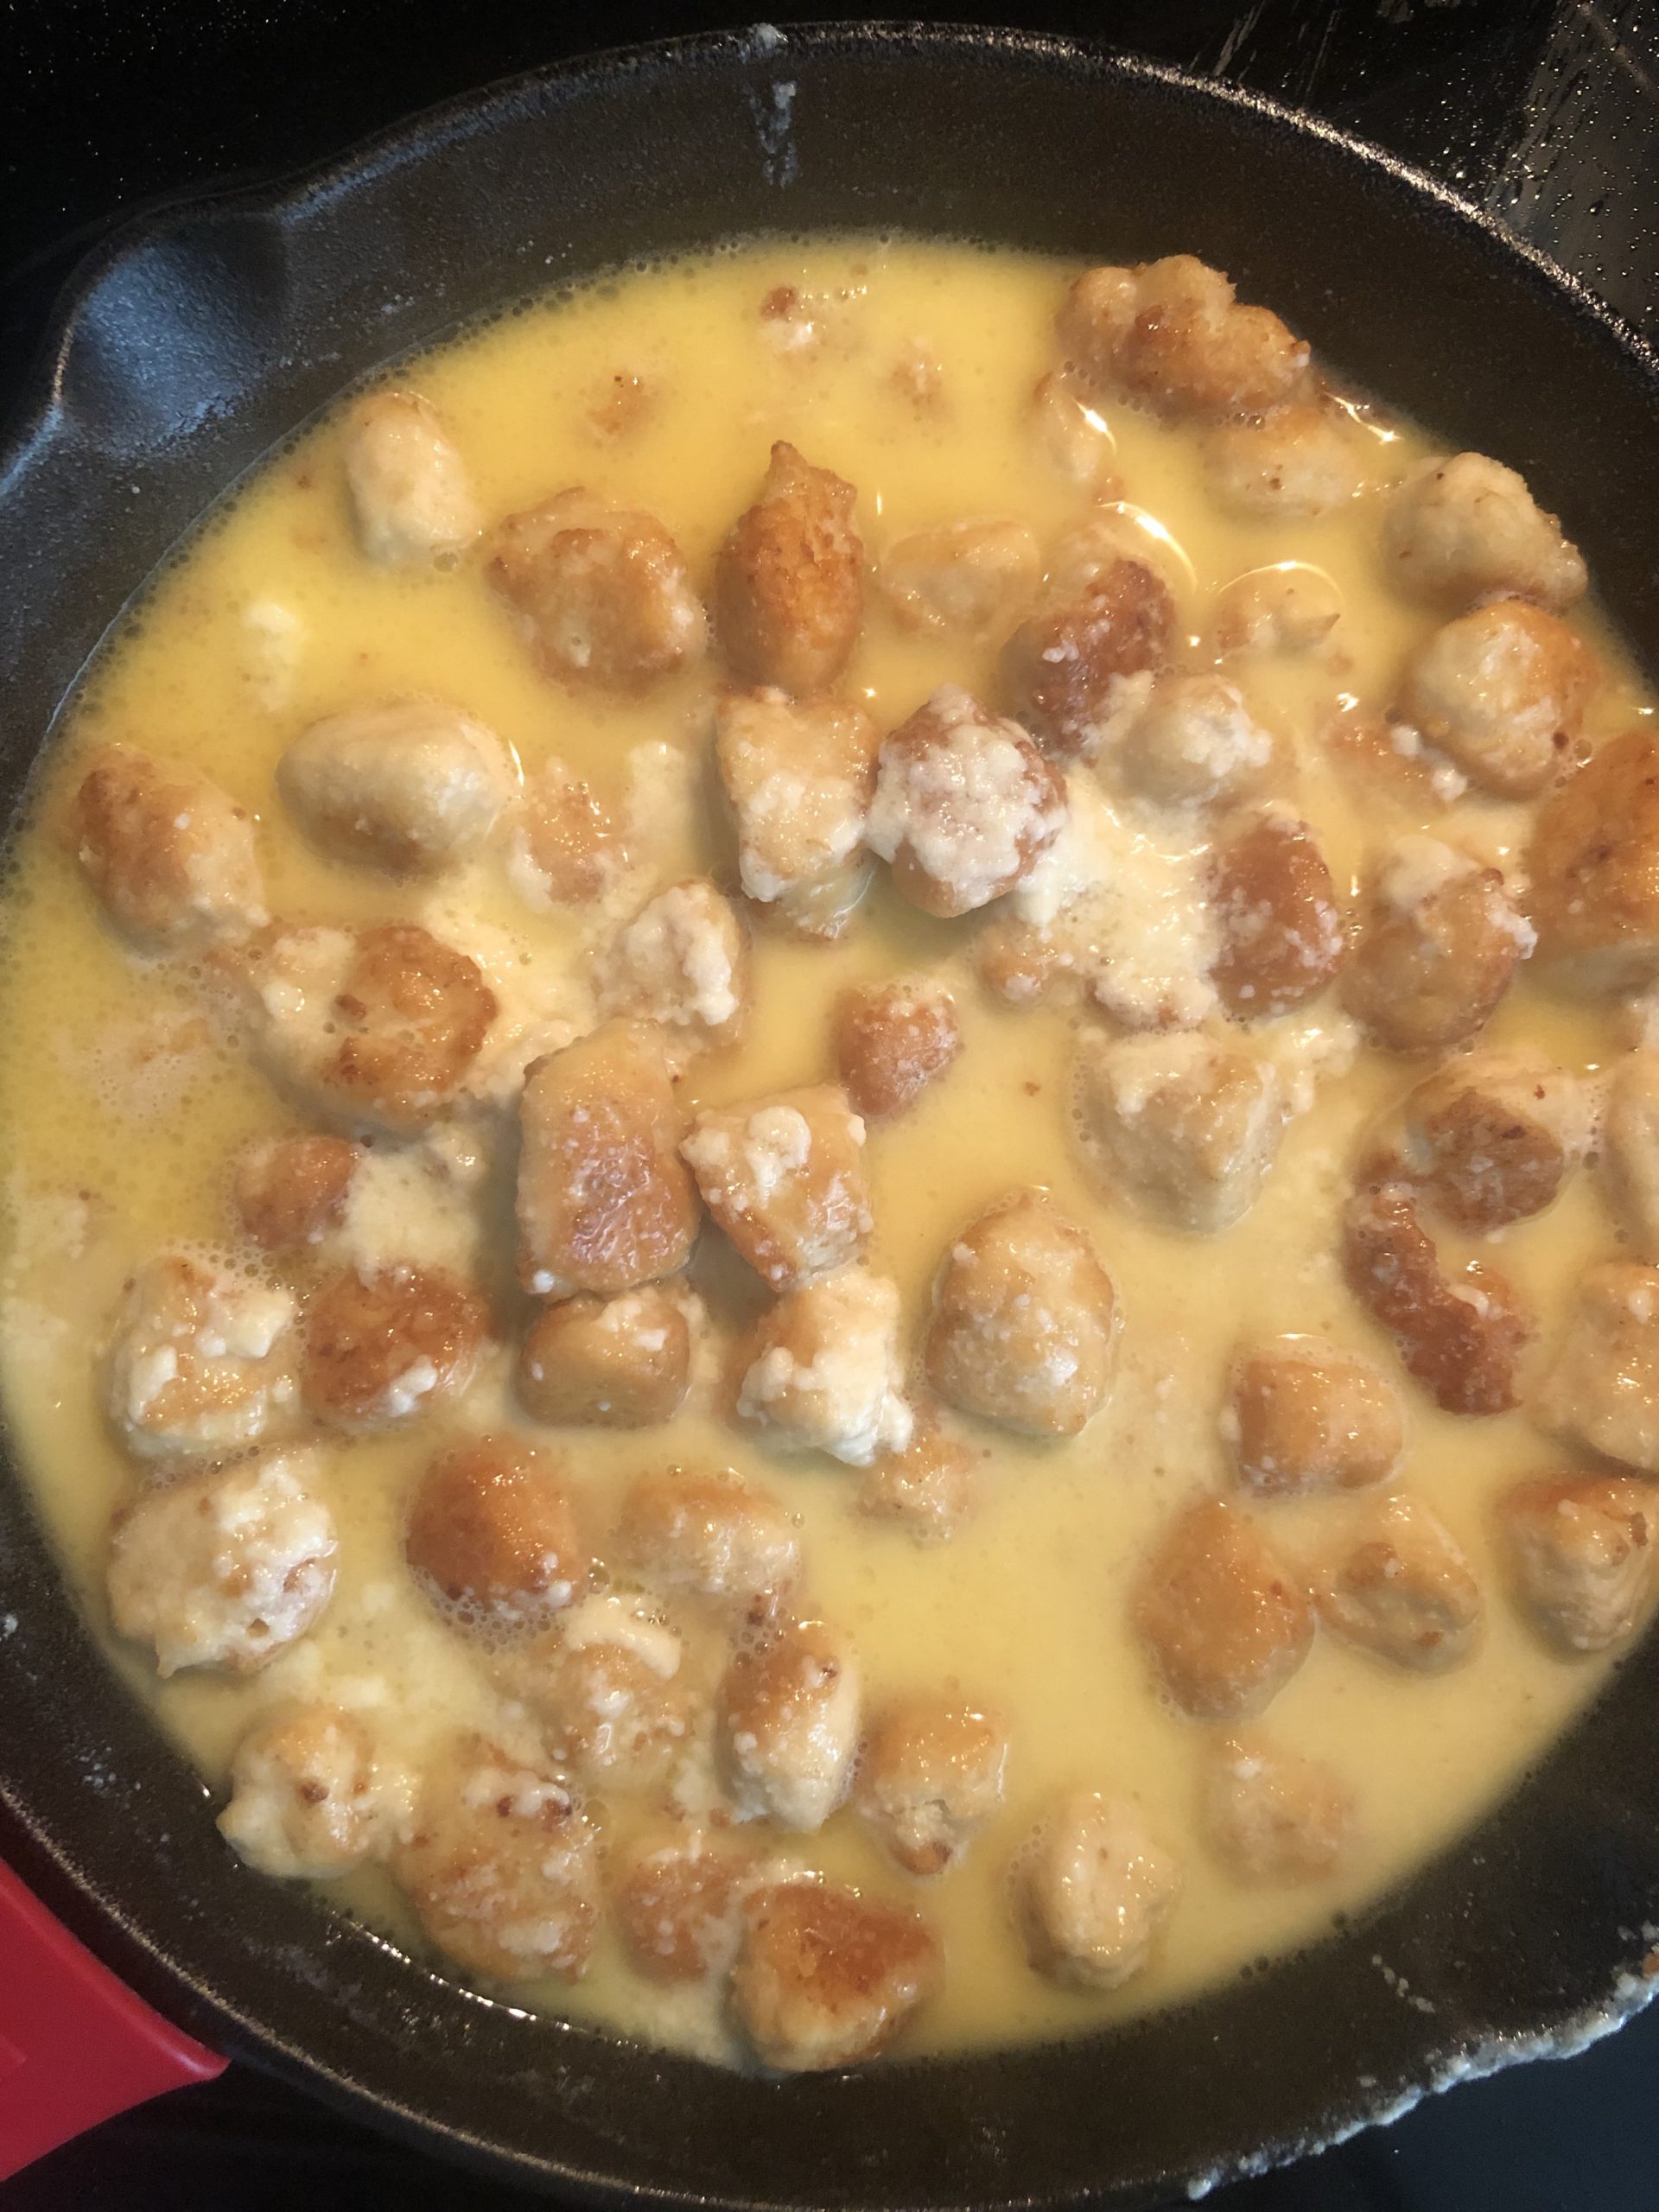
Pour the cheese sauce over the mac. It may be watery. This is normal and it will thicken while baking.
Note: There are pictures under the “Tips to make the best…” section to demonstrate what this looks like for reference.
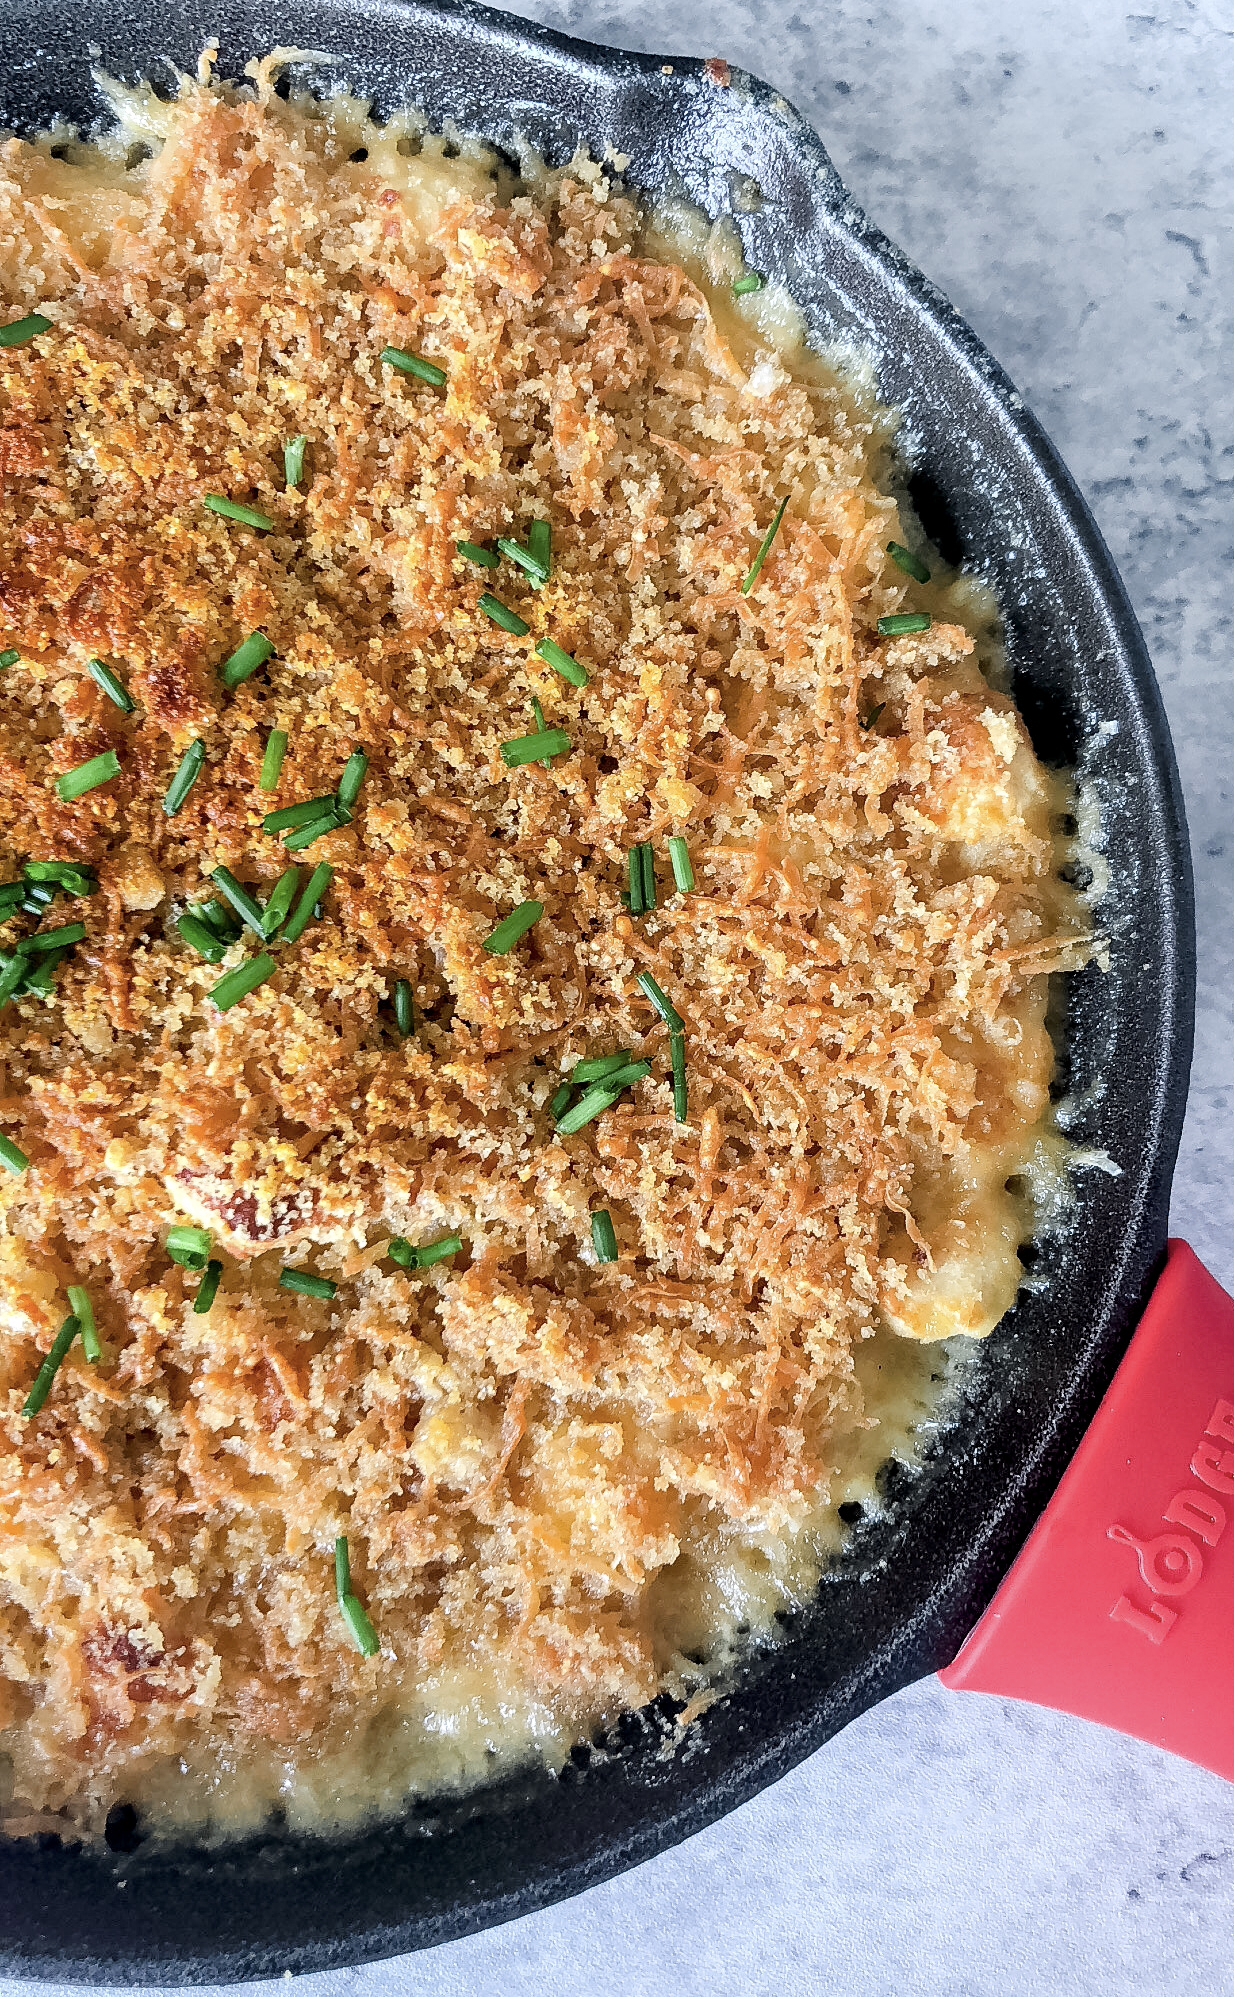
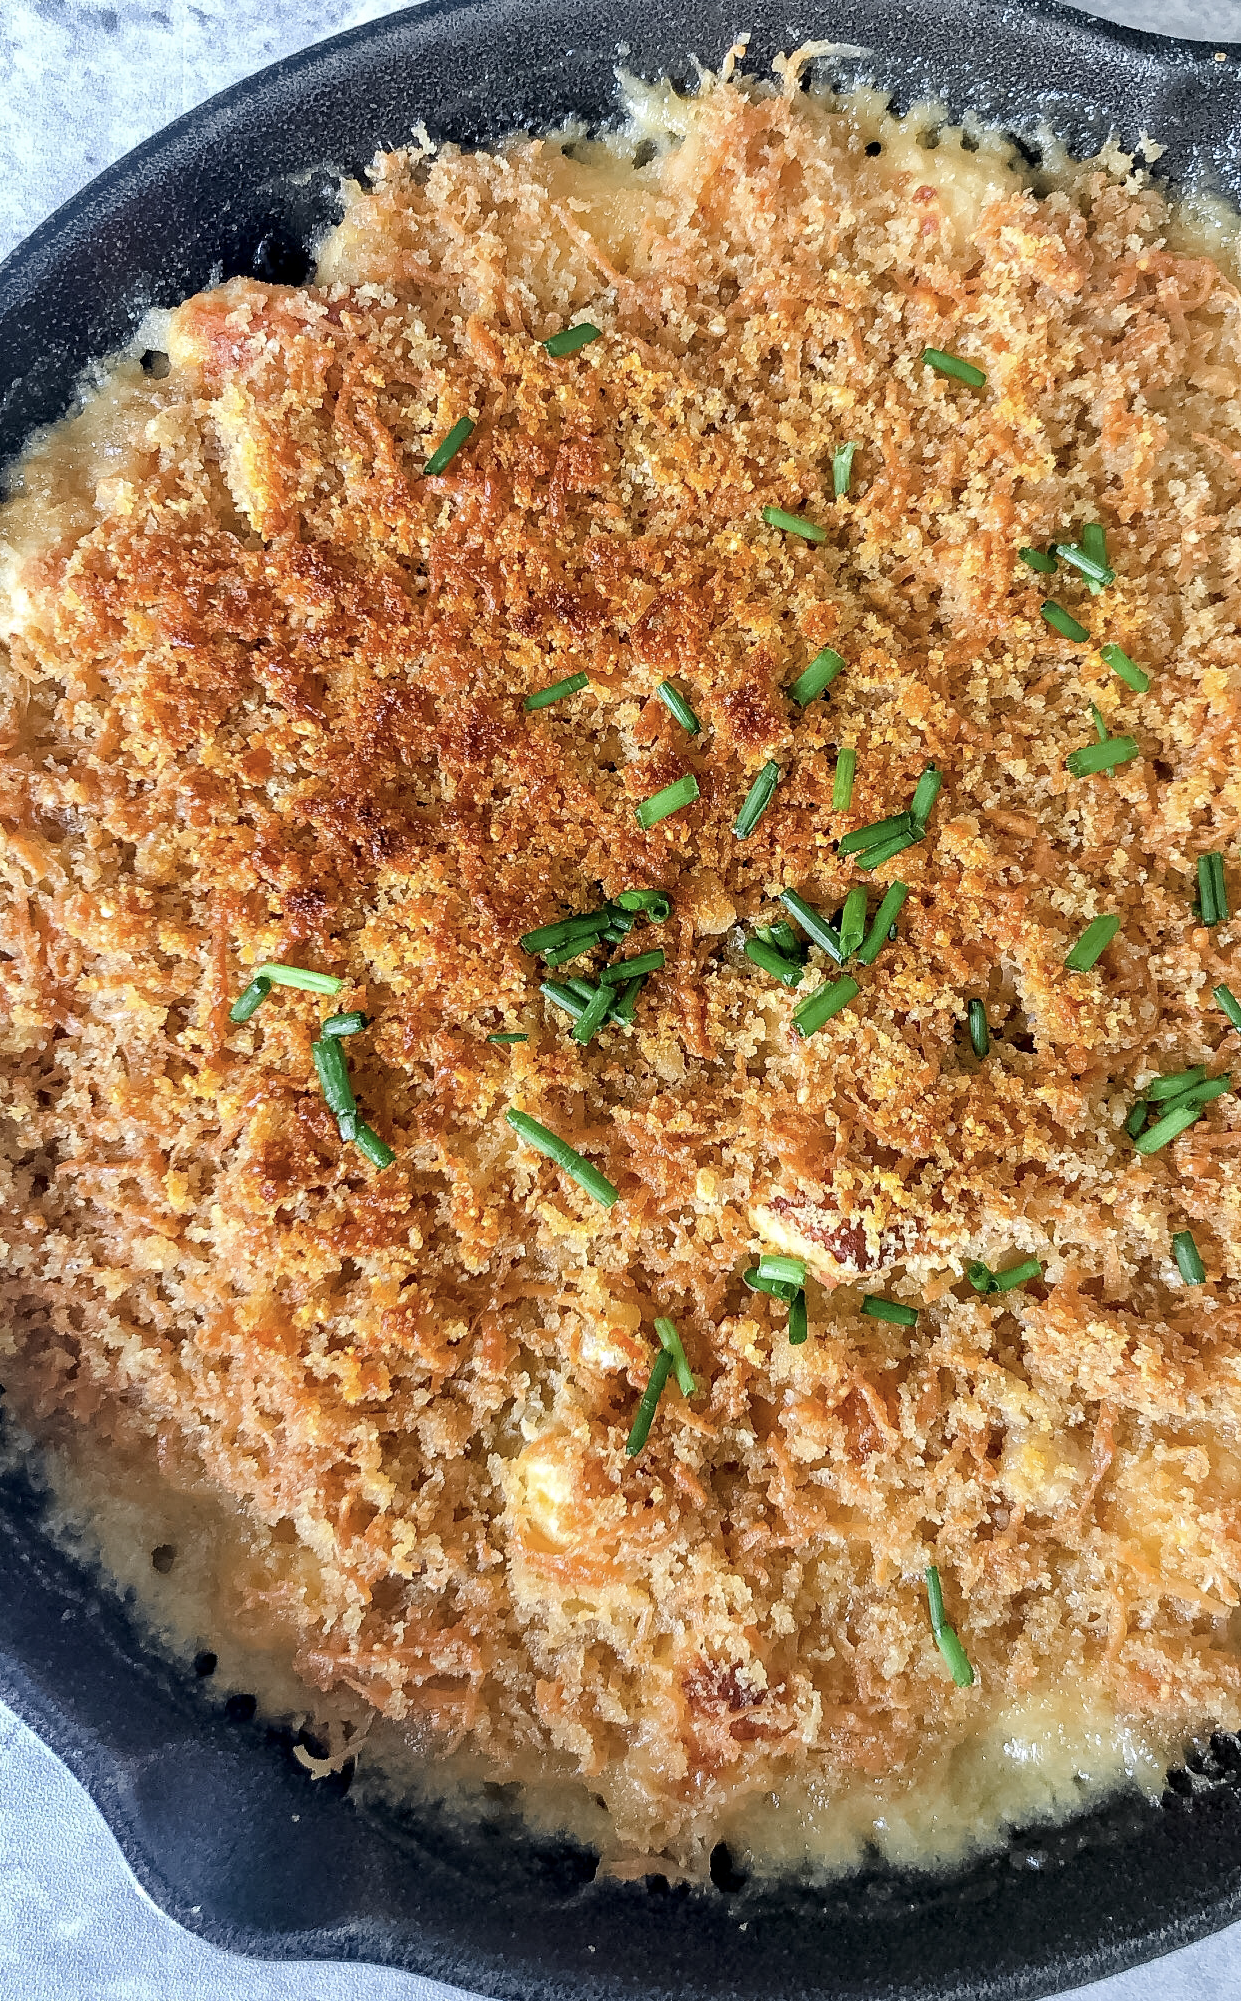
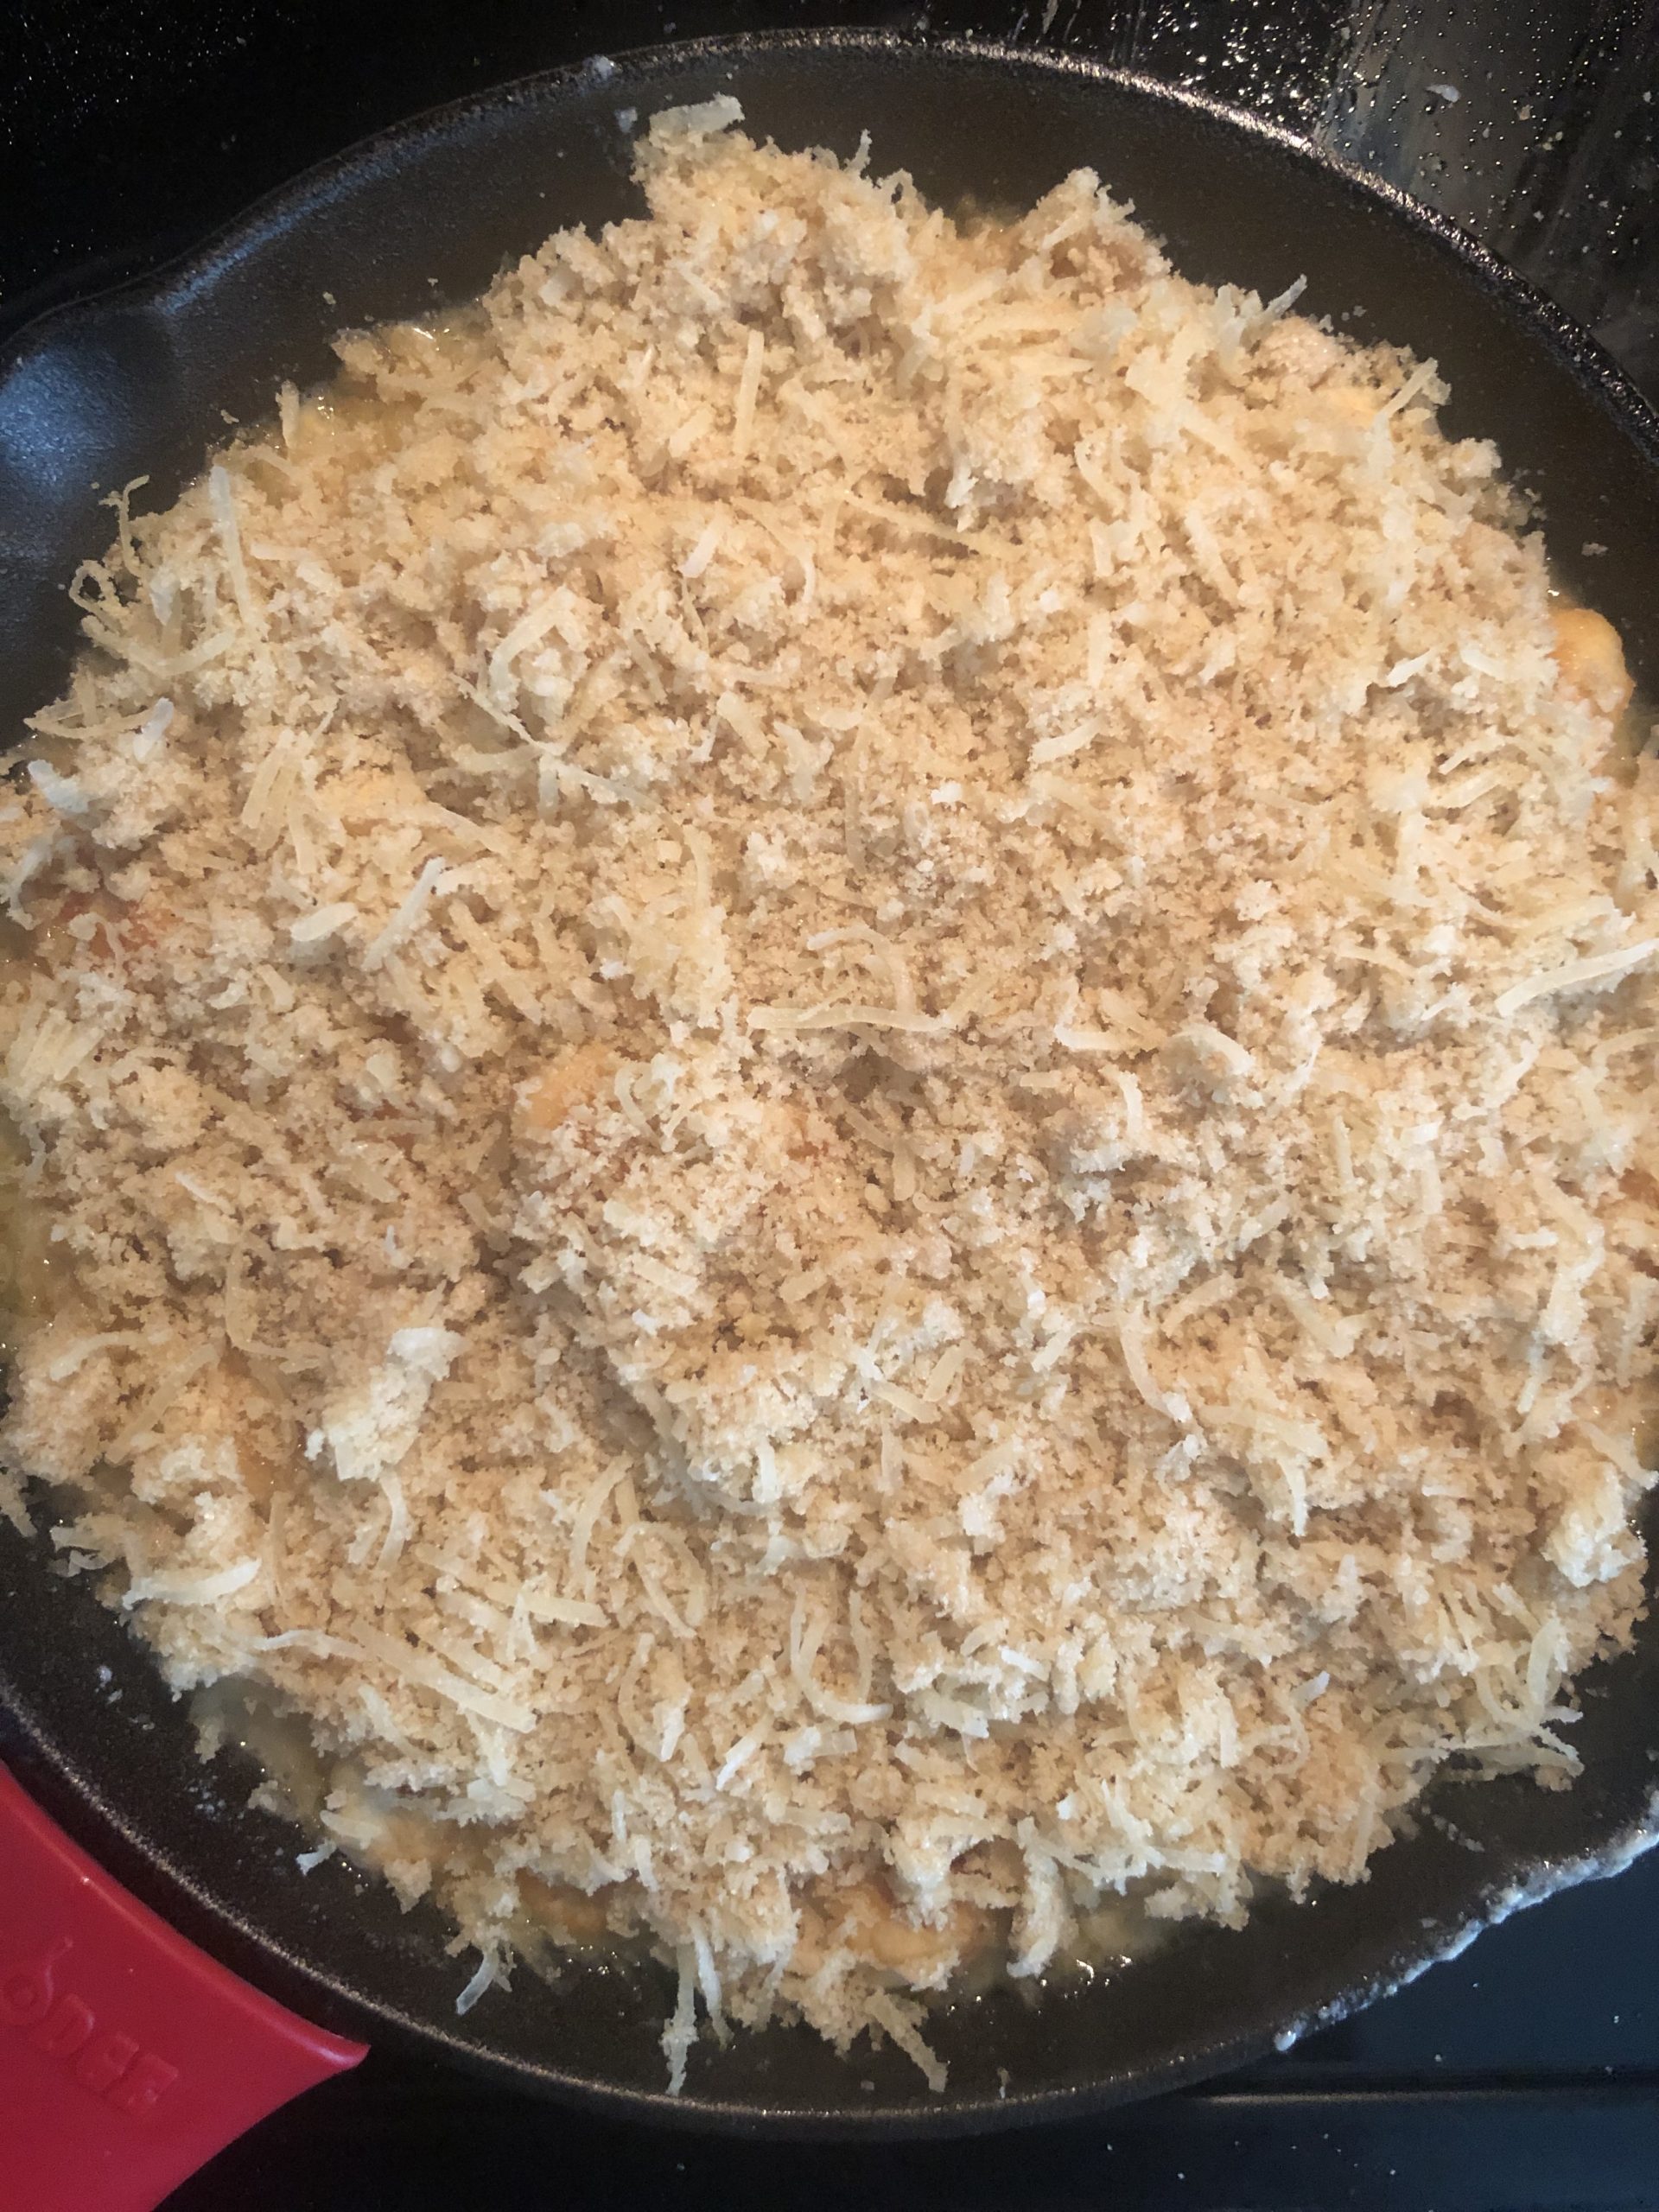
Top the Mac and Cheese with a thick layer of your breadcrumb mixture.

Bake the dish.
Place the Mac and Cheese in the oven and bake at 400 degrees for 10 minutes.
Broil the dish.
Near the end of the 10 minutes, set your oven to broil and watch it closely. Broil for 30-60 seconds, or until the breadcrumbs start to crisp up and brown. Don’t set it and forget it at this step! It will burn fast if you don’t pay attention.
Once it’s done broiling, remove the Mac and Cheese from the oven and allow it to cool for 10-15 minutes.
Garnish and serve.
Garnish with freshly chopped chives or whatever you wish.
This dish is best served and enjoyed fresh, although leftovers can be stored in the fridge in an airtight container for 2-3 days.

Tips to make the best Carnivore Mac and Cheese
- Reference these photos when creating the “mac”:
Other favorite dinner ideas:
Cobb ‘Salad’ with Duck Fat Ranch Dressing
Carnivore Mac and Cheese
Carnivore Mac and Cheese
Equipment
- Blender or food processor
Ingredients
For the "breadcrumbs":
- 2.5 oz pork rinds (pre-ground)
- 2 oz raw cheese
For the "mac":
- 2 eggs
- 1 lb raw ground chicken
- grass-fed ghee (for pan-frying)
- sea salt, to taste (ASHLEYR for 15% off)
For the cheese sauce:
- 6 oz cheese
- 1 cup milk or cream
- 2 tsp yellow mustard (optional, but recommended)
- 1 tbsp fresh lemon juice (optional, but recommended)
- sea salt, to taste (ASHLEYR for 15% off)
Garnish:
- Chives (to taste - optional)
Instructions
- If you’re interested solely in the recipe, skip this bullet point and keep on reading. For those interested in sourcing nutrient-dense food, low-toxic household products, and discounts on brands that may support your AB journey, you may find value in my product guides. Head over to this page if you’d like to check them out. All are free (and always will be).
Make the "breadcrumbs".
- In your blender, blend the pork rinds down to a fine powder, then set the powder aside in a bowl.
- Cut 1/4 (2oz) off your 8oz block of cheese.
- In the same bowl with the pork rind powder, with your vegetable grater, finely shred the 2oz block of raw cheese.
- Mix the pork rind powder and shredded raw cheese around with your hands to get it to a uniform consistency, then set the mixture aside.
Make the "mac".
- Note: if you go through tons of salt in your household like we do, check out this salt purchasing hack that will save you money + make things more efficient. We started this last year, and I'm so happy we did!
- Pour the paste into your freezer bag (or large plastic bag) and zip it shut while removing the air and pushing the mixture down to one corner.
- Note: Act as if you're creating a tool to ice a cake. There are pictures under the "Tips to make the best..." section to demonstrate this for reference.
- Place 1-2 tbsp of ghee in your cooking pan, and bring to medium-high heat.
- Once the pan is hot, cut one of the corners of the plastic bag with your kitchen shears, creating a hole to squeeze out the mixture.
- Squeeze out nuggets of the chicken-egg mixture into the hot pan, and pan-fry them until golden brown. I did 1-2 minutes on each side, then kept flipping them until they turned the color I wanted.
- Note: There are pictures under the "Tips to make the best..." section to demonstrate this step for reference.
- You may have to add more ghee to the pan if it runs out before you're done pan-frying. Once the pieces are all done frying, place them in your 8" cast iron pan (or whatever baking dish you're using) and set it aside.
Make the cheese sauce.
- Preheat your oven to 400 degrees.
- Pour the milk (or cream) into your cooking pot, and bring it to a boil while stirring.
- Once the milk is boiling, slowly stir in the remaining (6oz) cheese.
- Once it's fully mixed, remove the sauce from heat.
Prepare the dish.
- Pour the cheese sauce over the mac. It may be watery. This is normal and it will thicken while baking.
- Note: There are pictures under the "Tips to make the best..." section to demonstrate what this looks like for reference.
- Top the Mac and Cheese with a thick layer of your breadcrumb mixture.
Bake the dish.
- Place the Mac and Cheese in the oven and bake at 400 degrees for 10 minutes.
Broil the dish.
- Near the end of the 10 minutes, set your oven to broil and watch it closely. Broil for 30-60 seconds, or until the breadcrumbs start to crisp up and brown. Don't set it and forget it at this step! It will burn fast if you don't pay attention.
- Once it's done broiling, remove the Mac and Cheese from the oven and allow it to cool for 10-15 minutes.
Garnish and serve.
- Garnish with freshly chopped chives (do not use if strict carnivore) or whatever you wish.
- This dish is best served and enjoyed fresh, although leftovers can be stored in the fridge in an airtight container for 2-3 days.
What I used for this recipe:
Other favorite dinner ideas:
Cobb ‘Salad’ with Duck Fat Ranch Dressing
Note: This post contains Amazon affiliate links. This means that if you click on a link and make a purchase, I will receive a small commission at no cost to you. Thank you for supporting me!

Ashley Rothstein develops tasty, whole food, animal-based recipes that include a moderate amount of “minimally toxic” plant foods. To fix her own health issues, she bounced around between the carnivore, keto, and paleo diets for a few years. After experiencing and studying each diet philosophy, she learned she feels her best by merging the three and following an animal-based diet. As a glut at heart, she likes to channel her creativity and create meals that are healthy but also satisfy her inner gluttonous spirits.


I’m on a very restricted animal based diet that my medical nutritionist put me on and I’m so excited to find your website!! This looks so good. I’m going to try it this week. I can’t wait to try all of your recipes.
Author
Yay! Welcome. 🙂
Do you have to use Raw Cheese? I am not able to get it where I live. The website that your link goes to is all sold out of everything and I don’t even know if they ship their products.
Author
Nope, pasteurized cheese will work. Raw Farm (the website I linked – I’m partnered with them) experienced a devastating fire in their creamery recently. I believe they are back up and running again with product in stores, but they may be still catching up with online inventory. Hopefully they’ll be up and running again online soon.
I can’t stand pork rinds by themselves but as a breading for chicken or pork, it’s amazing. So maybe give it a try!
We don’t like pork rinds with what can we substitute
Author
I’ve never tried it so I’m not 100% sure, but plantain flour may work. Also, dehydrated chicken skins.
This was SO good! I need to get better at making the meat nuggets, but regardless, I couldn’t believe how tasty this was! It will def be on repeat in our house. I’m so happy I found this blog! Ashley, you have a gift of coming up with carnivore recipes that make food interesting. I get bored way too easy with simple foods which causes me to eat things I shouldn’t. I’m confident that I can stick with carnivore and animal-based eating now 🙂
Would this be good without the “breadcrumb” topping? I’ve never been a fan of dry stuff on top of my mac and cheese. I’m making this for Thanksgiving; I can’t wait! Thank you!
Author
Yep, would still be good!
I made this last night, and it was SO good! I wasn’t sure how the crunchy top would be because I don’t actually like pork rinds, but I had no complaints. Cutting the lil chicken nuggies was slightly tricky at first, but the demo above the recipe was super helpful. I put a bunch of cottage cheese in my sauce and it still thickened up as promised. Definitely will be making again! Thank you!
Would this work with beef? I’m allergic to chicken and I miss mac n cheese.
Author
Not sure, but don’t see why not. Probably worth a try.
I just made this last night for my mom’s birthday celebration. I prepared it a bit differently & had to make some adjustments as I was missing a few ingredients. I hand mixed the ground chicken, egg, & salt. I dumped all of it into a cast iron & browned like I would ground hamburg. For the cheese sauce I used 1 block of cream cheese, 1 cup milk, & 1/2 stick butter on low heat in cast iron. I poured that over the brown chicken. I didn’t have pork rinds so I used crispy, crumbled bacon as the topping, along with some grated cheddar cheese. This dish was a HUGE hit! It was HEAVENLY. I will definitely be making this dish again & again with different variations. Thank you for this amazing recipe!