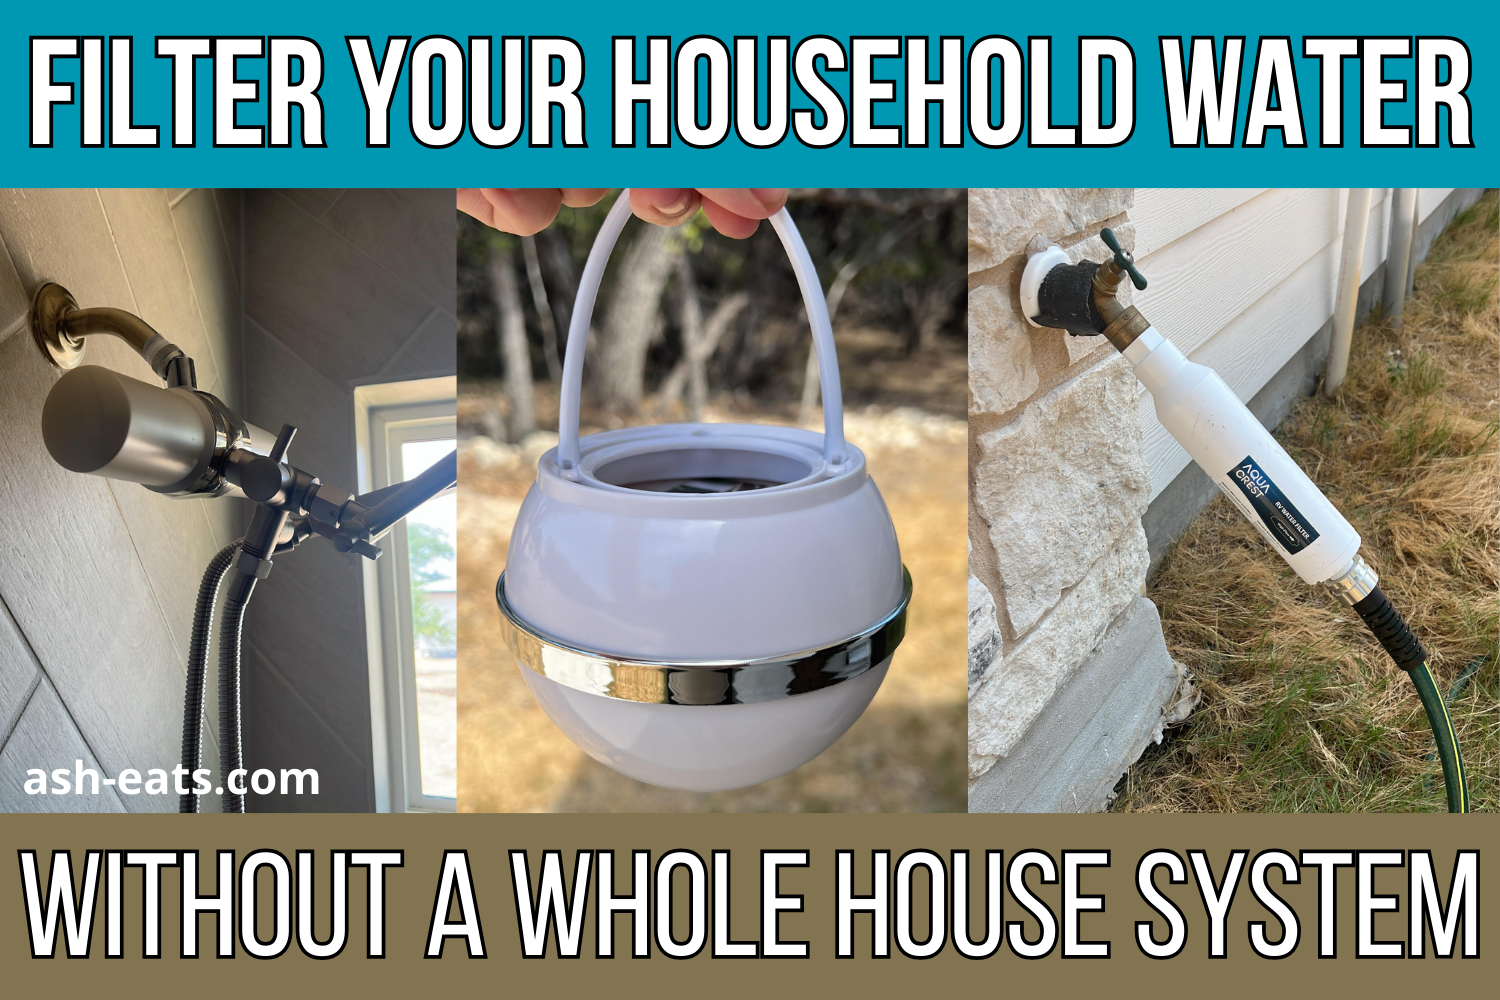
I recently felt called to filter our household water at all spout points. The desire to do this came seemingly out of nowhere, but it almost felt necessary.
The modern-day toxic load is high, so whatever I can do to minimize my family’s toxic burden (that’s not too complicated or too expensive) seems like a good idea these days.
We’ve drank reverse osmosis water for years, which I am fine with.
But while many of us drink water often, this is not the only time our bodies are exposed to water.
We’re also exposed to water in the shower, in the bath, when we brush our teeth, when we wash our hands and face, and when we do the dishes or water plants.
So while the quality of your drinking water is important, I started to wonder about our other water.
Was it okay to brush our teeth with tap water or take a bath/shower with it? And our hose water – was it okay for my daughter to play with? And wash our pup with? Or were they being exposed to carcinogens and other toxins?
Have I just blindly trusted the quality of our tap water all along?
Enter: the EWG database. I came across it through a friend.
You input your zip code and it lists out the contaminants in your tap water (as well as the potential side effects of the contaminants).
This is ours…

Yikes.
Thankfully I learned of the EWG database shortly after I decided to filter our household water, which was great timing and validation.
If money weren’t a thing, I would love to get a whole house system. However, it’s not in our budget right now to drop thousands of dollars on one. So instead, I figured out a way to filter each individual system (which ended up being loads cheaper than a whole house system).
In this post, I go over how we filter our:
- hose water
- bath water
- shower water
- drinking water
- sink water (both kitchen + bathroom)
Plus how much it cost us to do all of this.
While we eventually plan to get a whole house RO system, this setup works great for us for now.
Hose water
Filtering our hose water was the first thing we did.
Since my daughter occasionally plays with the hose water (plus we use it to wash our dog, Bear), filtering it was important to us. It also seemed like an easy place to start.
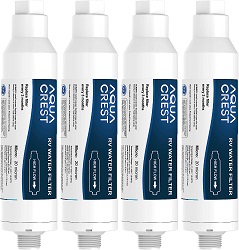
I found this filter on Amazon. It filters out chlorine, lead, and other compounds. It’s actually designed to be used by RVers to turn hose water into water that is safe for drinking.
It was super easy to install. You literally unbox the filter, screw one end into your faucet, then screw the hose into the other end.

For a tutorial, check out my Instagram “Water” highlight.
It comes with a set of 4 filters. You’re supposed to change the filter out every 3 months, so this is a year’s supply.
Also, we don’t actively garden, but we do have a few plants. Whether you garden yourself or just have a few plants like us, I’m sure the filtered water is better for them too!
Shower water
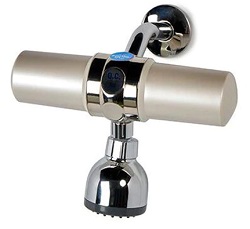
For our shower, I chose this dual KDF filter.
It reduces chloramine, chlorine, fluoride, iron, lead, heavy metals, bacteria, volatile organic compounds (VOCs), PFAS, chemicals, lime, calcium, and disinfectant byproducts.
It also reduces odors, organic waste, trihalomethanes, and common carcinogens such as carbon tetrachloride, chloroform, benzene, and vinylidene chloride.
We purchased one for our master bedroom shower and will be purchasing another for our second shower in a few months. (We just use our master shower for now.)
Installation was straightforward. To see a video of what it looks like installed, check out my Instagram “Water” highlight.
Here is a photo of the shower filter installed.
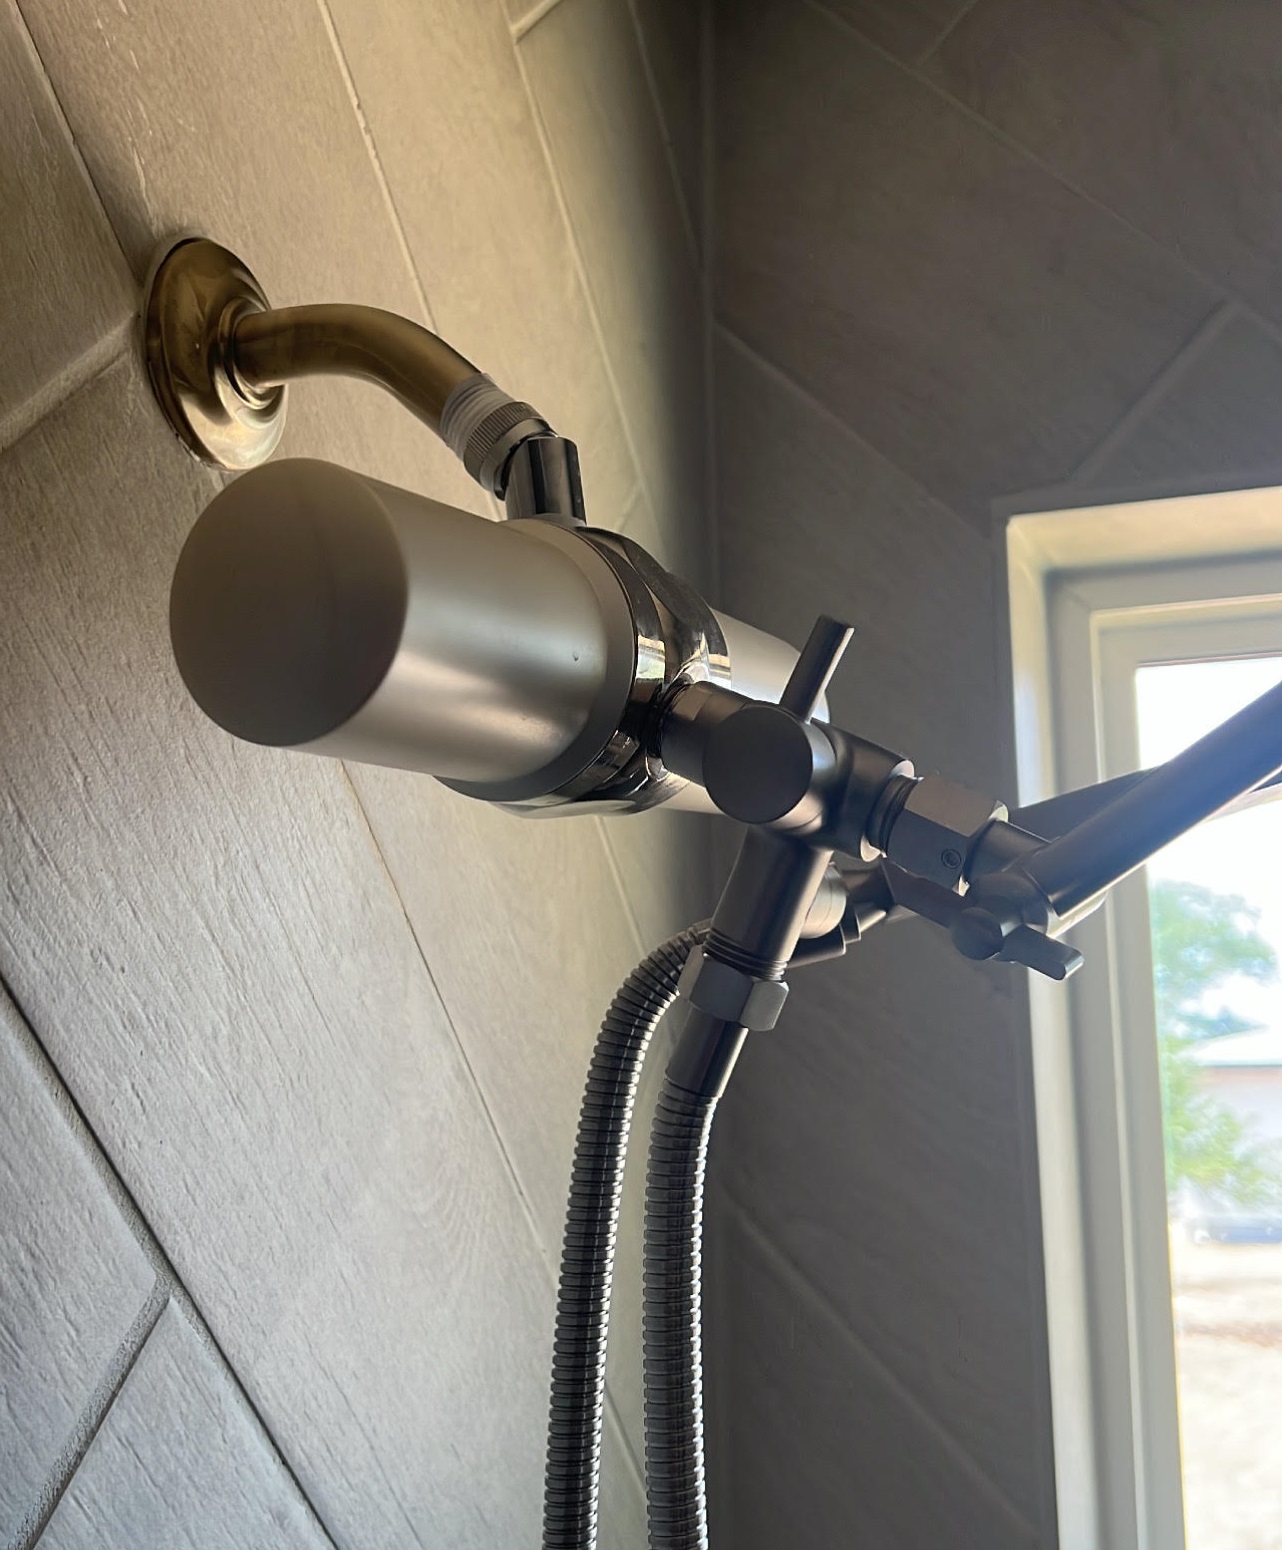
The filters last 12 months.
Note: This filter is not compatible with Moen shower heads. We had a Moen, so we had to get a new shower head. My husband and I have always wanted a “rain” system, so that’s what I chose. It wasn’t cheap, but it wasn’t horribly expensive either and we both really like it so far! For a video of the system installed, check out my Instagram “Water” highlight.
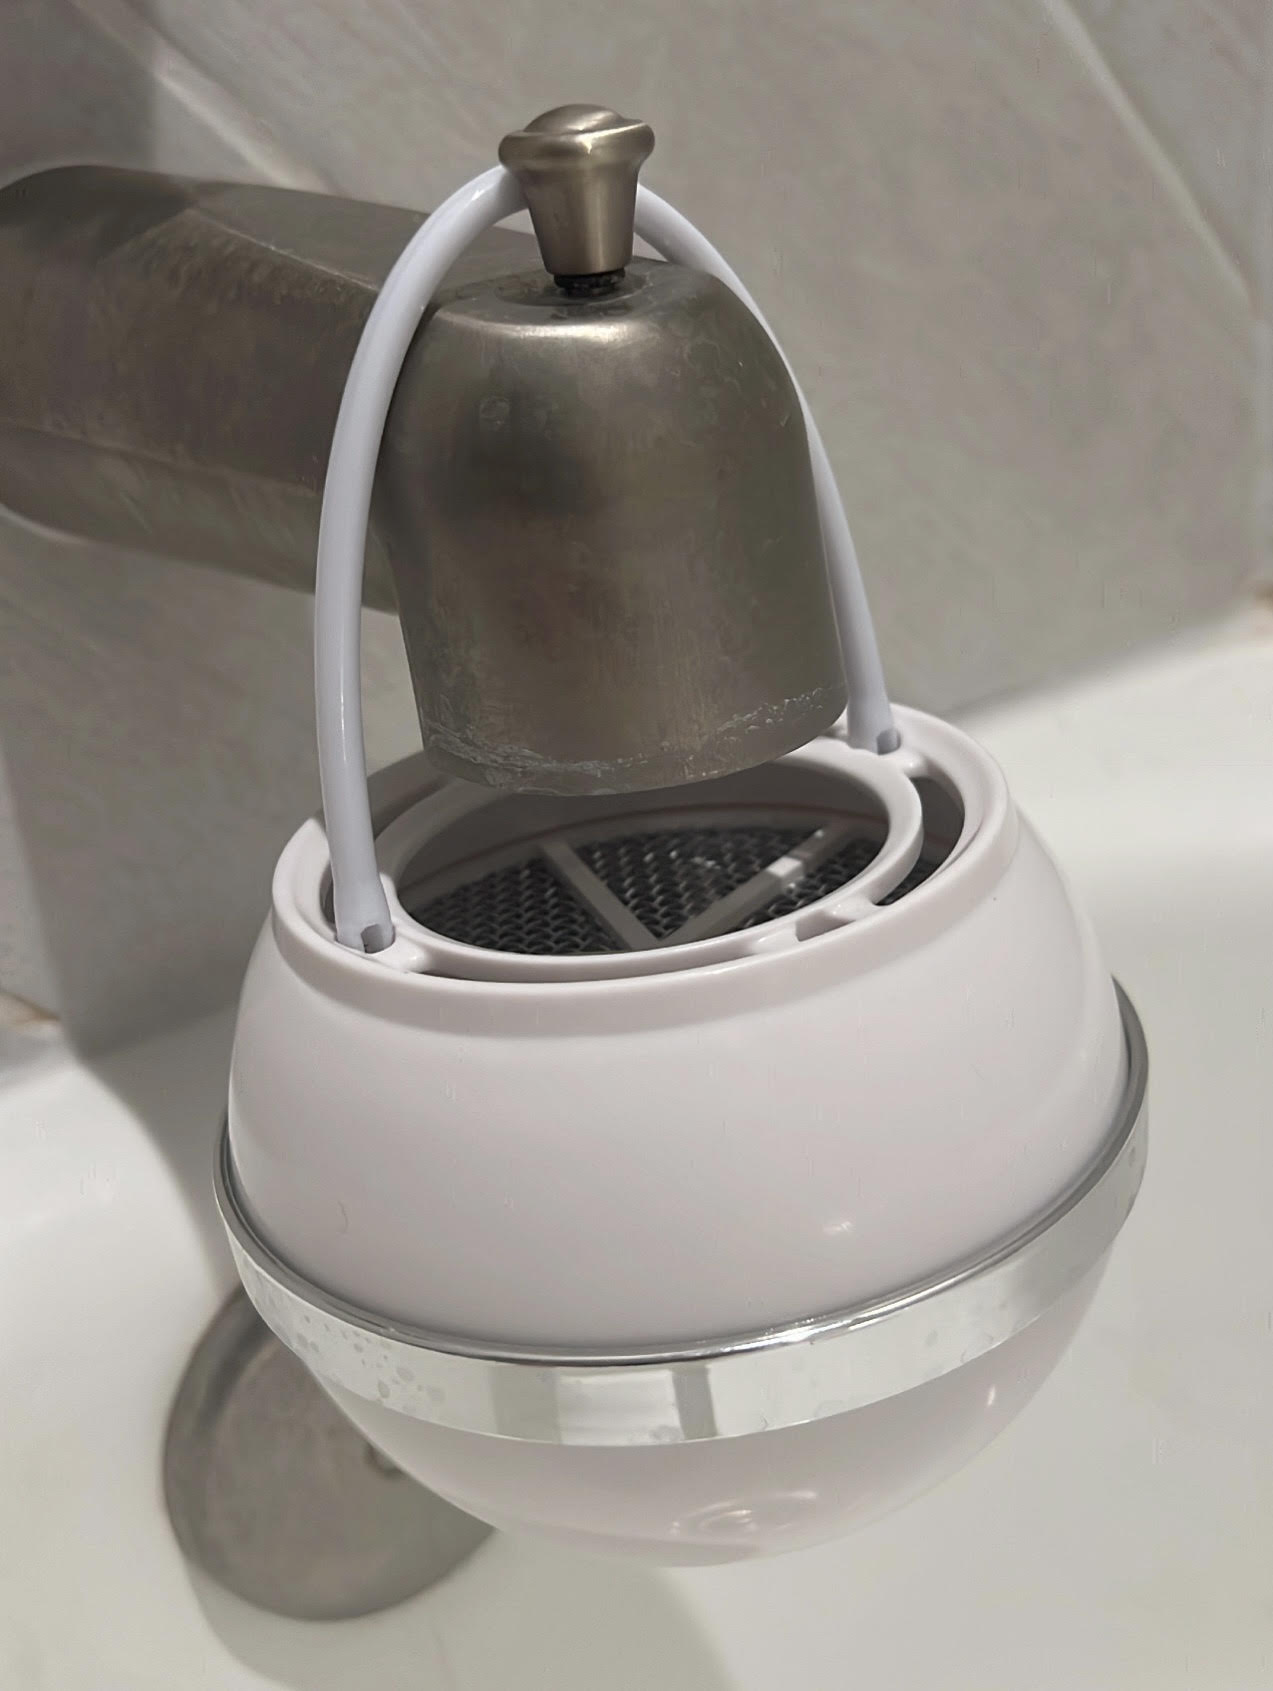
Bath water
For our bath water, I chose this bath ball filter (ASHLEYR for 5% off). It removes chlorine, chloramines, VOCs, PFAS, THMs, pesticides, sulfur, heavy metals, hydrogen sulfide (“rotten egg” odor), iron oxides (“rust water”), dirt, sediment, and other odors while also balancing pH.
Installation was a breeze. It was up and running in minutes. For a tutorial, check out my Instagram “Water” highlight.
Here is a photo of the bath ball filter installed.
Each bath ball lasts 12 months.
Important note from the product page: “The hardness of your water will determine the performance of the bath ball filter. Hard water has the ability to damage the coating on the chrome bath ball filter. If your water is hard, then we recommend wiping down the bath ball after each use or purchasing the white bath ball for durability against your water.”
I chose the white bath ball for this reason as I did not want to worry about extra maintenance.
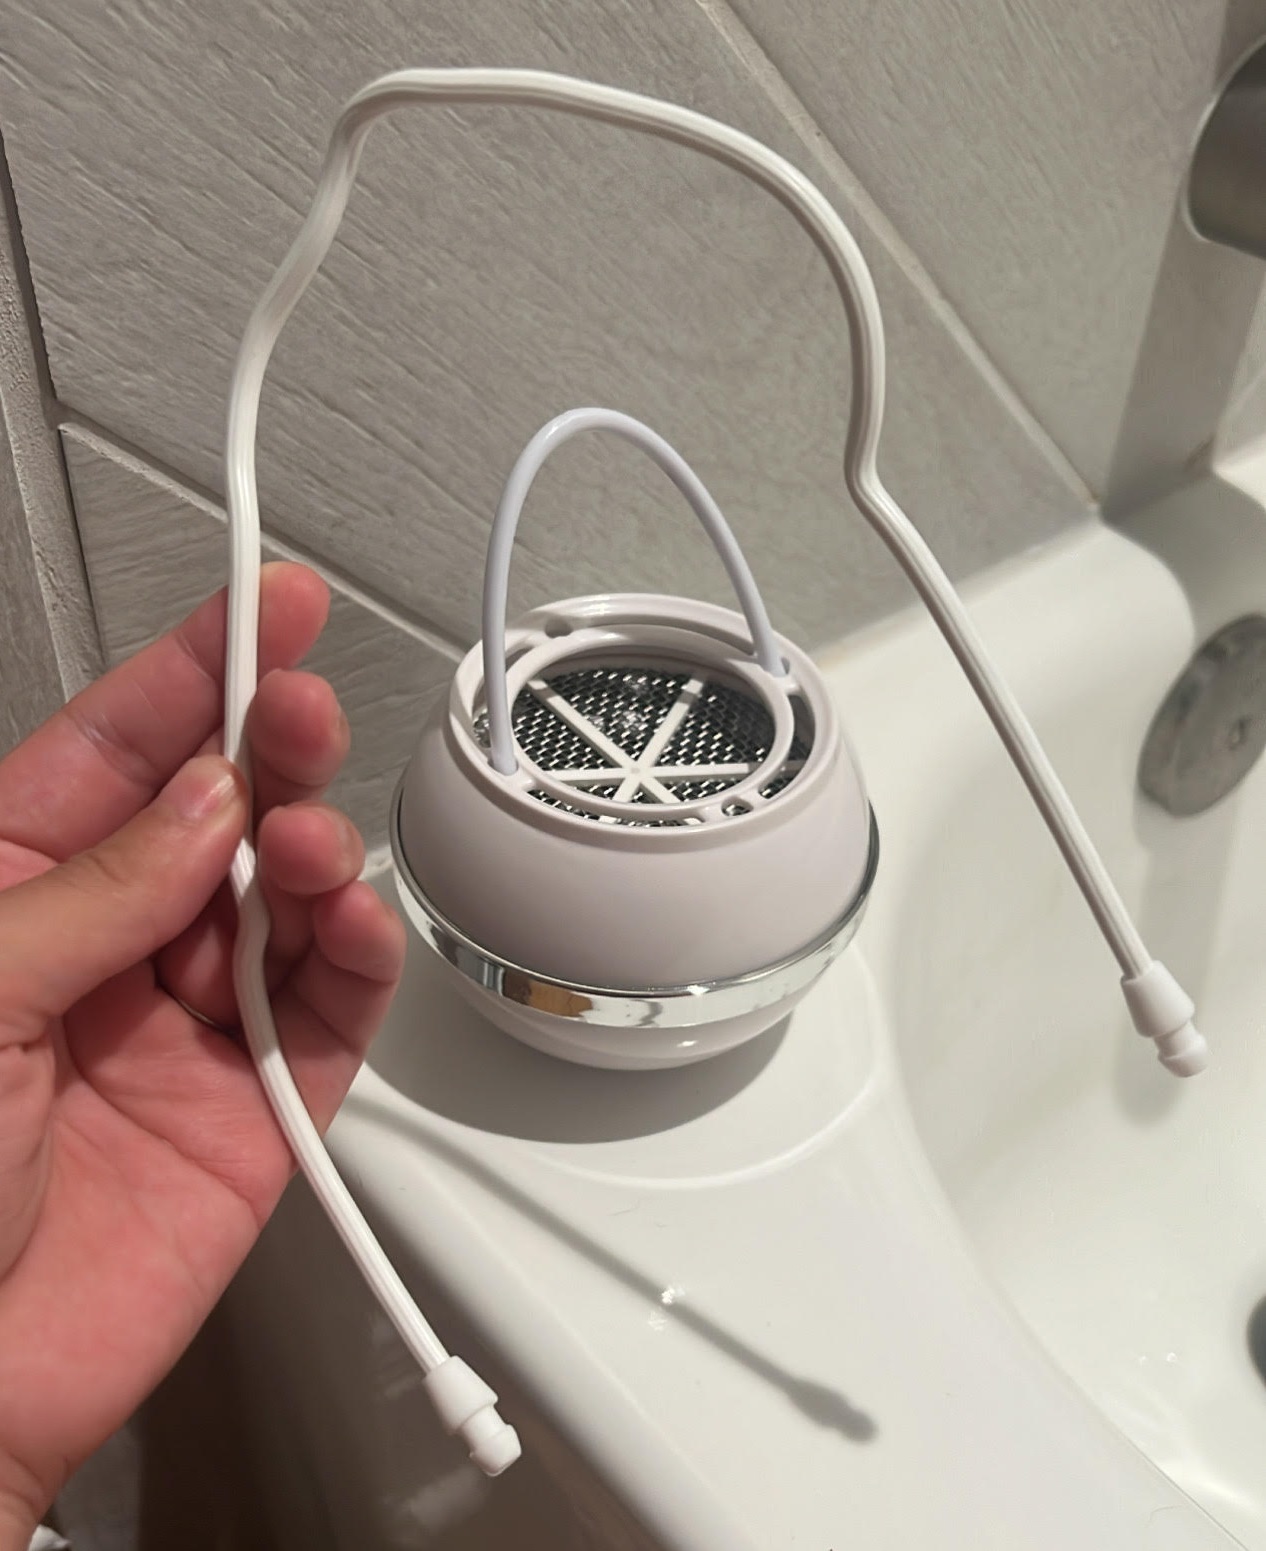
If the standard handle doesn’t fit around your faucet, it also comes with a flexible handle (pictured below) that you can bend into whatever shape you want. I have friends who have a tilted faucet with no plug stopper on it, and the flexible handle ended up working for them.
Also, I got a great question from a reader who purchased a bath ball filter. She was concerned about running hot water through it since it’s plastic and wondered if that bothered me.
My thoughts on that:
No, it doesn’t bother me. Would I prefer metal over plastic? Absolutely. But the introduction of the bath ball filter is a net positive to the health of our water overall, so that’s a win for me. If I find another filter that is metal, I will get it when it comes time to replace the filter in a year. But for now, I am excited about this one.
Drinking water
We buy reverse osmosis water from Whole Foods.
The water is basically stripped when it comes out, so we remineralize it with sea salt (ASHLEYR for 15% off) or Trace Minerals.
We also remineralize our dog’s water (using Trace Minerals, not sea salt). If you think about it, there was probably never a point in time where animals drank stripped/filtered water. That’s a modern thing.
We house our drinking water in this dispenser. The body is glass and it has a stainless steel spout, which is great because every other glass water dispenser I looked at had a plastic spout. The spout feels great/heavy in the hand which makes me think it’s high quality. The dispenser holds 2 gallons.
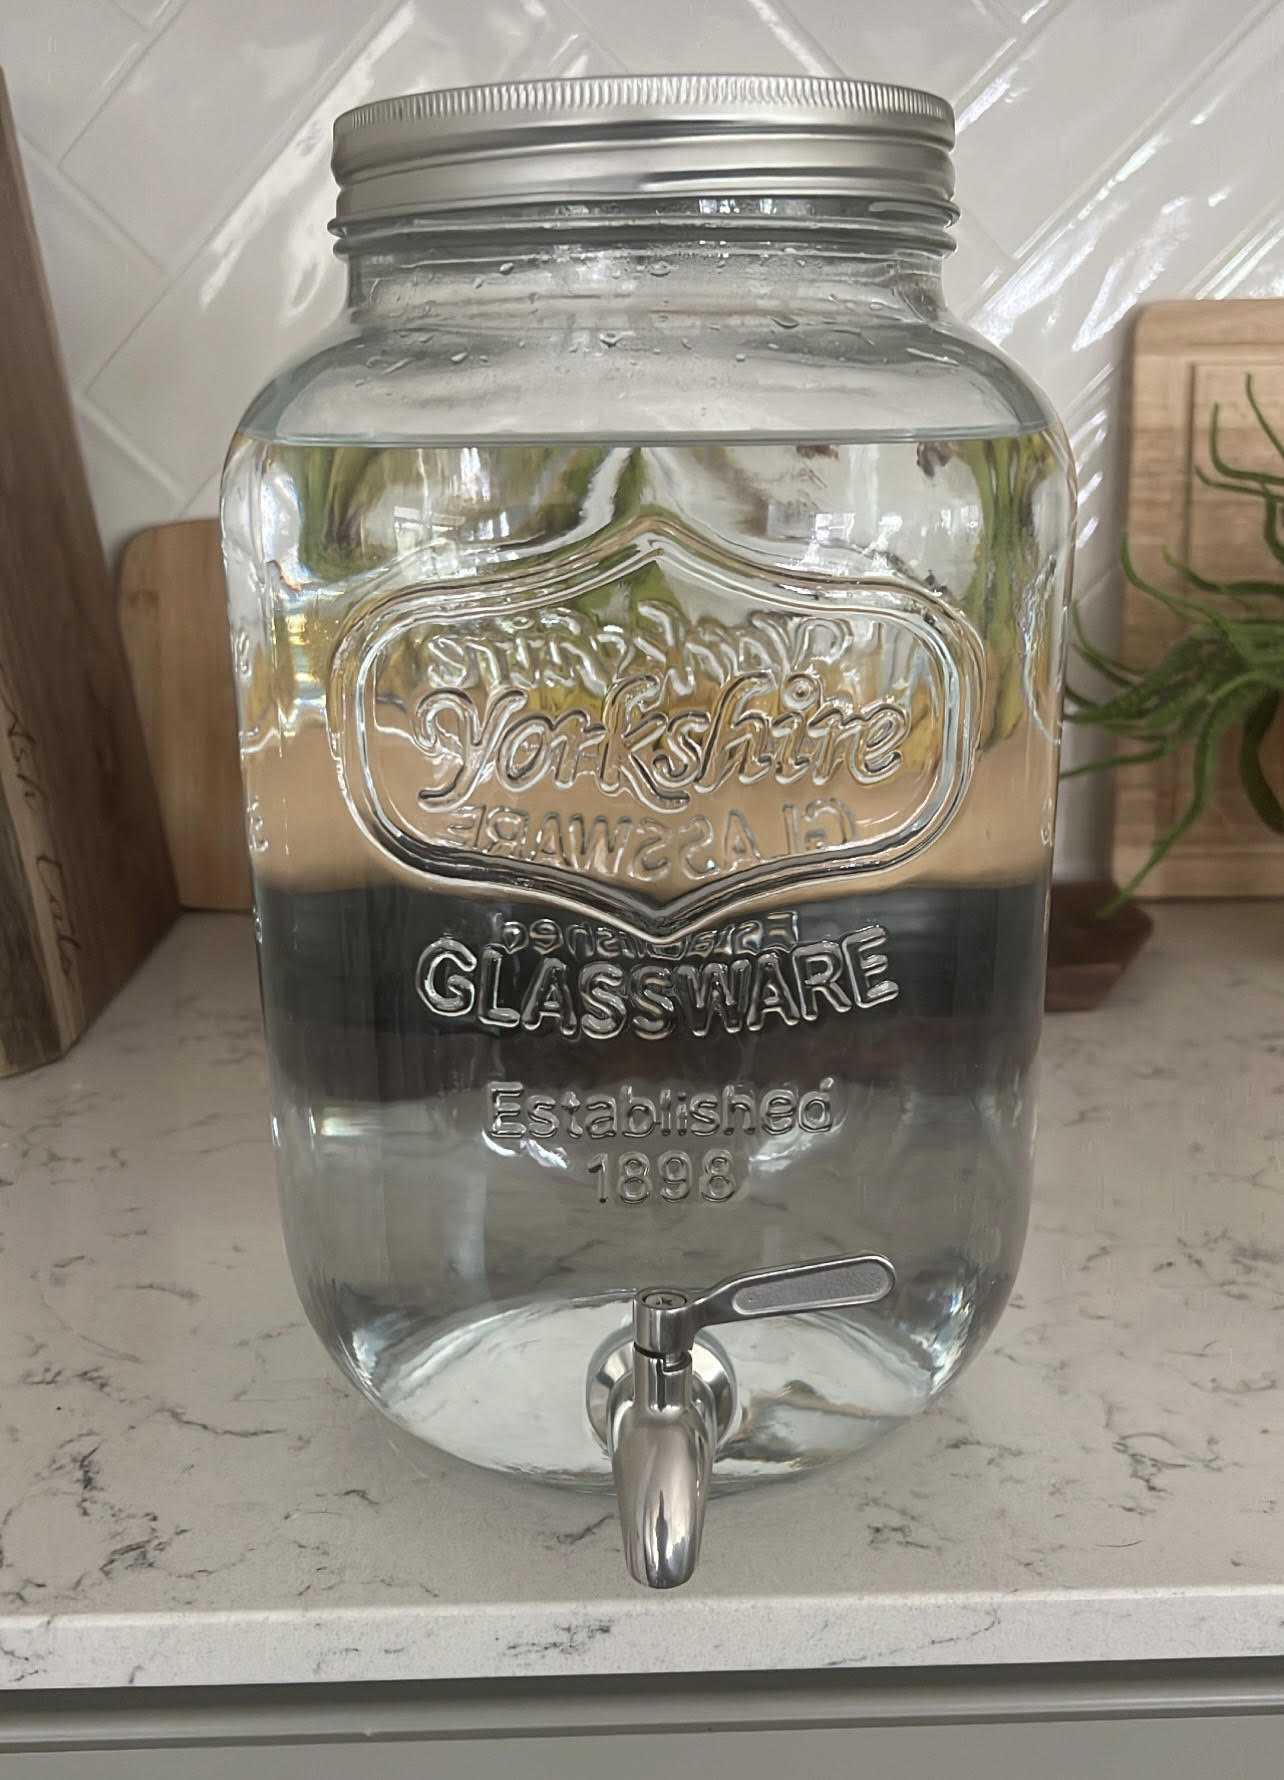
It also comes with a fruit infuser (which is plastic). I probably won’t use it, but I do randomly crave fruity water so maybe one day I will. It’s cool to have the option.
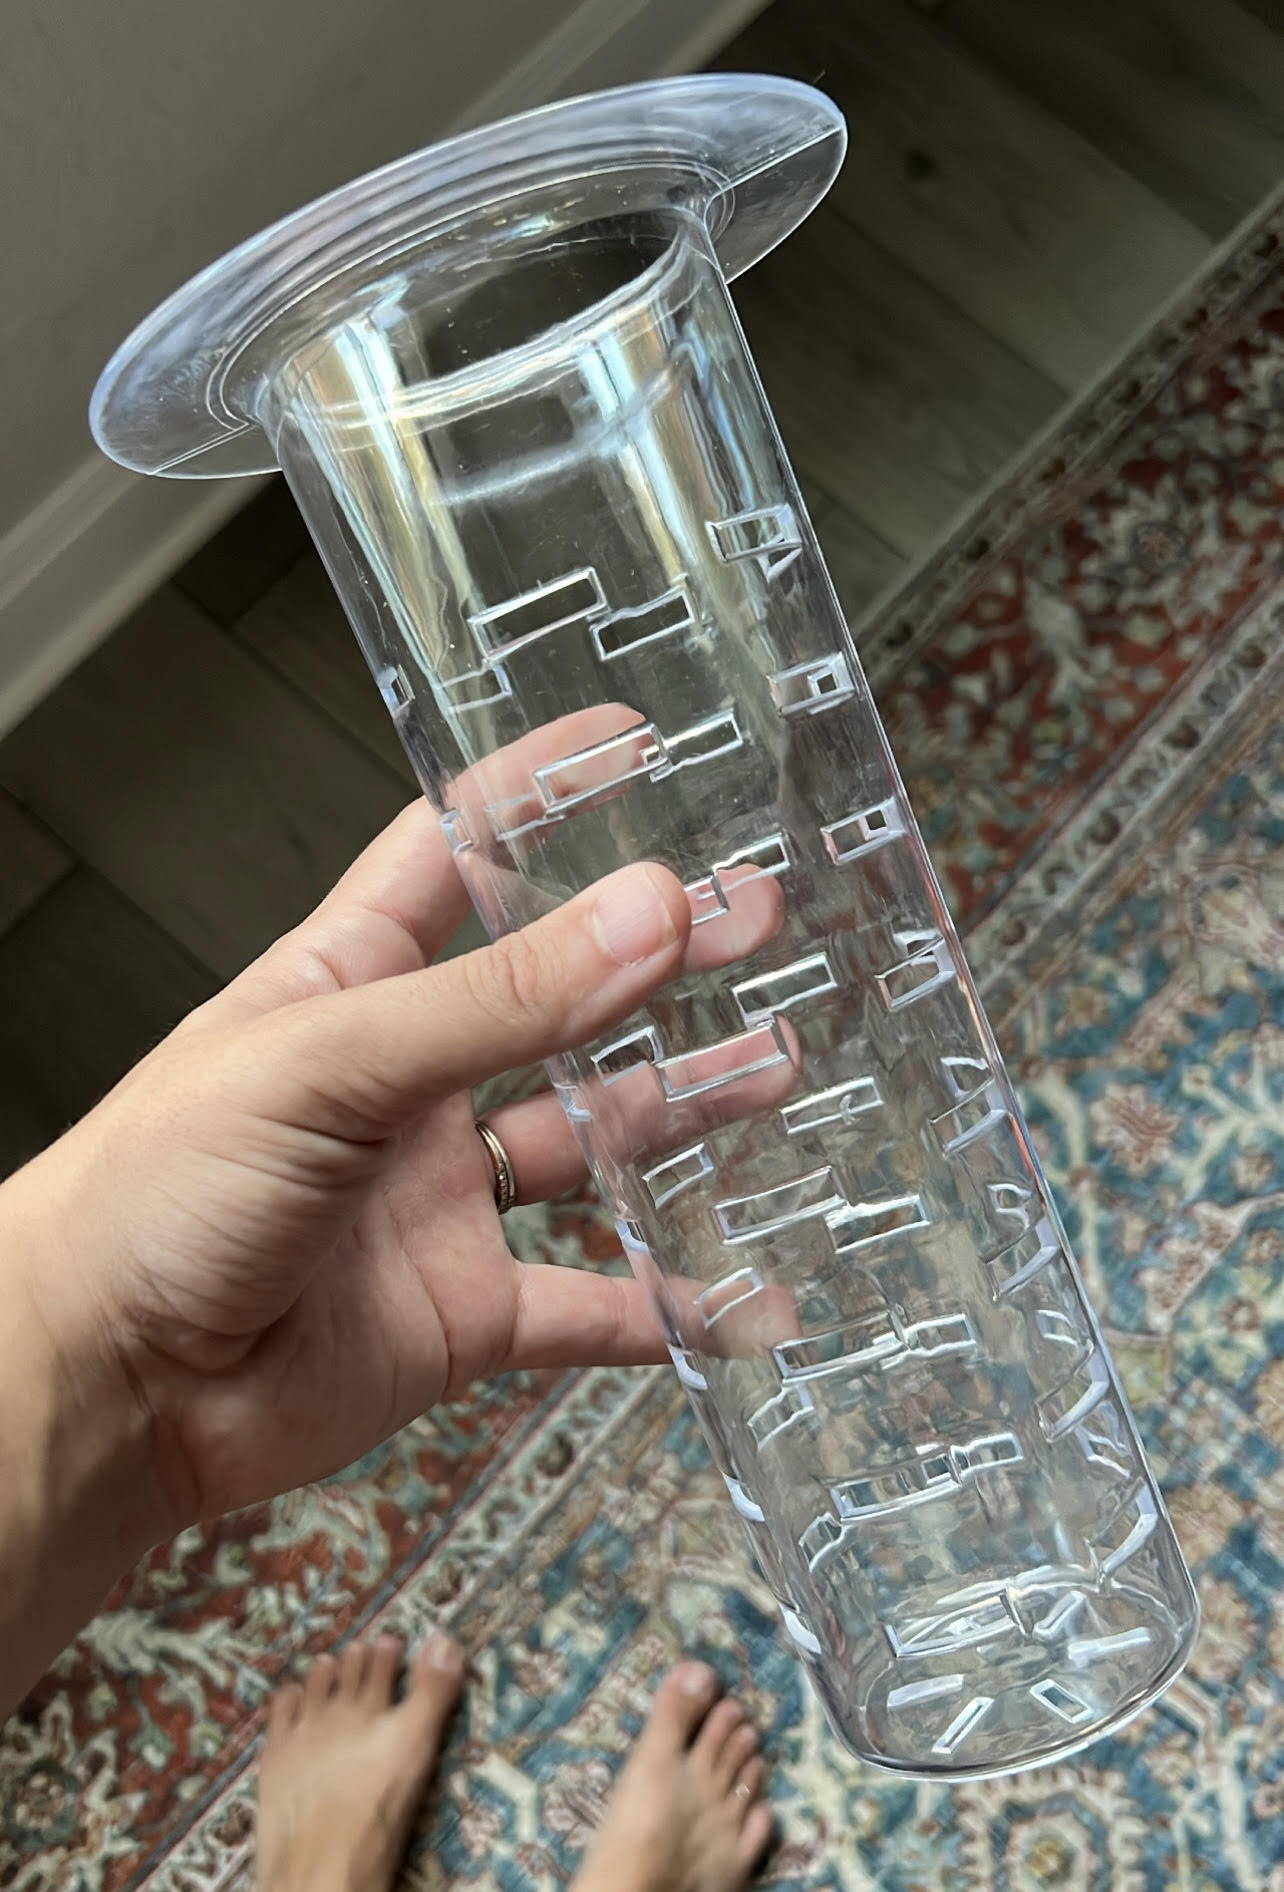
We used a plastic dispenser for years, and I’m excited to get rid of it! One less plastic thing in our home.
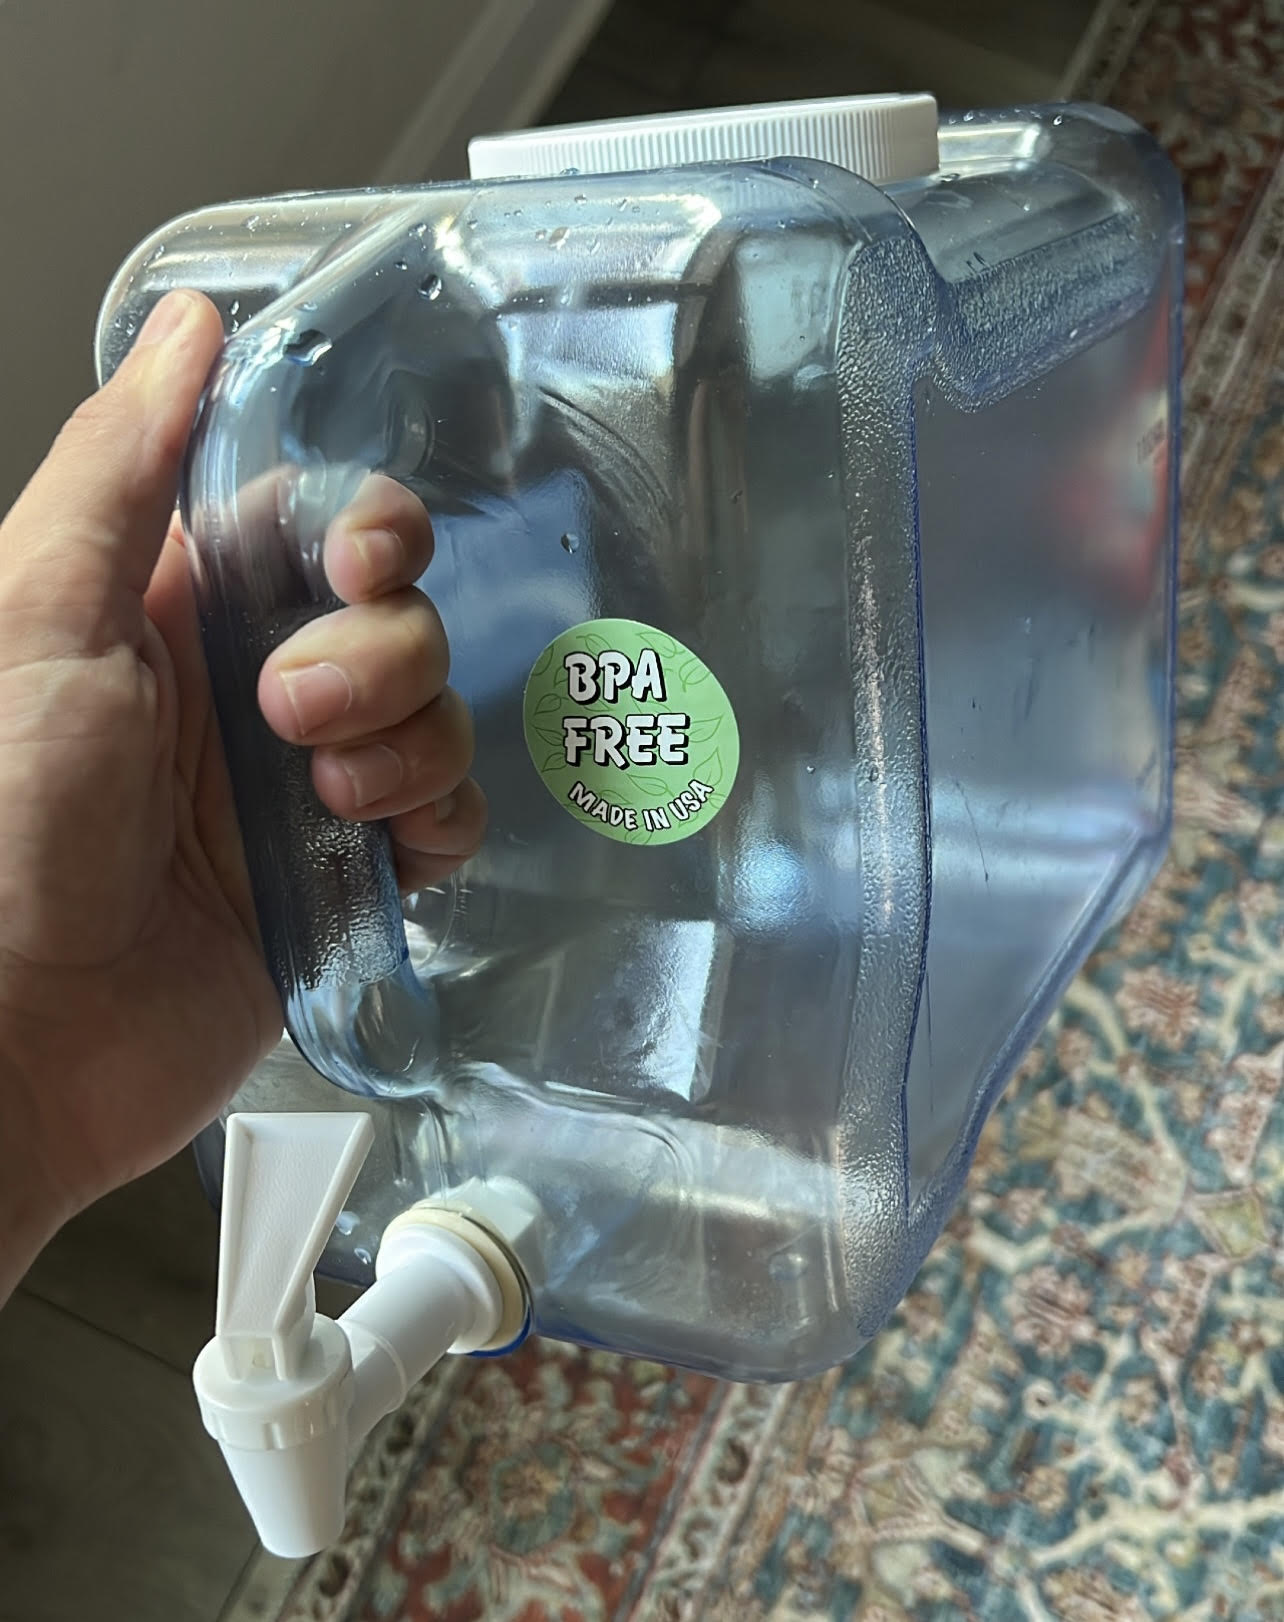
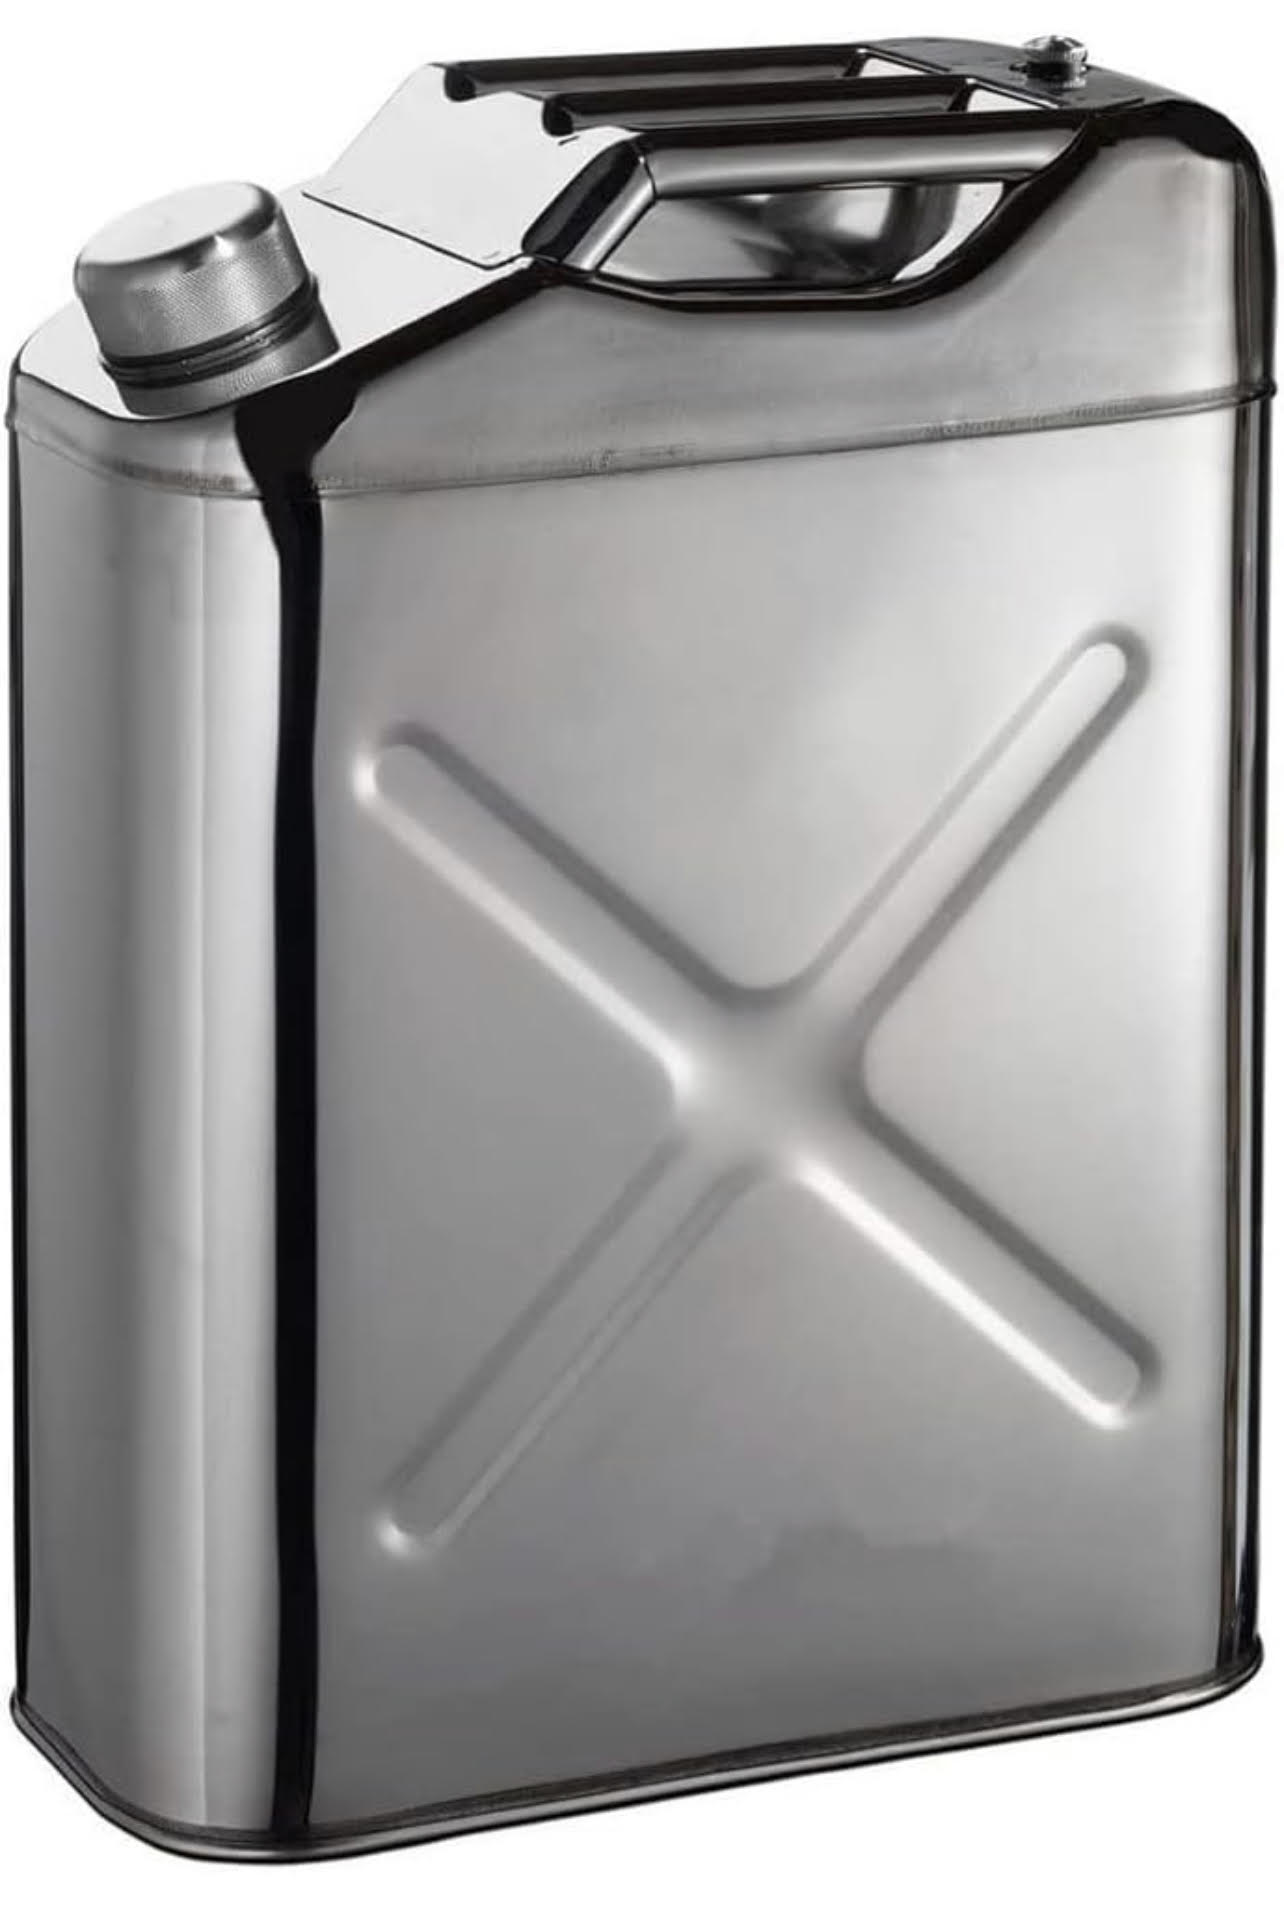
The 5-gallon jugs that we use to get our RO water each week are plastic. I found some super cool stainless steel cans (5-gal and 10-gal options). I am hoping to swap our plastic jugs out for those once our budget allows. And eventually, we won’t need jugs at all once we get a whole house RO system.
Sink water
The last thing we did was filter all of our sink water.
It’s something I never even considered before, but it’s crazy to think that we’ve been brushing our teeth, washing our faces, and doing dishes with carcinogenic water.
It’s a wild (and eye-opening) realization when I write it out like that.
Since we have one kitchen sink and three bathroom sinks, I purchased four of these systems.
The filter reduces PFAS, PFOA/PFOS, lead, chlorine, heavy metals, chemical iṁpurity, sediment, and other large particles.
On the product page, the company lists out a few possible configurations. Connect a filter…
- to the household faucet
- to an exclusive faucet
- directly to the fridge/ice maker/RVs
The “household faucet” route sounded nice, but we’d probably be running so much water through there that we’d have to replace that filter much more often.
So we decided to go the “exclusive faucet” route, which is why I bought four systems – one for each sink.

Installation was straightforward. It took my husband about two hours to install all four.
Each filter lasts two years.

What all of this cost us
Here’s a breakdown of what we purchased to filter our household water:
- One set of hose filters: $30.99 – lasts 12 months
- One shower filter: $199 – lasts 12 months
- One shower head: $104.46 – lasts indefinitely
- One bath filter: $64.95 – lasts 12 months
- One water dispenser: $39.99 – lasts indefinitely
- Four sink filters: $69.99/filter – lasts two years
Here’s the start-up cost breakdown (not including tax + shipping):
- Hose filters: $30.99
- Shower filter: $199 x 10% off with ASHLEYR = $179.10
- Shower head: $104.46
- Bath filter: $64.95 x 5% off with ASHLEYR = $61.70
- Water dispenser: $39.99
- Sink filters: $69.99 x 4 = $279.96
TOTAL = $696.20
Here’s the breakdown of what it costs annually to maintain the system*:
- Hose filters: $30.99
- Shower filter refills: $115 x 10% off with ASHLEYR = $103.50
- Bath filter: $64.95 x 5% off with ASHLEYR = $61.70
- Sink filters: $69.99 X 4 = $279.96/2 (since they last two years) = $139.98
TOTAL = $336.17
This comes out to about $28/month.
*The annual cost breakdown factors in the following considerations:
- filter refills are cheaper than the initial start-up cost for the shower filter,
- the sink filters last two years (not 12 months like the rest of the filters),
- the water dispenser/shower head should not need to be replaced anytime soon.
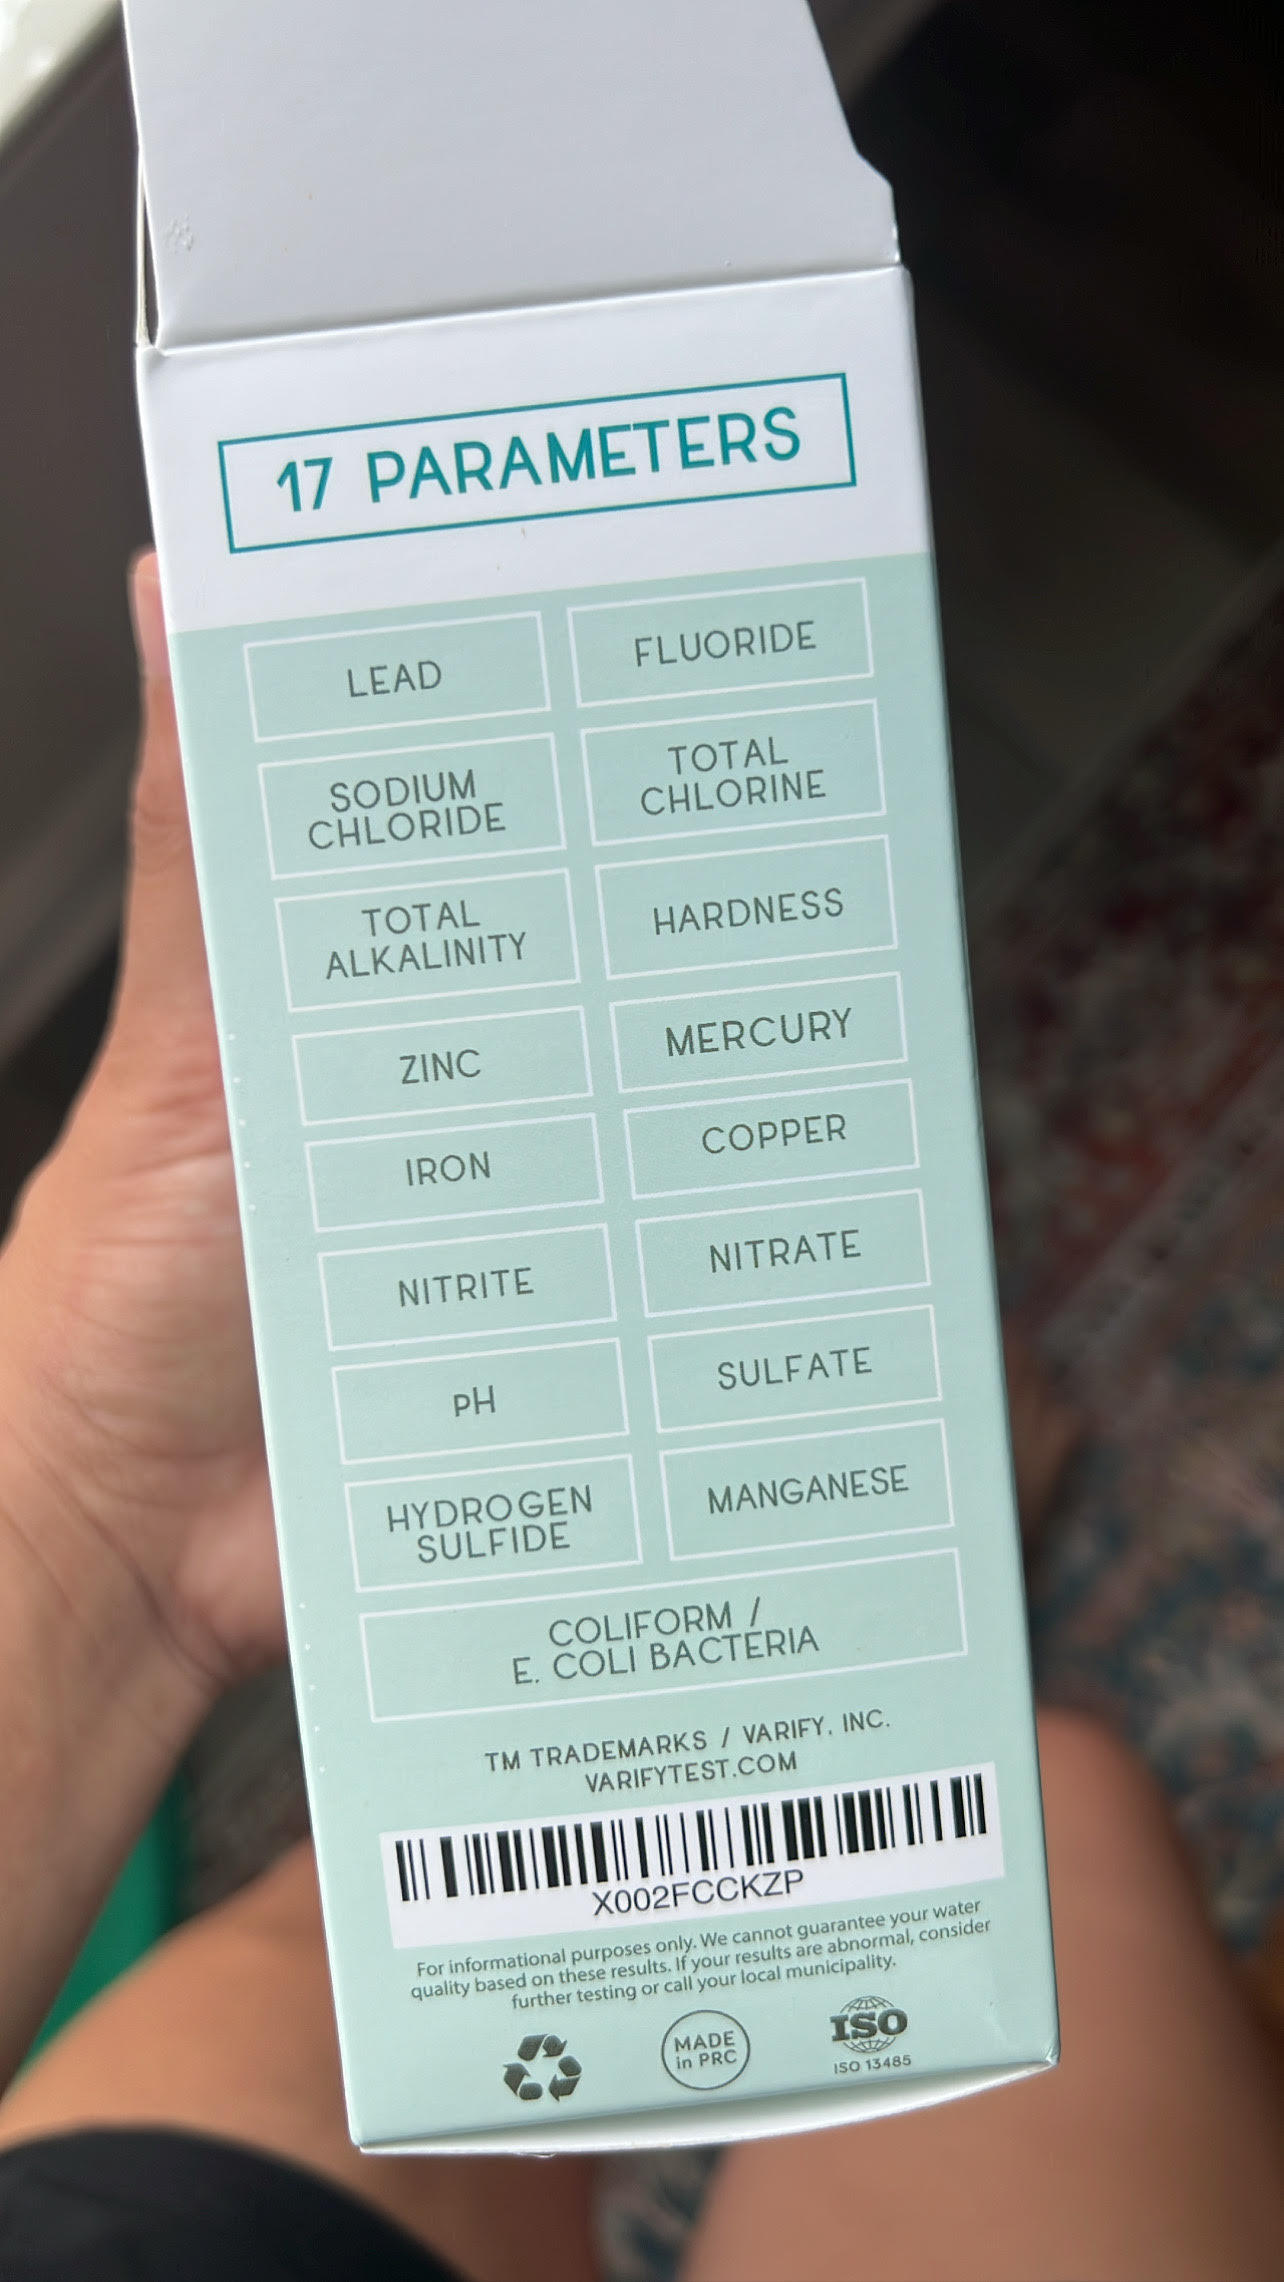
Testing our water for major contaminants
After installing the water filters, I thought it would be a good idea to test our water for major contaminants.
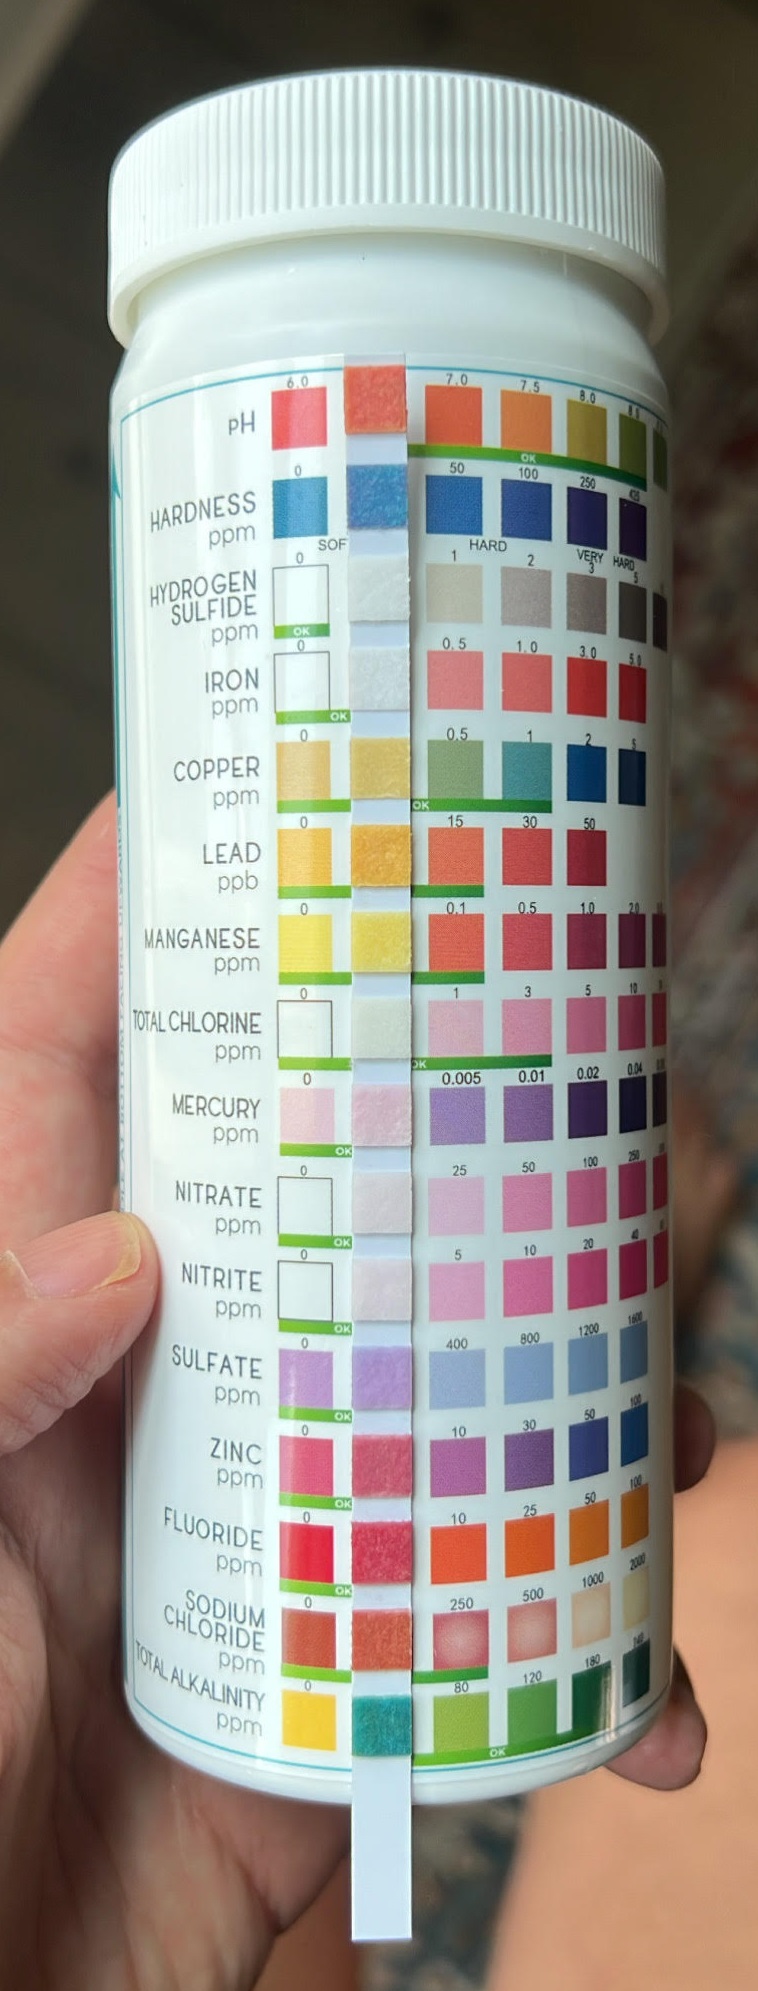
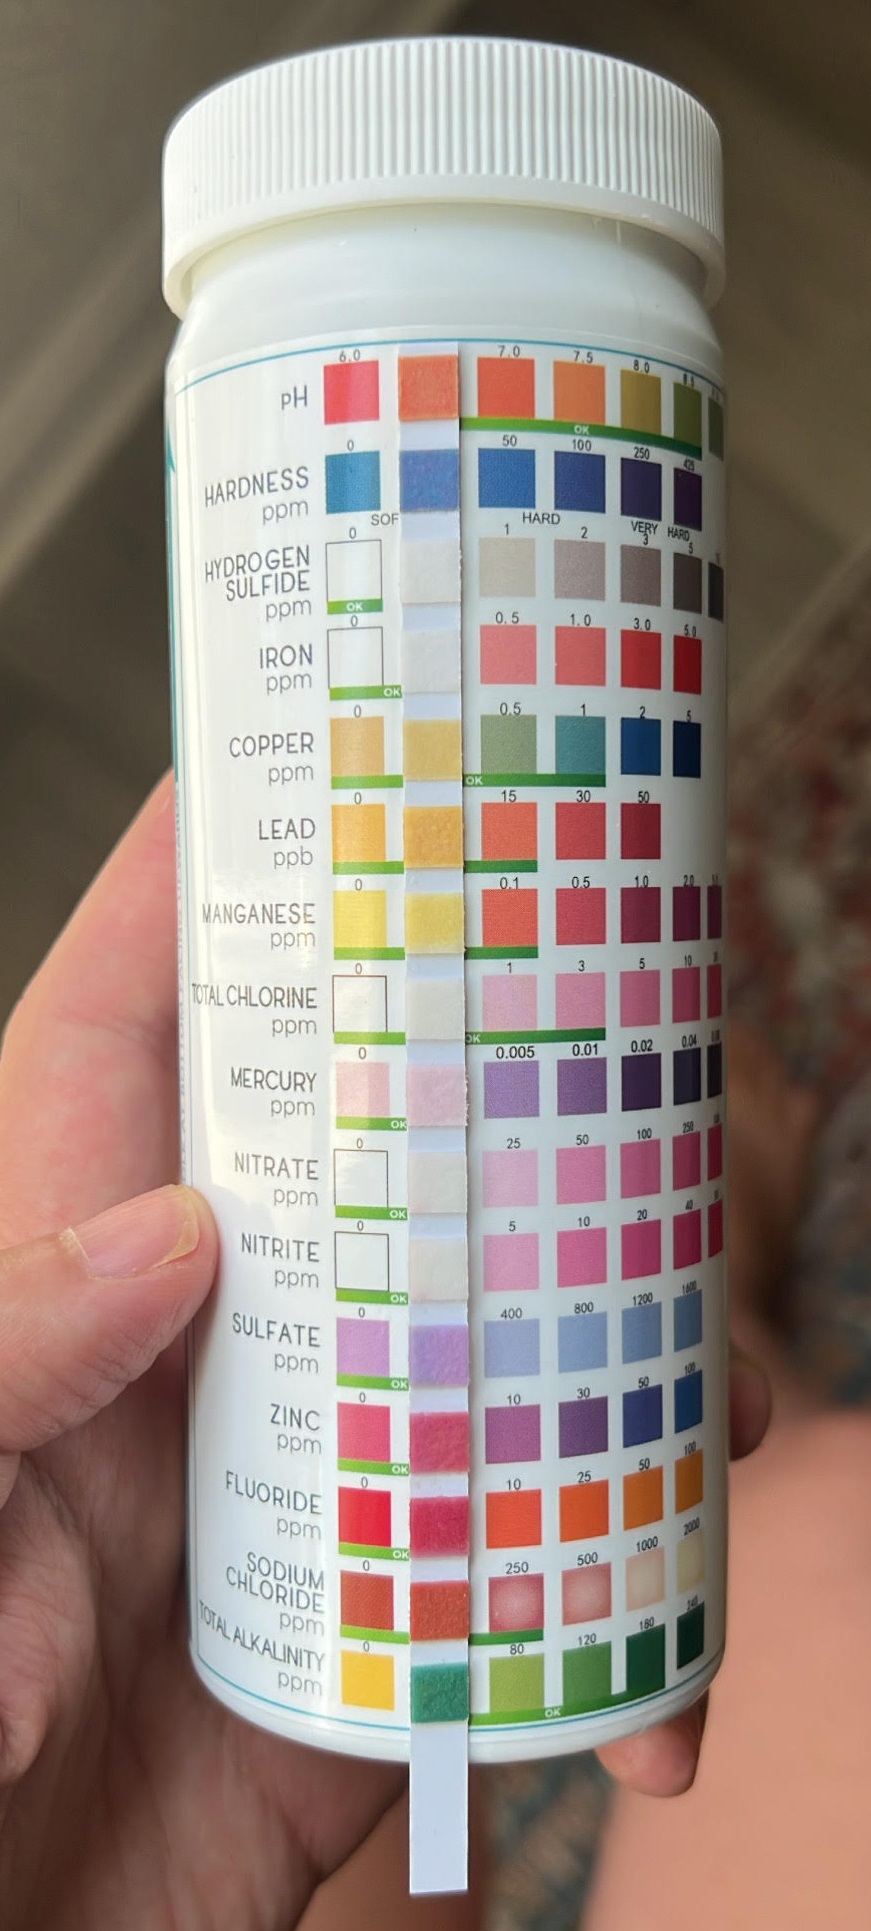
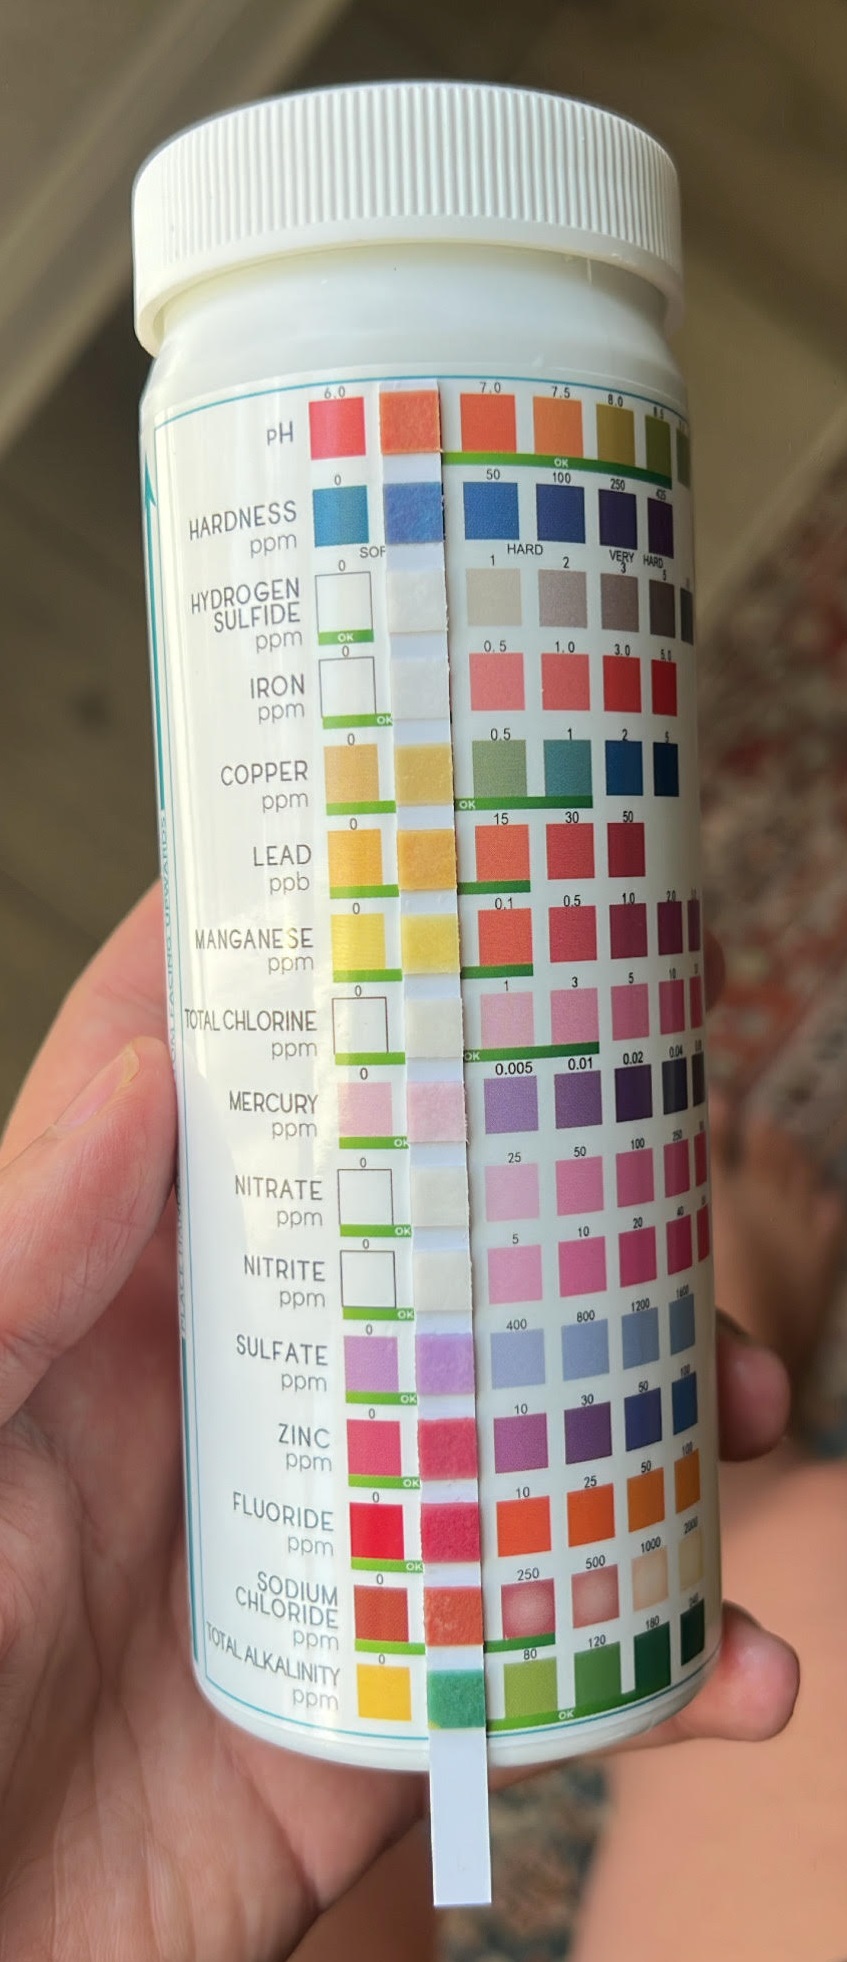
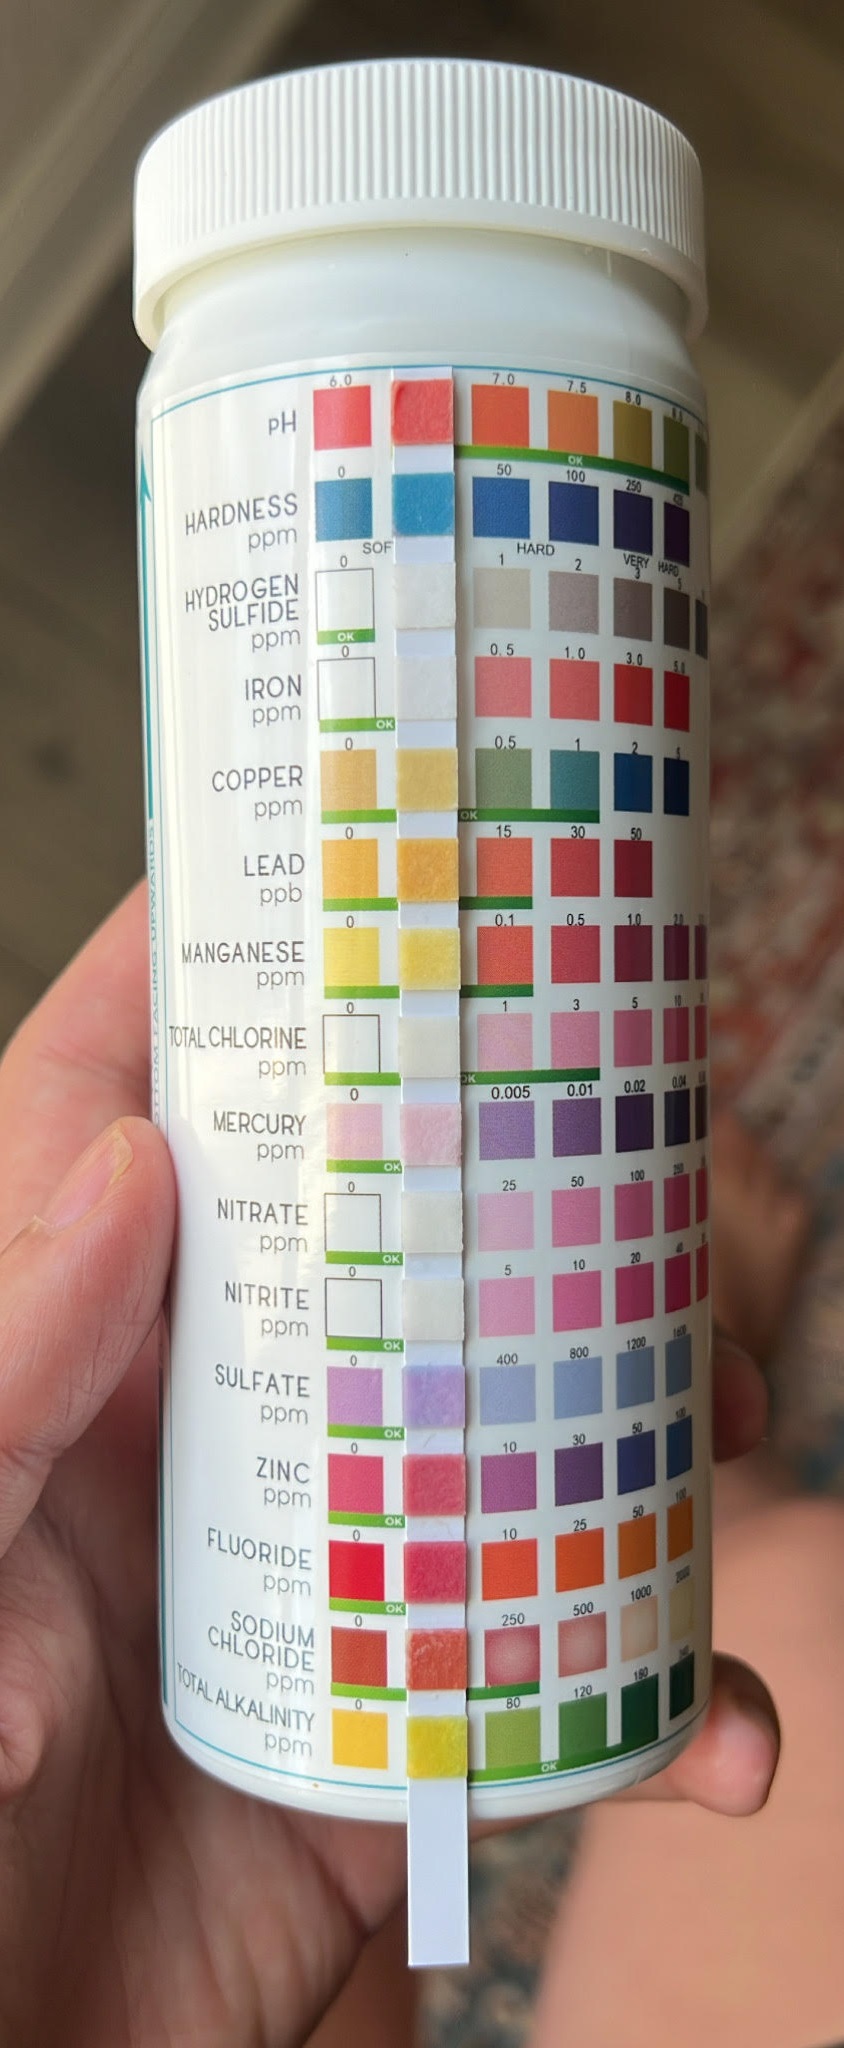
These are the parameters the strips test for:
This is the kitchen sink water. It is free of major contaminants, the water is much softer than I thought, and is slightly alkaline.
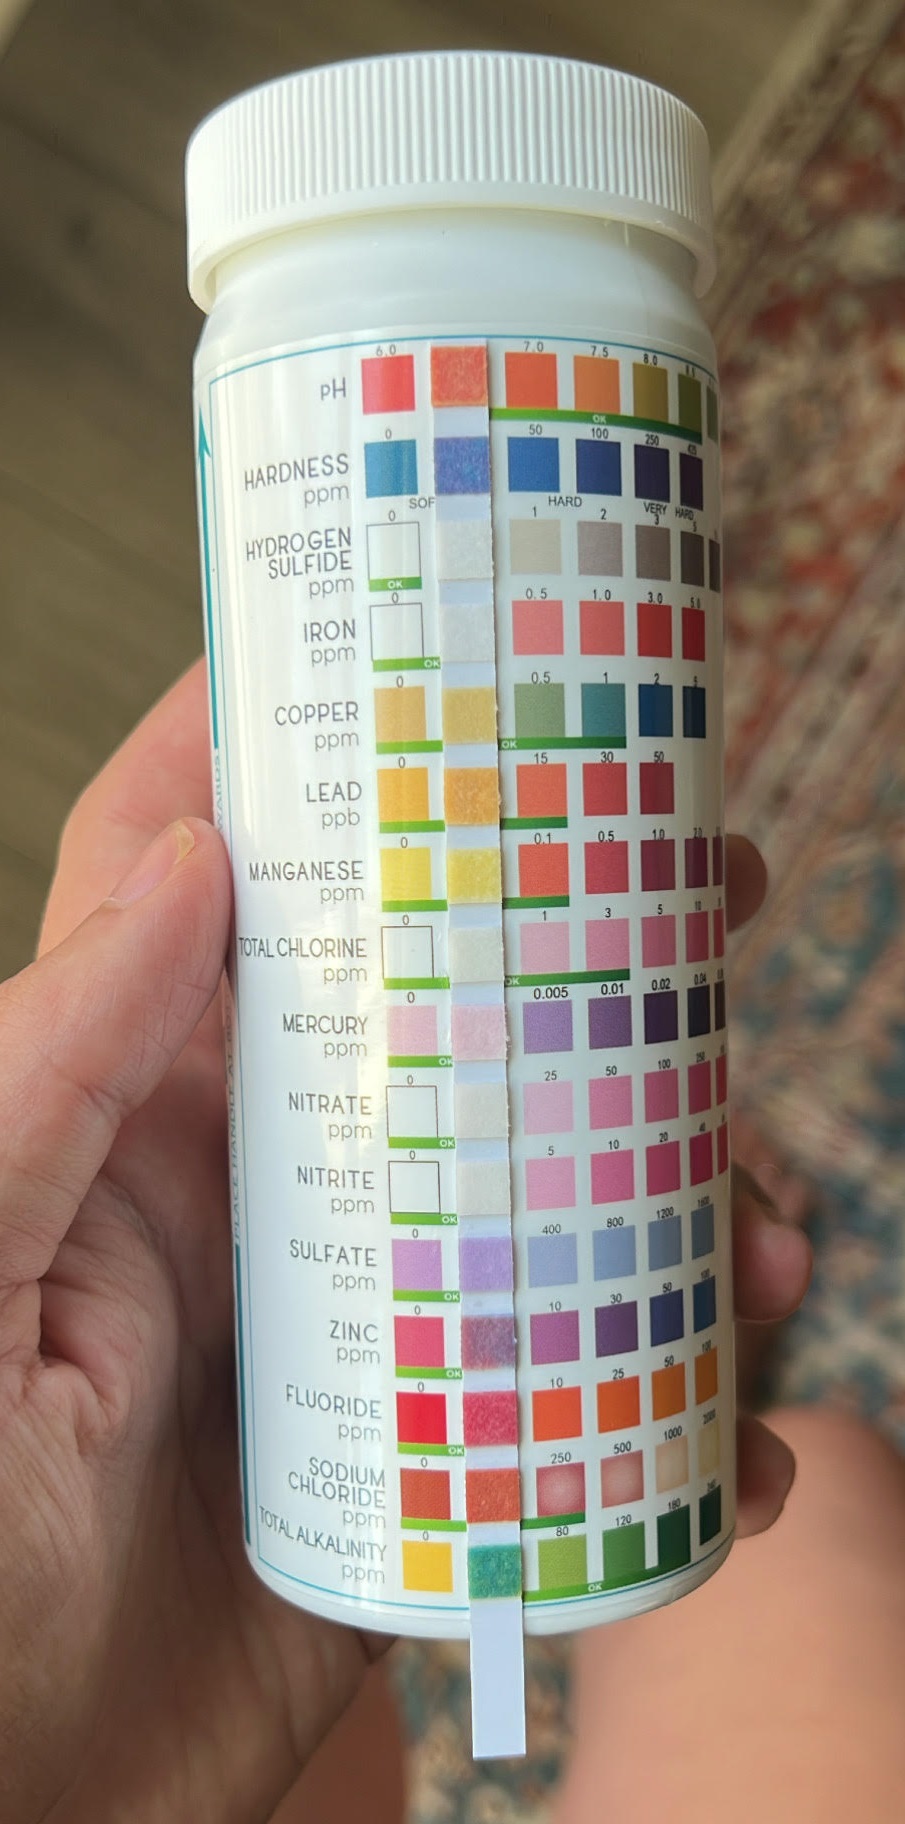
This is our master shower water. Same results as the kitchen sink.
This is the bath water. Same results as the previous two.
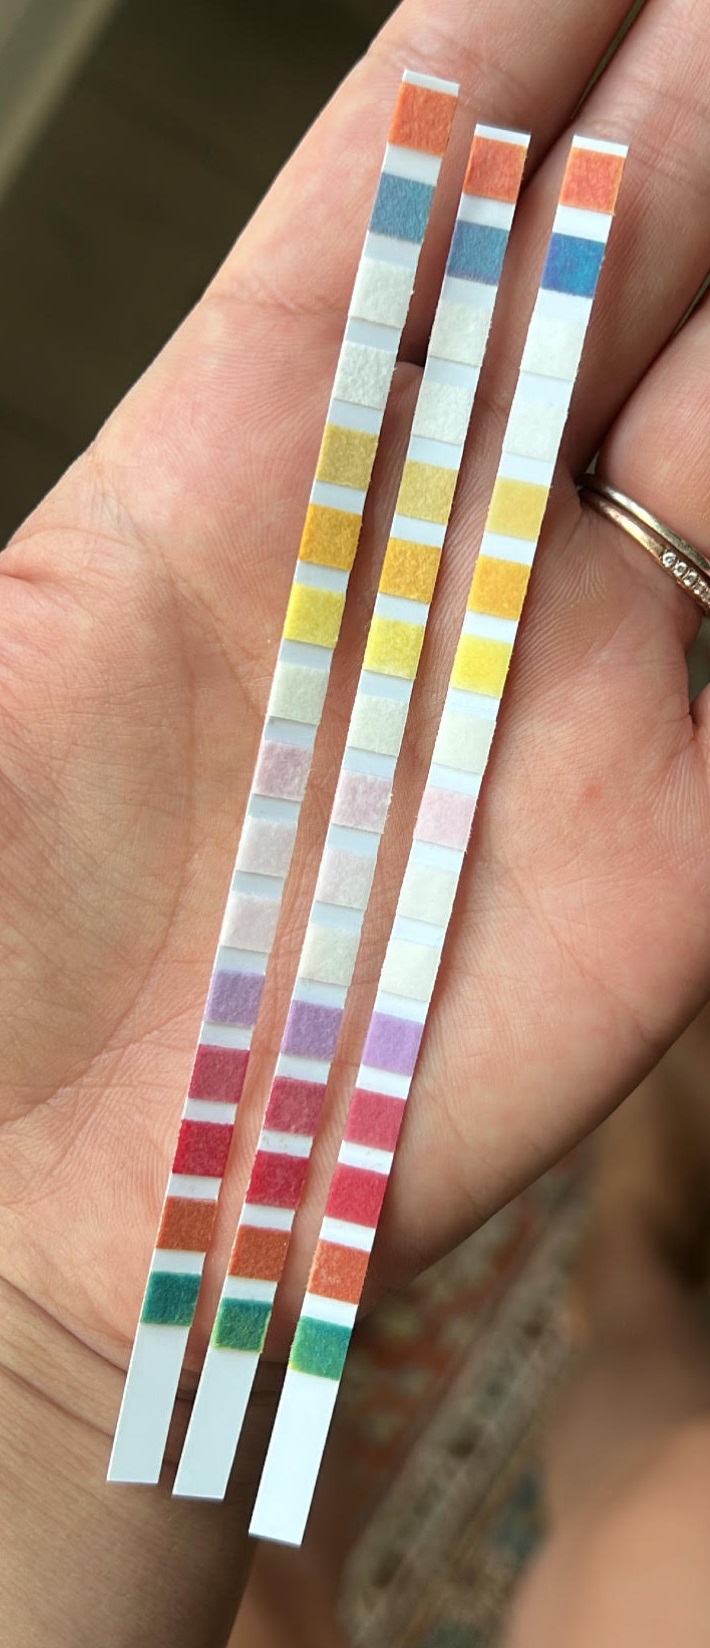
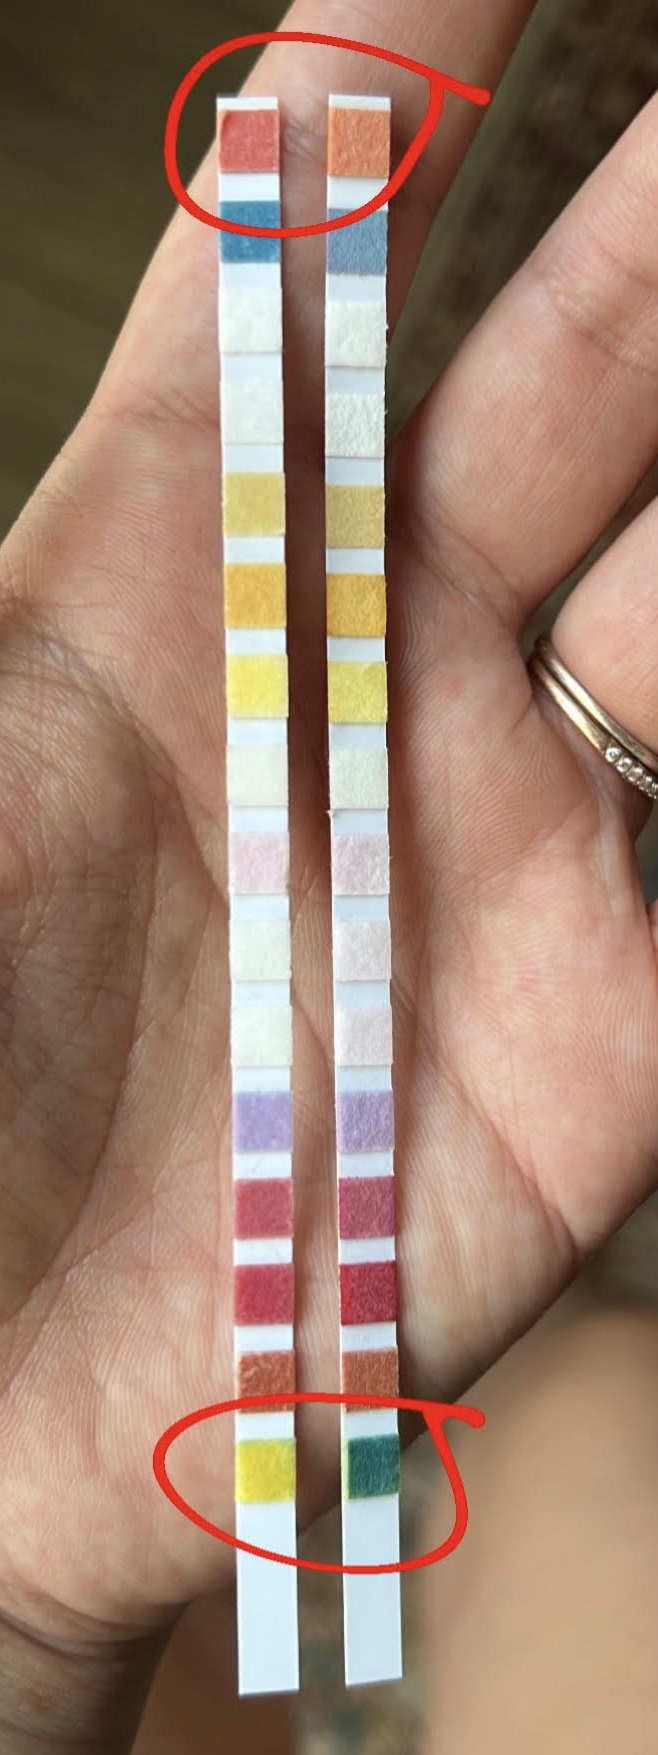
Here are the three strips side-by-side. Drying skews the colors a bit (you’re supposed to read results after 60 seconds; some of these were sitting longer than that), but generally speaking, the results were the same.
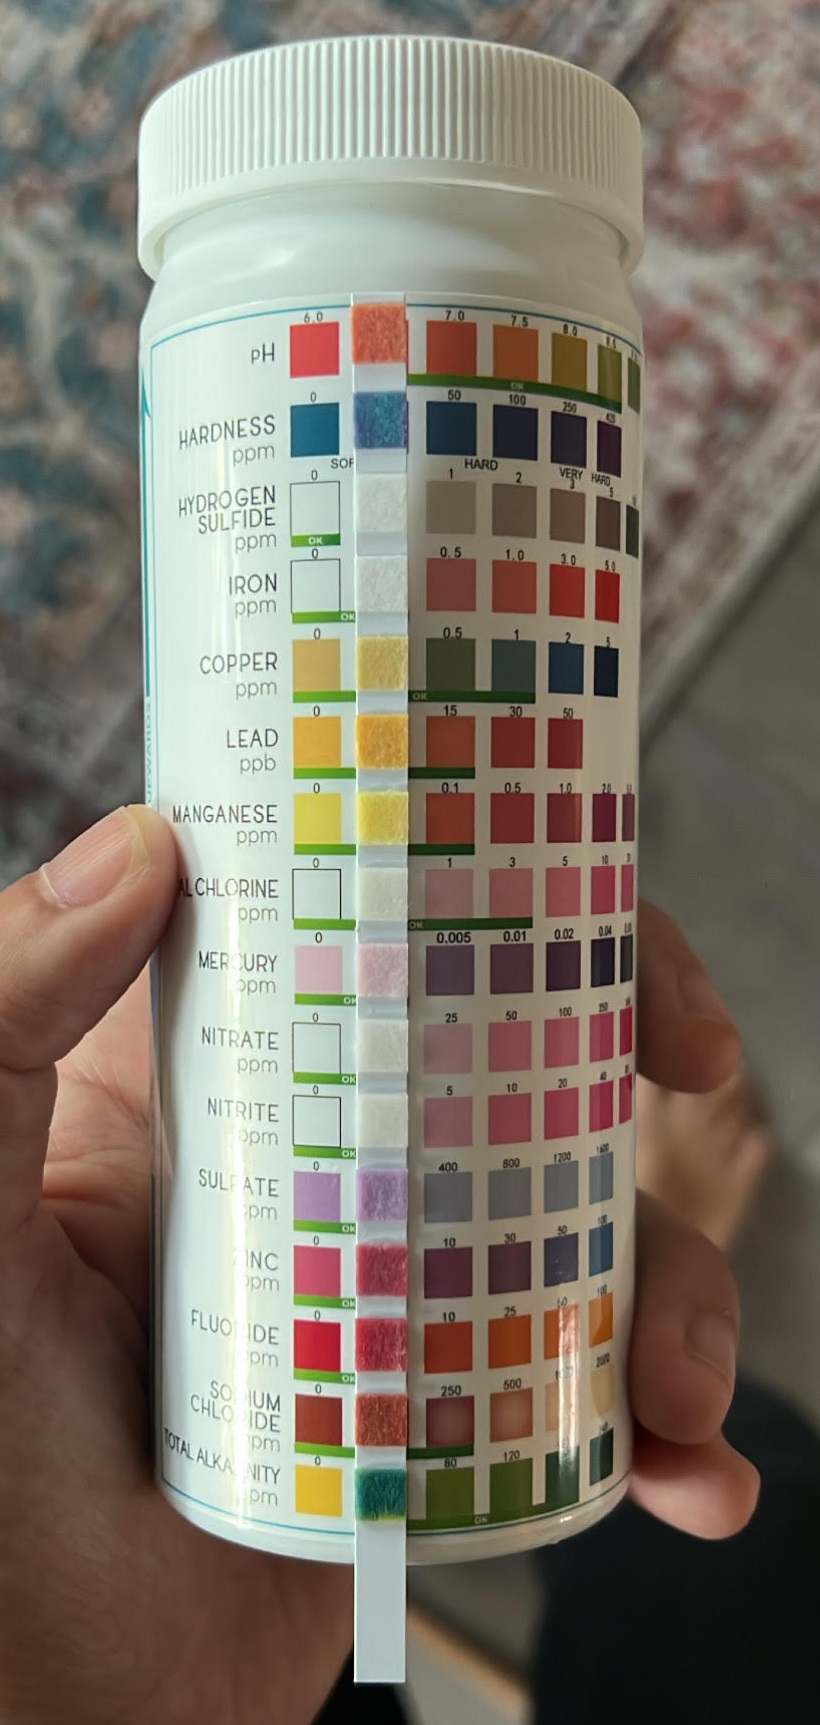
This is our drinking water (we get reverse osmosis from Whole Foods). It is free of all major contaminants and is more acidic than our other water. I looked this up and RO water is known to be more acidic, so this checks out.
This is a drinking water strip next to one of the others. You can clearly see the difference in pH.
This is the hose water. It is also free of major contaminants. Zinc appears to be slightly elevated compared to the other strips. I tested twice and got the same result for zinc both times. Not too concerned, but may look into that more.
I also tested the unfiltered tap water and it was free of major contaminants, alkaline, and surprisingly soft. It’s good to know that our tap water is free of these things. I’m also happy that we have filters because they filter out more than what’s listed here.
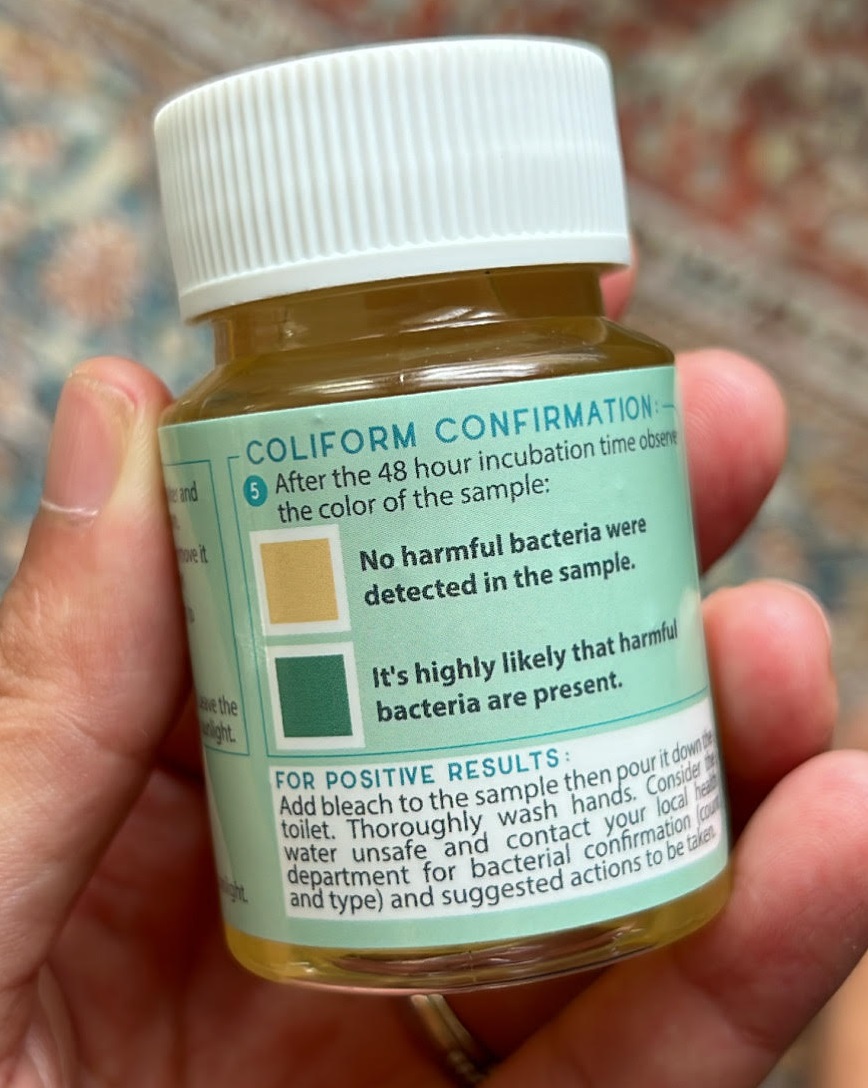
The test kit also comes with two bacteria tests which test for the presence of Coliform/E. coli. If it turns up positive, there is a good chance that the water is contaminated with feces. I chose to test our sink water and our shower water since we use those the most. I filled up each jar and let them sit for 48 hours.
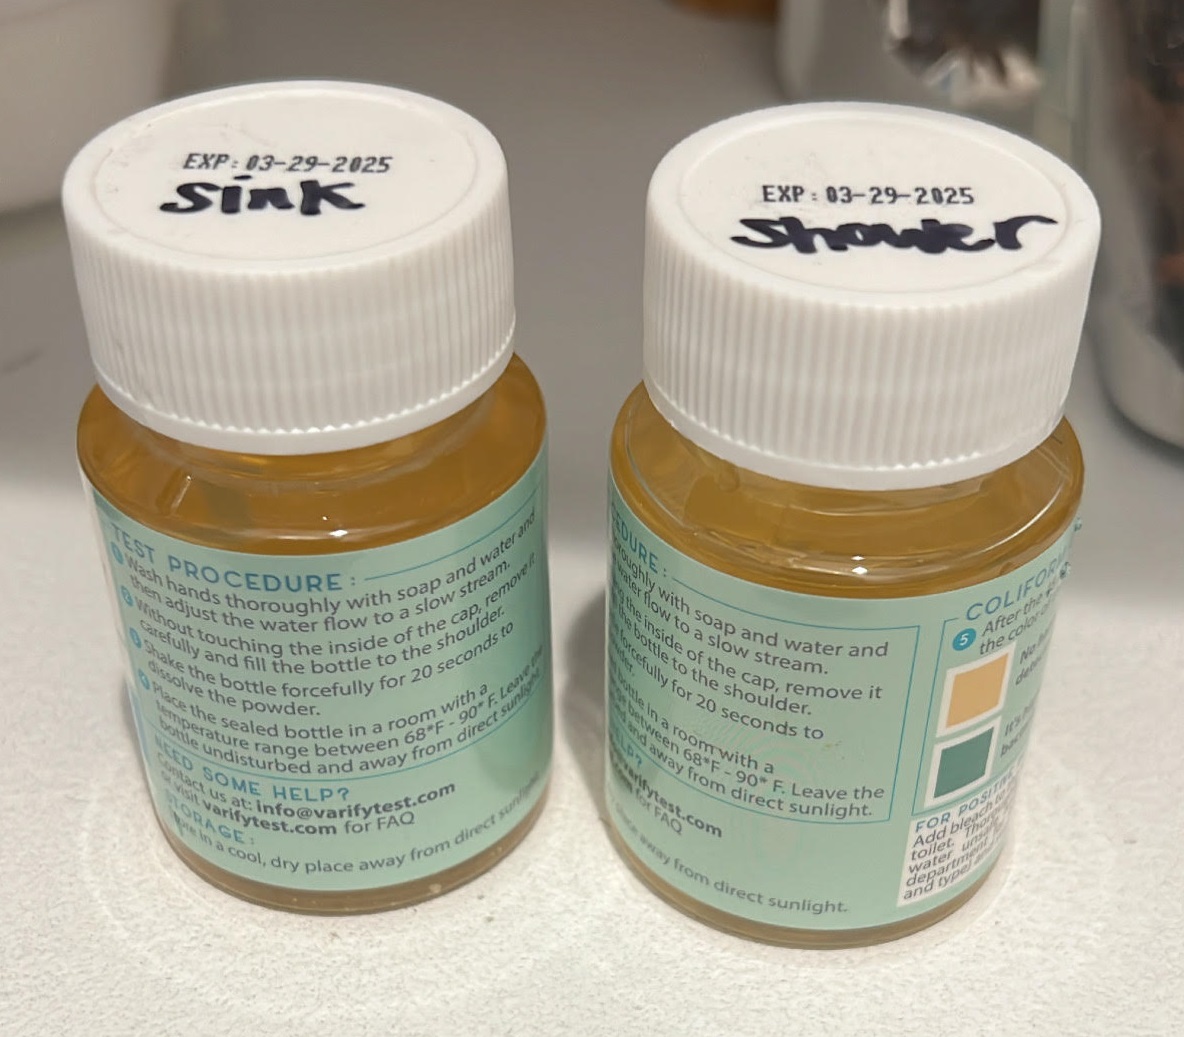
This is the color key:
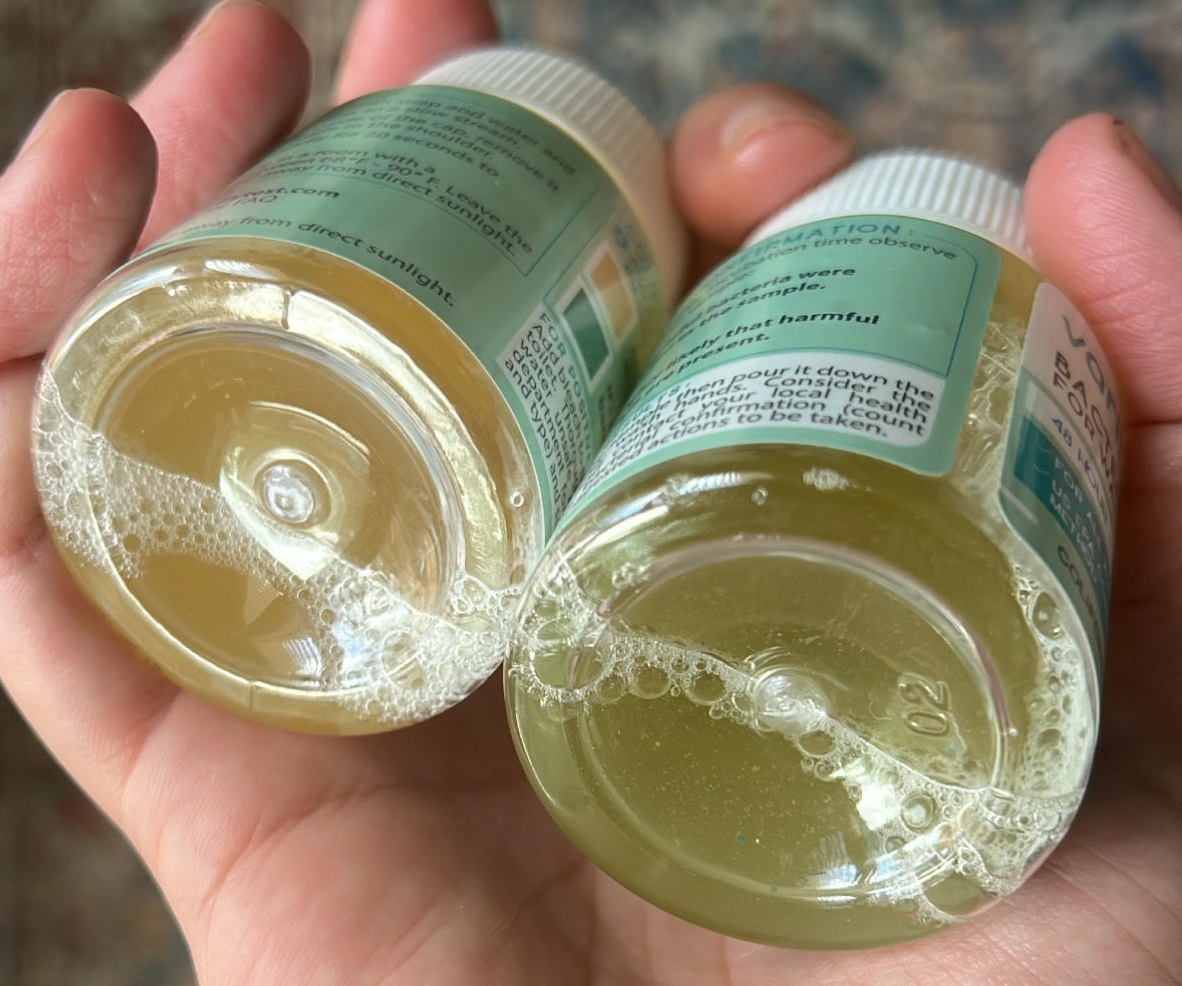
To my surprise, our shower water showed up slightly green. There are strict handling instructions with the bacteria tests. You’re supposed to wash your hands and not touch the sample at all. While I did wash my hands, the water from our shower comes out uniquely (we have a “rain” showerhead). I wasn’t mindful of that when I was filling up the jar, and the water just splashed everywhere. I wondered if this skewed the result, so I purchased another kit and ran a new round of bacteria tests.
I did four tests this round. Our shower water again, the kitchen sink water again, sink water with my daughter’s poop in it (as a control – it was easy to swab from her diaper), and tap water from the hose. I let these sit for 48 hours.
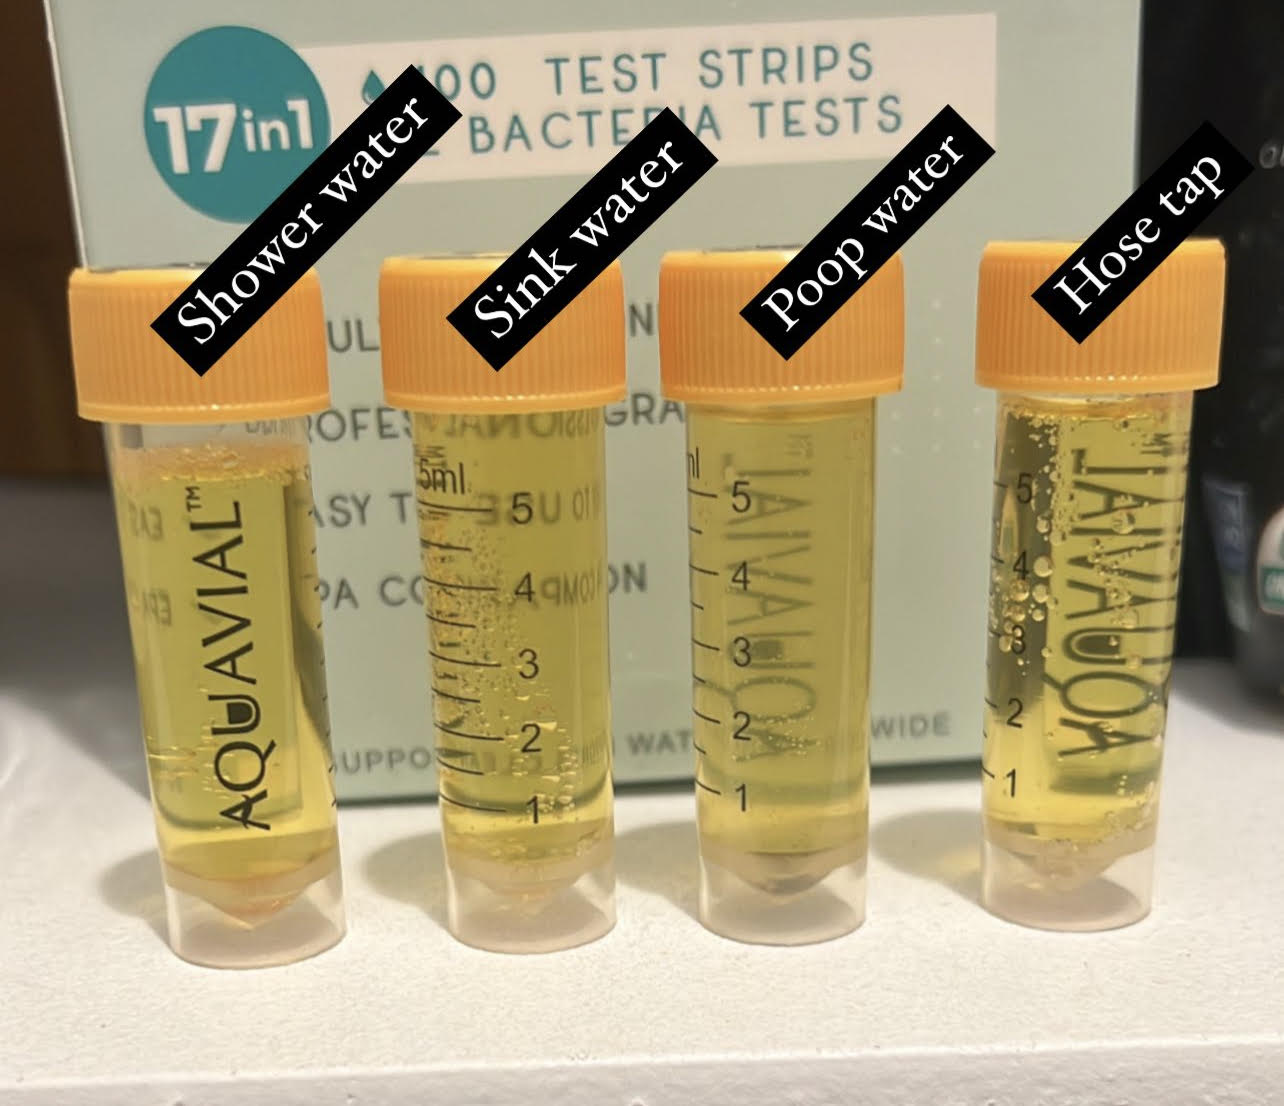
These were the results after 48 hours. All were clear aside from the poop water, as expected.
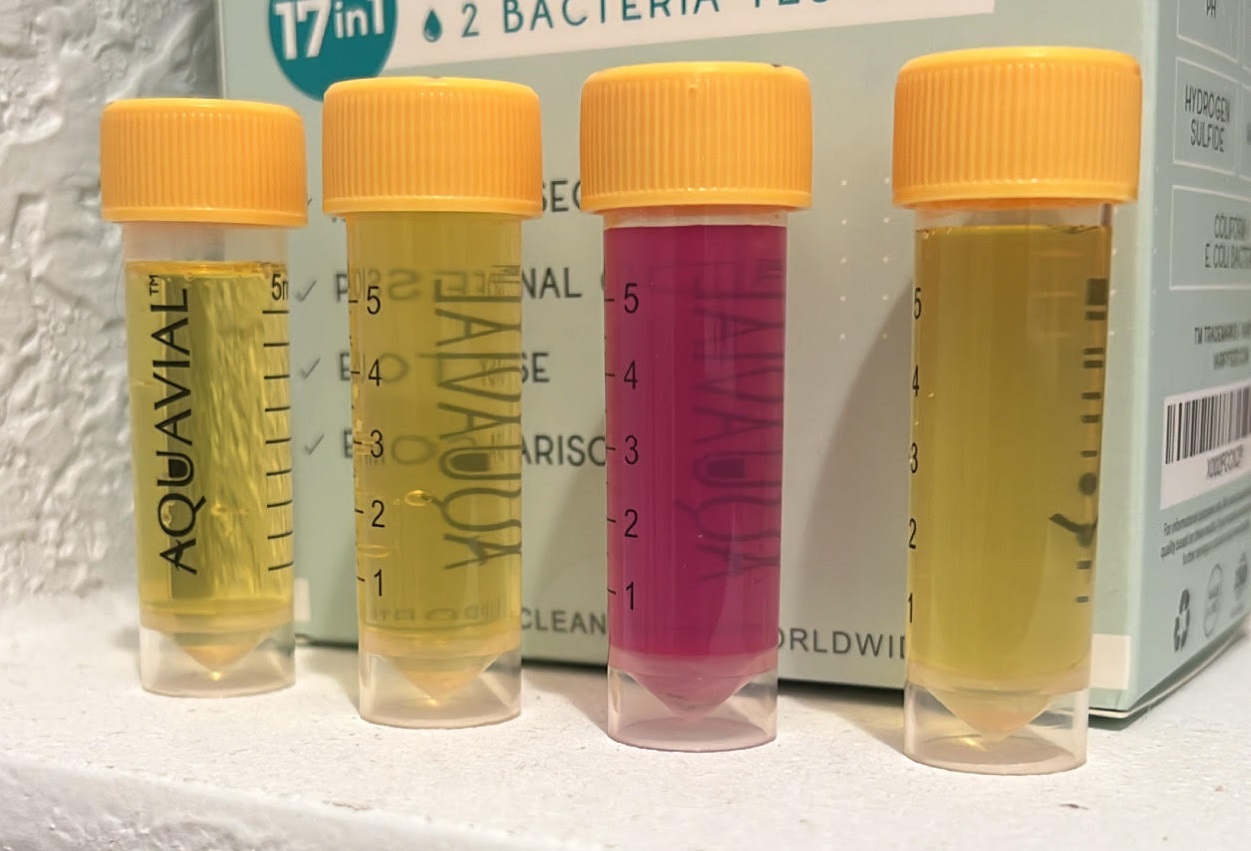
I gave the vials a good shake and took a photo in the light to make sure I was getting the color right. All still looked good.

Final thoughts
I feel better knowing that the water my family uses is much cleaner now.
If you decide to filter your household water, I hope the suggestions in this post were useful.
I took videos of many of the steps explained above and shared them on Instagram Stories. They’re saved in my Instagram “Water” highlight if you want to reference them.
Lastly, if you have any questions, do not hesitate to reach out to me at asheatsgood@gmail.com.

Ashley Rothstein develops tasty, whole food, animal-based recipes that include a moderate amount of “minimally toxic” plant foods. To fix her own health issues, she bounced around between the carnivore, keto, and paleo diets for a few years. After experiencing and studying each diet philosophy, she learned she feels her best by merging the three and following an animal-based diet. As a glut at heart, she likes to channel her creativity and create meals that are healthy but also satisfy her inner gluttonous spirits.

We got several of these filters for our house this Christmas. My son has terrible skin issues. Hoping the filtered water and natural soaps will improve things!